EUS0153210_YFact_Standard_E.pdf - 第49页
2-15 2 Board Explorer 6 Register the machines. After registering the line, register machines with that line. Up to 10 machines can be re gistered with one line. c CAUTION For solder paste printers, only one machine can b…
2-14
2
Board Explorer
5
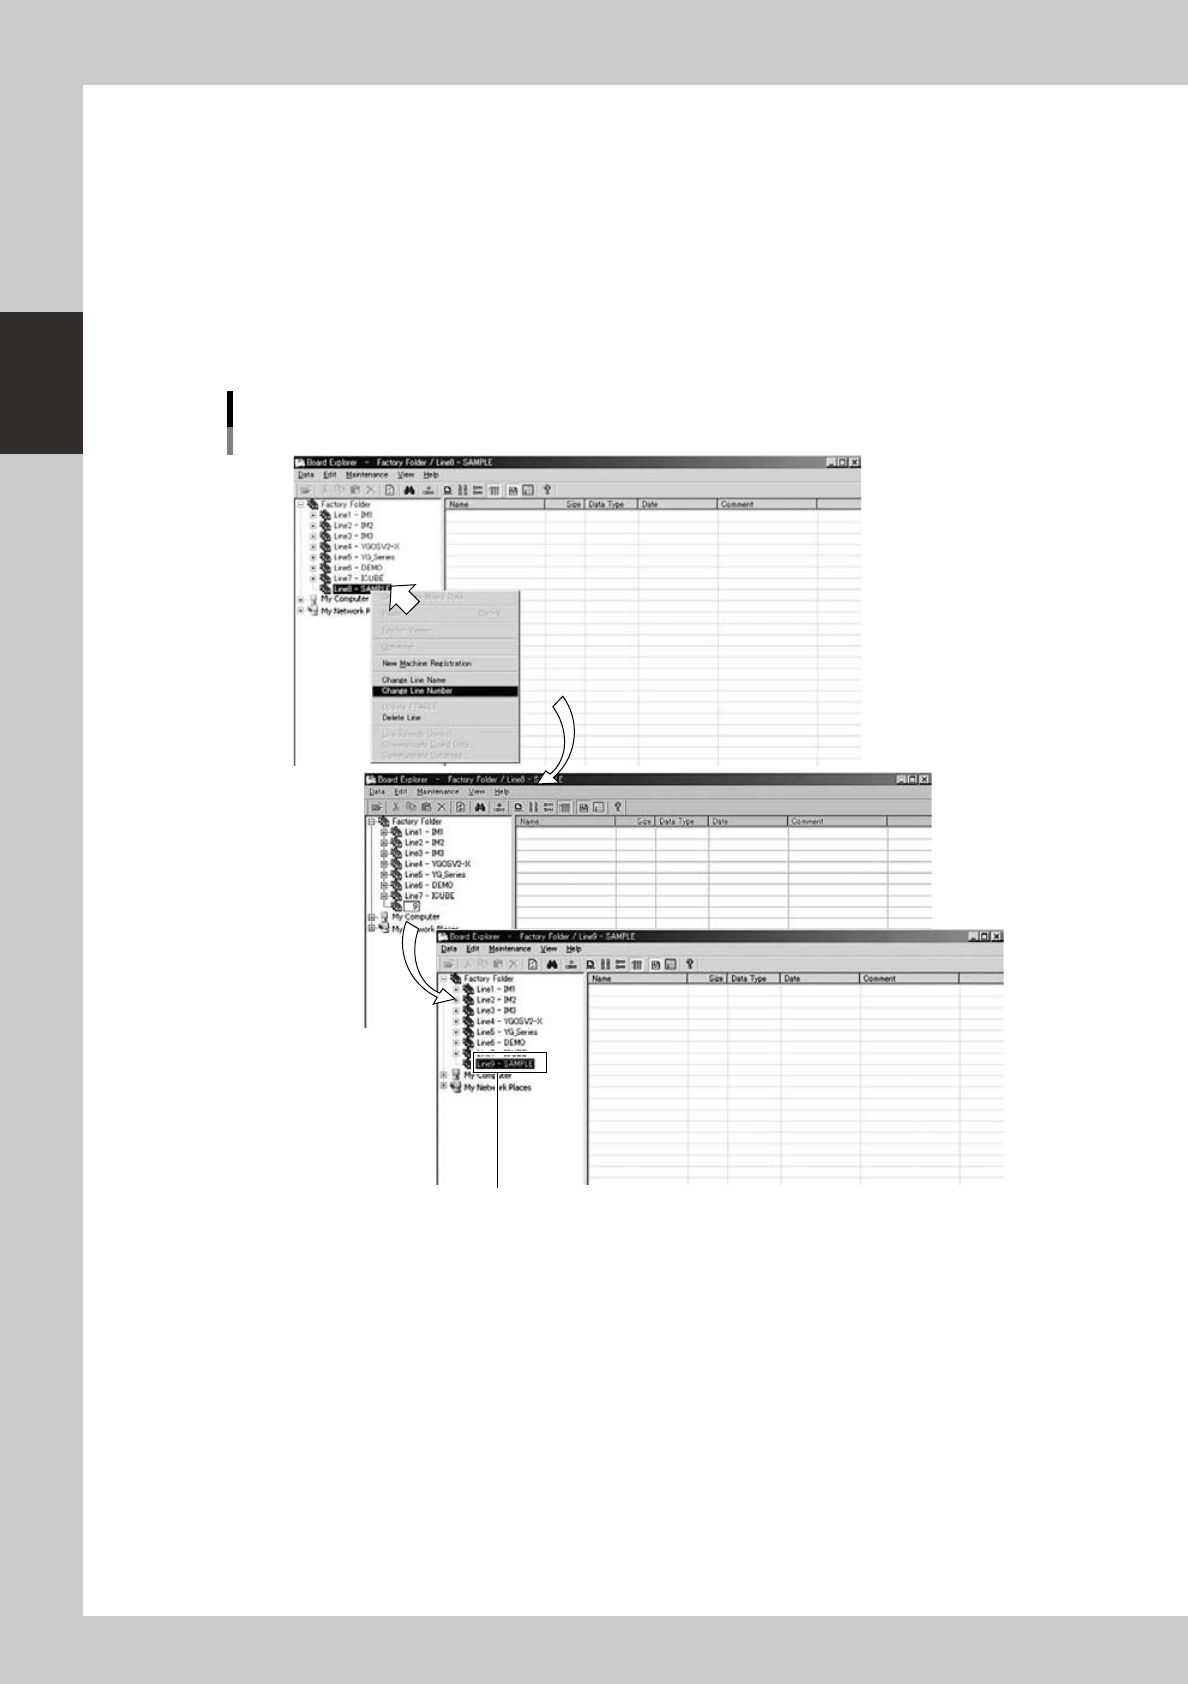
Change the line number.
The line number can be changed as needed.
1. Select the line in the tree view and click the right mouse button to display the context menu.
2. Select "Change Line Number" from the menu and type the new line number.
As the initial line number, "Line 1" has automatically been assigned to the new line when no lines are
registered. When one or more lines are already registered, the smallest number that is not used has
been assigned to the new line.
Any line number up to "50" can be used if not yet registered.
3. After changing the line number, press the [Enter] key to register the new line number.
The new line number is displayed in the tree view.
Menu operation
Changing the line number
New line number is displayed.
64223-S0-00
2-15
2
Board Explorer
6
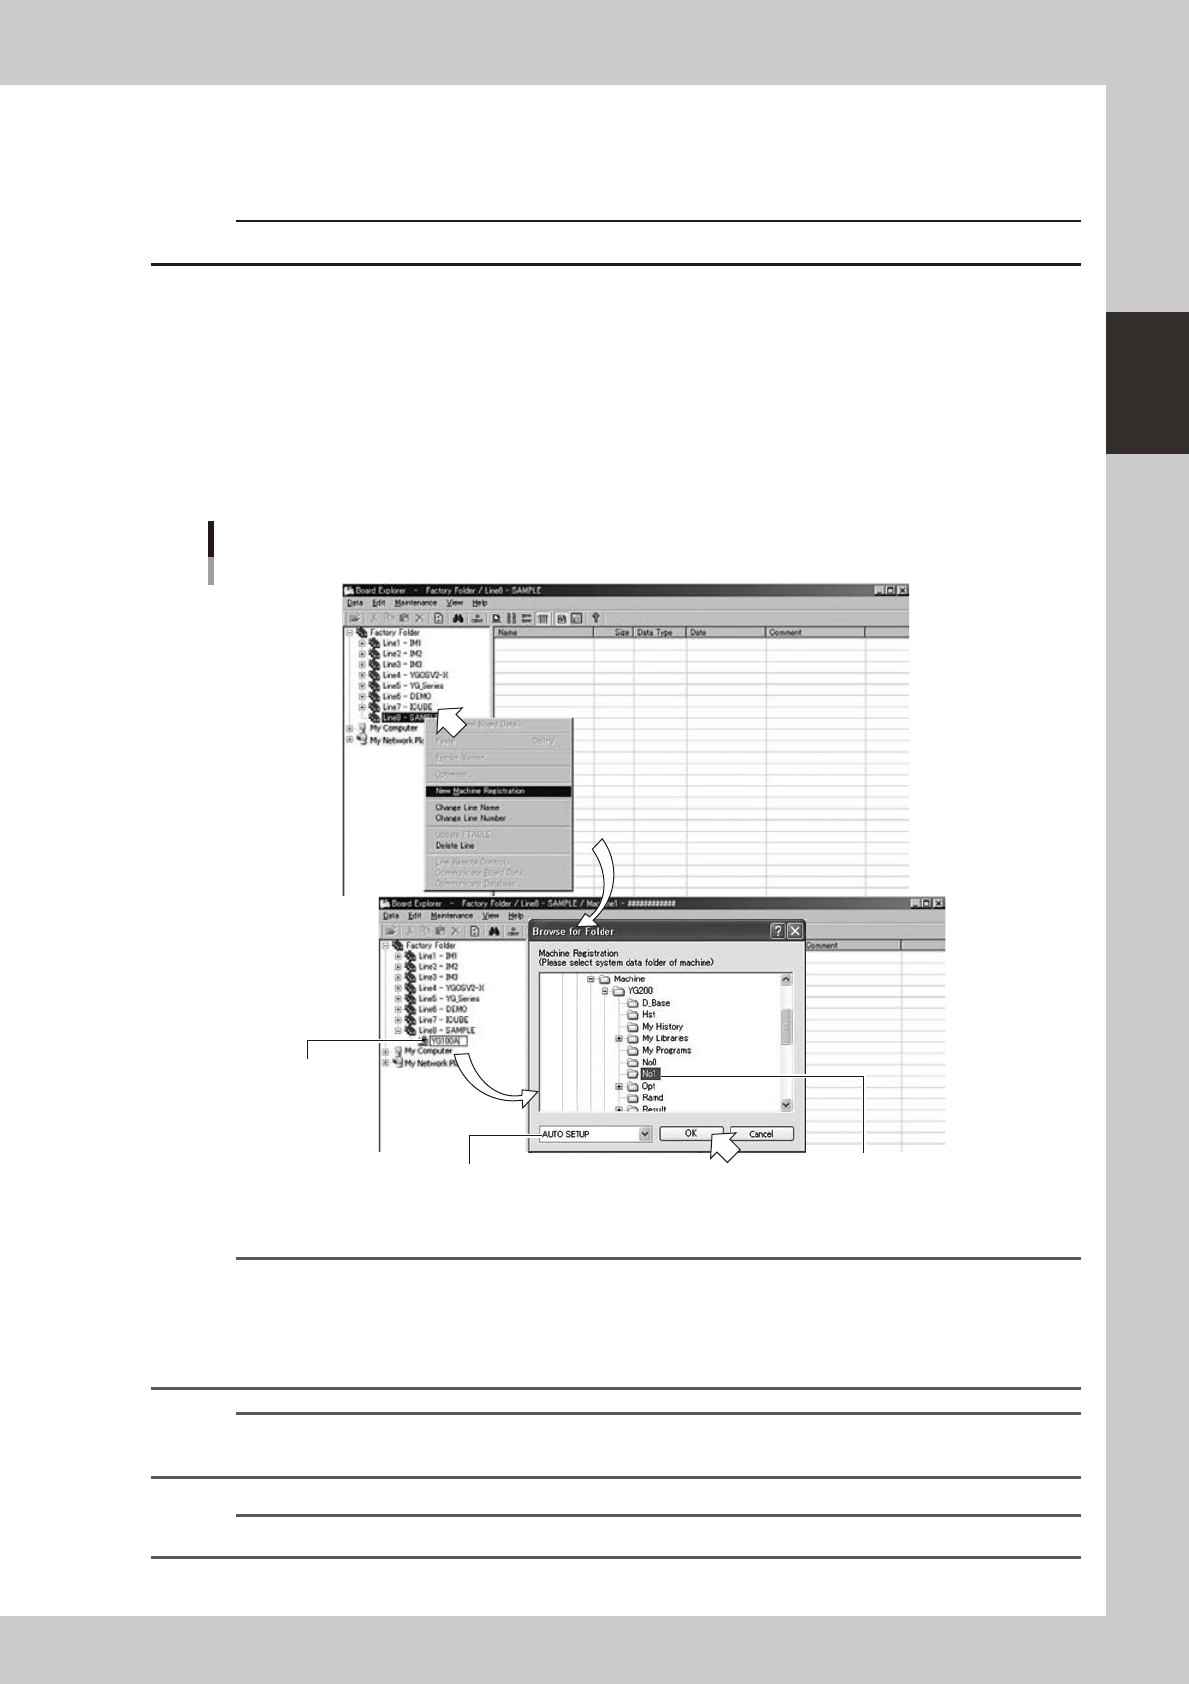
Register the machines.
After registering the line, register machines with that line. Up to 10 machines can be registered with one
line.
c
CAUTION
For solder paste printers, only one machine can be registered at the top of each line.
1. Click the right mouse button on the registered line to display the context menu and select "New
Machine Registration" from the menu.
2. Type the machine name and press the [Enter] key.
Any name can be used if each machine can be identified with the name. We recommend using the
model name of the machine. The machine name can be up to 12 alphanumeric characters
including underbars.
3. When the "Browse for Folder" dialog box appears, select the folder that contains the machine data
to be registered (for example, A:\NO.1) and click the [OK] button.
The selected machine data will be copied.
Machine registration
Type the machine name
and press [Enter].
Select the folder containing
the machine data to be registered,
and click [OK].
Select the data type.
64224-S0-00
Reference
When "AUTO SETUP" is selected for data type, the following data formats are automatically specified.
• YVP-Xg,YCP : Printer text
• YGP : YGZ
•YS series, YG series (except YG200, YGP) : YGX
• Other machines : VIOS or YGX
Reference
If you want to set an option other than "AUTO SETUP", refer to <"
n
Data formats used with each machine model" in "3.3
Board data format" of Before Reading>.
n
NOTE
The Board Editor will use the data type specified here as the default data type.
2-16
2
Board Explorer
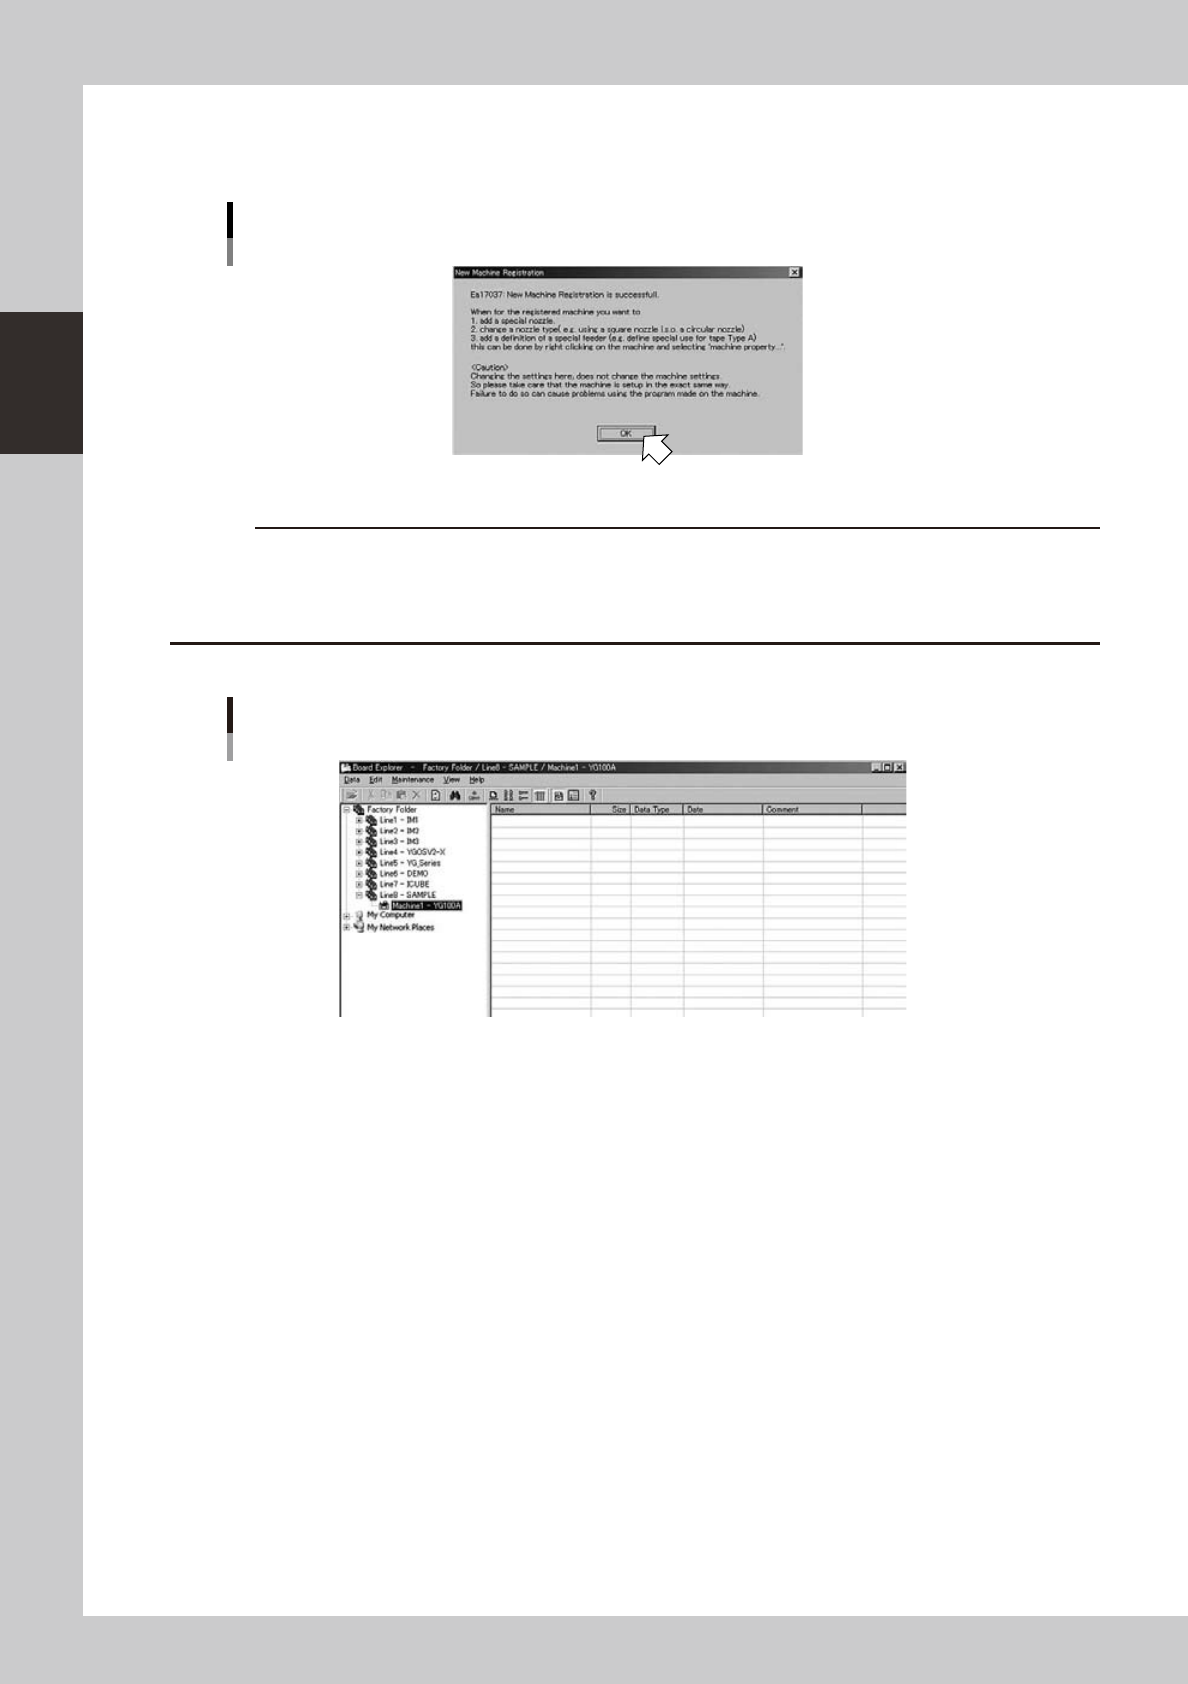
4. When the following message appears indicating that the new machine registration is complete,
check the contents and click the [OK] button.
The display returns to the Board Explorer window.
Message for new machine registration
64225-S0-00
c
CAUTION
Feeder spec and nozzle spec are not registered when a machine is registered.
To register the feeder spec and nozzle spec, you must set the machine property (VmSpec) To start the machine
property (VmSpec), click the right mouse button on the machine icon to display the context menu and select
“Machine Property”. The VmSpec window then appears, so set “Specification Information”.
5. Check that the registered machine is displayed under the specified line in the tree view.
Tree view showing the registered machine
64226-S0-00
6. To register two or more machines, repeat the above substeps 1 to 4.
7
To register two or more lines and machines, use the same procedure from steps 3
to 6.