00197501-02_AI_WPC_Umbau_X-Series_S_DE_EN.pdf - 第79页
Review 3 Setting up and Commissioning 3.6 Adjusting the Hood Assembly Instructions / Montageanleitung SIPLACE WPC an SIPLACE X-Serie S SIPLACE WPC on SIPLACE X Series S 03/2020 79 3.6 Adjusting the Hood Before the SIPLAC…
Review
3 Setting up and Commissioning
3.5 Fitting the Waste Tape Slide
78 Assembly Instructions / Montageanleitung SIPLACE WPC an SIPLACE X-Serie S SIPLACE WPC on SIPLACE X
Series S 03/2020
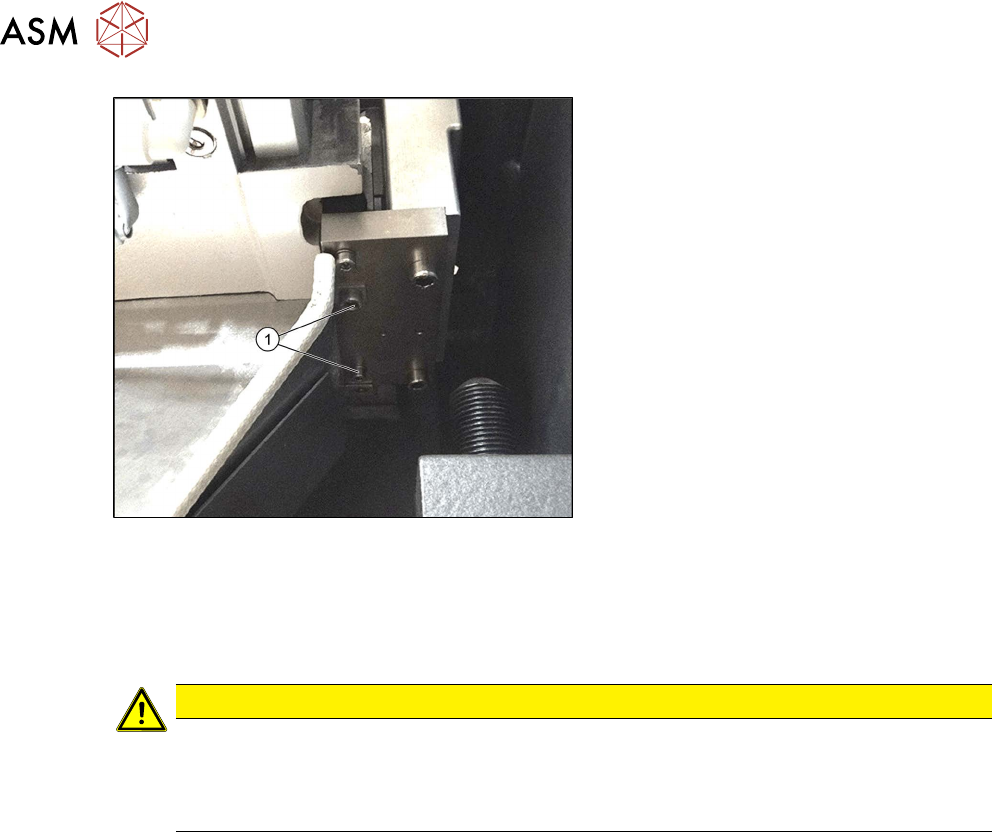
Fig.32: Fastening screw, right
1. Fastening screw for used tape chute,
right, at the location
Removal
► Remove the screws fastening the used tape chute.
► Take the used tape chute down and out of the machine.
CAUTION
Risk of cutting
The cutter, with its very sharp edges, is located under the tape duct.
► Do not reach into the cutter and make sure that it is never freely accessible for longer
periods.
Installation
► Follow the removal instructions in reverse order for installation.
Review
3 Setting up and Commissioning
3.6 Adjusting the Hood
Assembly Instructions / Montageanleitung SIPLACE WPC an SIPLACE X-Serie S SIPLACE WPC on SIPLACE X
Series S 03/2020
79
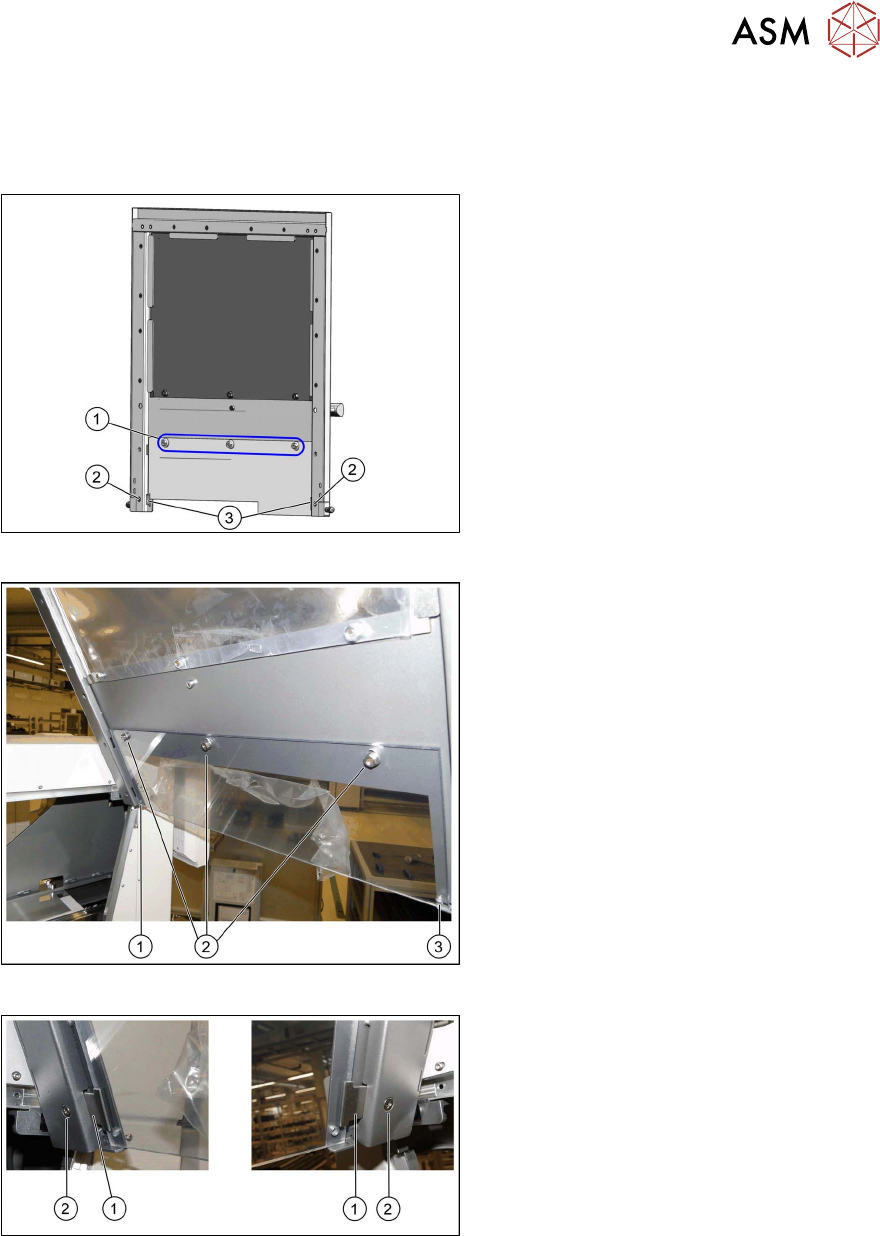
3.6 Adjusting the Hood
Before the SIPLACE WPC5/WPC6 can be moved to position 2, you need to replace the original
protective cover at the relevant location with the protective sheet assembly.
Fig.33: Hood with original protective cover at table position 1
There are three bolts on the inside of the
cover (1)
, where the protective cover is
hooked up and fixed.
► Remove the three hexagonal nuts that
fix the protective cover and lift off the
original cover.
► At (2), remove the fixture plate on both
sides (3)
.
Fig.34: Fixture points for protective plate
► Hook the protective plate onto the three
bolts and fasten these into place with
the three washers and the hexagonal
nuts (2)
that you previously removed.
► Also secure the protective plate with
the fixture plates on the left (1)
and
right (3)
.
Fig.35: Screwing the fixture sheets into place
► Insert the fixture sheets on the left and
right (1).
► Screw the fixture plates (2) into place
with the screws that you previously
removed.

Review
3 Setting up and Commissioning
3.6 Adjusting the Hood
80 Assembly Instructions / Montageanleitung SIPLACE WPC an SIPLACE X-Serie S SIPLACE WPC on SIPLACE X
Series S 03/2020
Fig.36: Track ruler
The track scale must have a distance of 5
mm to the metal edge (1)
.
► Use adhesive to fix the track ruler at all
locations towards the machine center (2)
.