00192169-01.pdf - 第27页
Order No. 00192 169-01 User Manual - Productivity Lift E_SPLFS03_V40_11_0300_200300_V1_14.doc Last update: 20.03.2000 - Version V 1.14 Page 27 4.4.2 Stop of emergency conveyor To stop the emergency conveyor the procedure…

Order No. 00192 169-01 User Manual - Productivity Lift
E_SPLFS03_V40_11_0300_200300_V1_14.doc Last update: 20.03.2000 - Version V 1.14 Page 26
4.3 Switching the device on
Once the device has been switched on at the main switch, an emergency stop message
appears in the display, which must be confirmed using the Enter key. This will set the device
to the stand-by-operating mode.
Pressing the Start key sets the device to the automatic operating mode, which begins by
running an initialisation phase. This serves to test basic system functions.
Following this brief initialisation, the device is set to the automatic operating mode and is ready
to operate.
4.4 Installation / Deinstallation of emergency conveyor
The emergency conveyor is used, when the shuttle is not in use e.g. for reasons of
maintenance.
4.4.1 In order to activate the emergency conveyor do the following:
1. By pushing the stop cursor the corresponding conveyor is put into stand-by modus.
2. Through Alt cursor the adjustment modus comes up.
3. Through the Enter cursor the menu comes up on the display which shows PCB
takeover comes up and you can check if the adjustment is dual lane. If this is not the
case one can switch to dual lane as described in the chapter 7.3.
4. Use the enter cursor. The menu PCB transfer comes up. Here it is the same procedure
as described in point 3 (see chapter 7.6).
5. Another use of the enter cursor brings up the menu PCB pass-through. In this menu
the emergency conveyor can be switched on by choosing the adjustment switched on
(see chapter 7.7). This change can be taken over with the enter cursor.
6. The adjustment modus can be quit with the stop cursor.
If the machine is started now the lift conveyor drives down and the emergency conveyor
lowers to the operating position and starts itself. Afterwards the device is again in operation
modus.
Order No. 00192 169-01 User Manual - Productivity Lift
E_SPLFS03_V40_11_0300_200300_V1_14.doc Last update: 20.03.2000 - Version V 1.14 Page 27
4.4.2 Stop of emergency conveyor
To stop the emergency conveyor the procedure described above has to be made the other
way round:
1. By pushing the stop cursor the corresponding conveyor is put into stand-by modus.
2. Through Alt cursor the adjustment modus comes up.
3. Through the Enter cursor the menu comes up on the display which shows PCB
takeover comes up and you can chose the adjustment as used before the emergency
conveyor (see chapter 7.3).
4. Use the enter cursor. The menu PCB transfer comes up. Here it is the same procedure
as described in point 3 (see chapter 7.6).
5. Another use of the enter cursor brings up the menu PCB pass-through. In this menu
the emergency conveyor can be switched off by choosing the adjustment switched off
(see chapter 7.7). This change can be taken over with the enter cursor.
6. The adjustment modus can be quit with the stop cursor.
The device can be started with the start cursor. After an initialising time the device is ready
for operation.
N. B.
Pay attention that the changes made in chapter 7.3 and 7.6 are set back to the adjustments as
before activated.
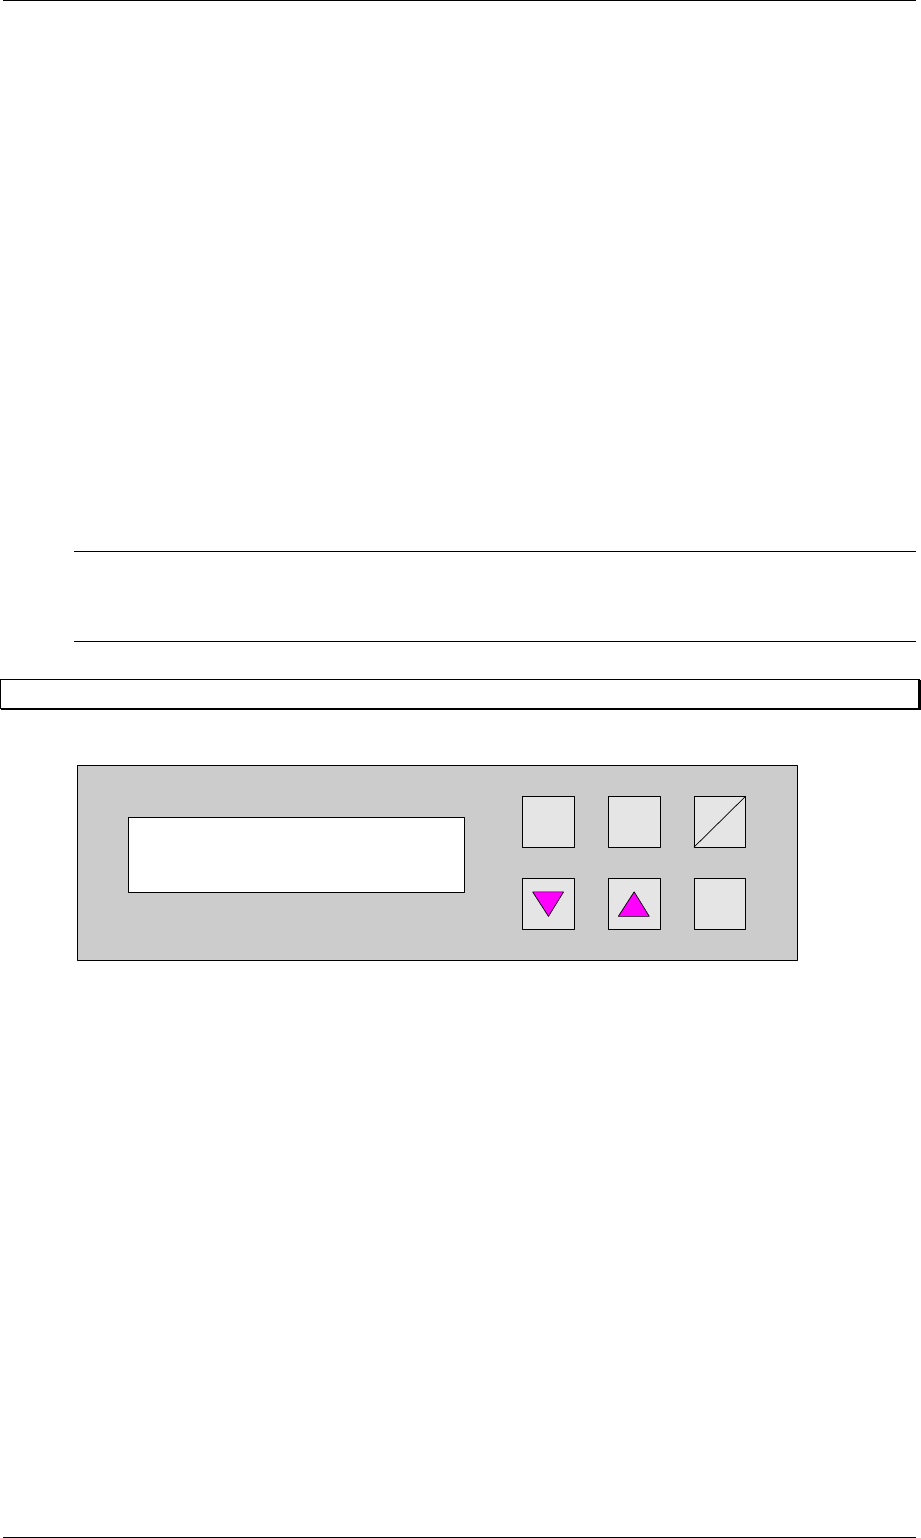
5 The function keys
Hand
Stop
Start
Enter
Alt
Figure 22: Control desk key arrangement
The keys of the CAN/P50 control desk are arranged as follows:
Hand : Calls up the test operation functions.
s and Alt : Call up the configuration menu.
Alt : Calls up the parameter menu.
Start / Stop : Starts the automatic operating mode and switches to the stand-by mode.
t : Cursor key to scroll downwards in the selection menus.
s : Cursor key to scroll upwards in the selection menus.
Enter : This is used to confirm modified settings and proceed to the next input menu
within the menus. Acknowledgement of alarm signals.
Prod. Lift
V 40.1x
Order No. 00192 169-01 User Manual - Productivity Lift
E_SPLFS03_V40_11_0300_200300_V1_14.doc Last update: 20.03.2000 - Version V 1.14 Page 28
6 Configuration
The configuration serves to set the required operating parameters. These are basic settings,
which need generally only be set during the initial system installation. These settings can be
modified at a later date, but only by personnel with the relevant expertise.
Numerical values can be entered as follows using the cursor keys and the Alt key:
1. The Alt key can be used to move the flashing cursor to the position to be changed. The
cursor moves from left to right from position to position.
2. The cursor keys s and t can be used to increase or decrease the numerical value at
the relevant position.
If selection options are given in the menus, the cursor keys can be used to scroll through them
in both directions.
Data is only entered in the menus if the Enter key is pressed after modifying the settings.
The user is then taken automatically to the next menu. It is possible to return to the standby
mode via the last menu.
If entries are not confirmed, the Start/Stop key must be pressed instead of the Enter key.
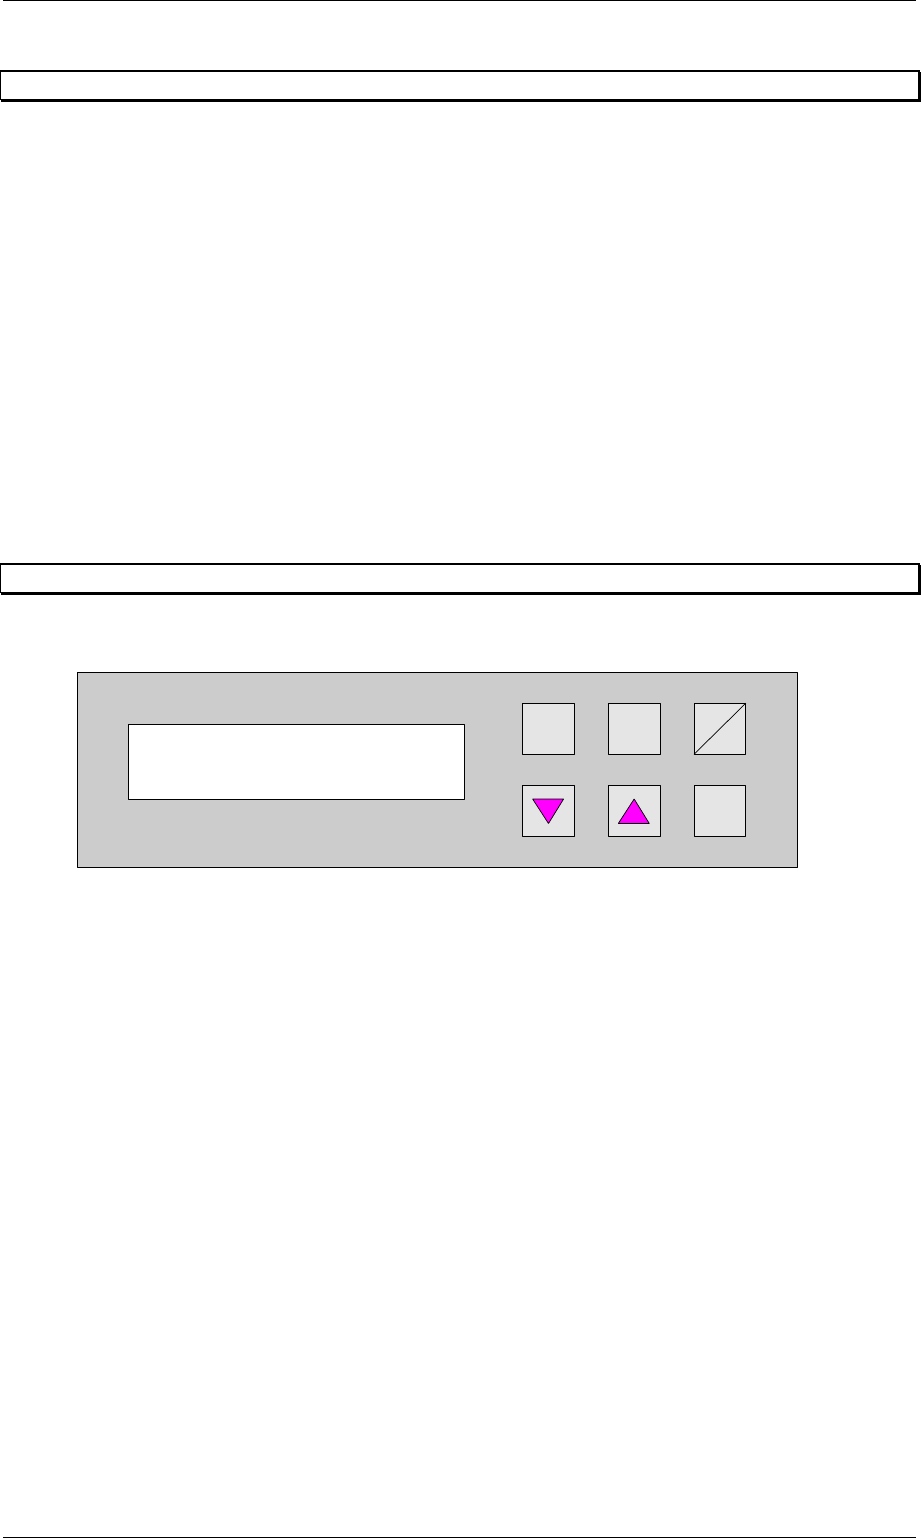
In stand-by mode, the configuration menu is called up using the s and Alt keys. These
keys must be actuated immediately one after the other.
6.1 Language
This menu is used to set the language of the display. The options are German and English.
Hand
Stop
Start
Enter
Alt
Figure 23: Language
Language
English