00197197-02-IM SetupCenter 5.1.pdf - 第17页
Installation Datalogic Scanner’s C radle BC-8030 (Narrowband) Hardware Install ation Installation Manual SIPLACE Setup Center 5.1 17 4.2.2 Datalogic Scanner’s C radle BC-8030 (Narrowband) The Datalogic scanner’s cradle B…
Installation
Hardware Installation Safety Instructions
16 Installation Manual SIPLACE Setup Center 5.1
4.2.1 Safety Instructions
The Datalogic barcode scanners conforms to laser class 2.
Warning label W216 (shown above) is displayed on the Datalogic barcode scanner.
DANGER
LASER RADIATION!
Do not look into beam.
Laser class 2
WARNING
CAUTION:
Before using the Datalogic barcode scanner, inform all operating personnel about the laser reg
-
ulations.
While operating the Datalogic barcode scanner, observe the respective regulations in line with
VDE 0837 "Protection from radiation emitted by laser devices" and the "Laser radiation" acci
-
dent prevention regulations (VBG93), applicable in Germany.
Also observe the accident prevention regulations applicable in your country.
Despite the low laser power, avoid looking directly at the laser beam. The natural closure reflex
of your eyelids will protect your eyes from the visible beam.
Installation
Datalogic Scanner’s Cradle BC-8030 (Narrowband) Hardware Installation
Installation Manual SIPLACE Setup Center 5.1 17
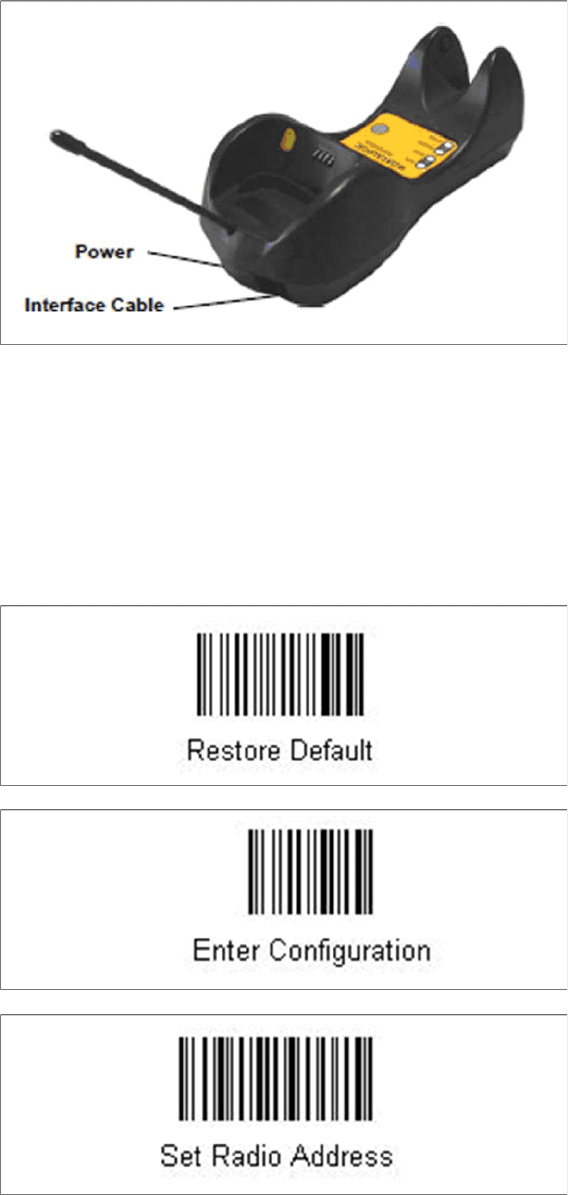
4.2.2 Datalogic Scanner’s Cradle BC-8030 (Narrowband)
The Datalogic scanner’s cradle BC-8030 needs to be connected to the Setup Center PC. The cradle in
-
corporates a multi-standard interface, which can be connected via USB or RS-232 to a PC.
See also
4.3 Software Installation [ ➙ 47]
4.2.2.1 Connect cradle via RS-232
The device may be configured to a different interface ex factory, the following steps switch to RS-232
port.
► Please scan the following barcodes in the order they are printed:
Installation
Hardware Installation Datalogic Scanner’s Cradle BC-8030 (Narrowband)
18 Installation Manual SIPLACE Setup Center 5.1
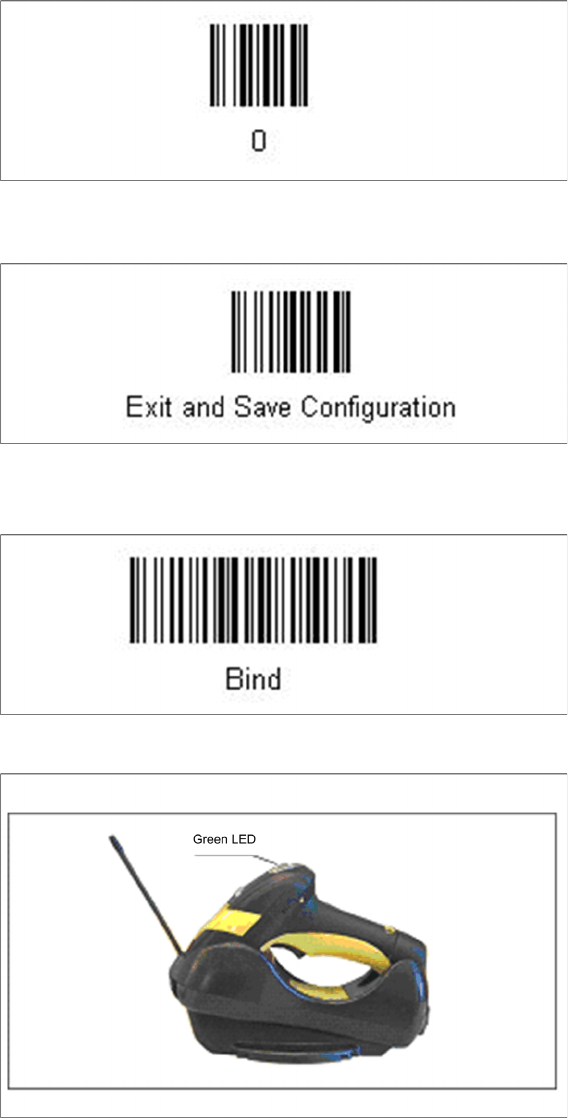
► Scan the barcode “0” four times.
The scanner must have an address (temporary "0000"), so that it can get connected to the cradle. This
address will be changed / set again later by Setup Center with the automatic configuration.
In order to configure the cradle a scanner needs to be bound to the cradle with the barcode "Bind".
► Scan the barcode "Bind" now.
► If the green LED of the scanner blinks, put the scanner into the cradle.
► The green LED is now switched off and the scanner is already registered on the cradle.
The interface of the cradle can be set up now with the following barcodes.