IPC9850_Surface Mount Equipment Characterization.pdf - 第52页
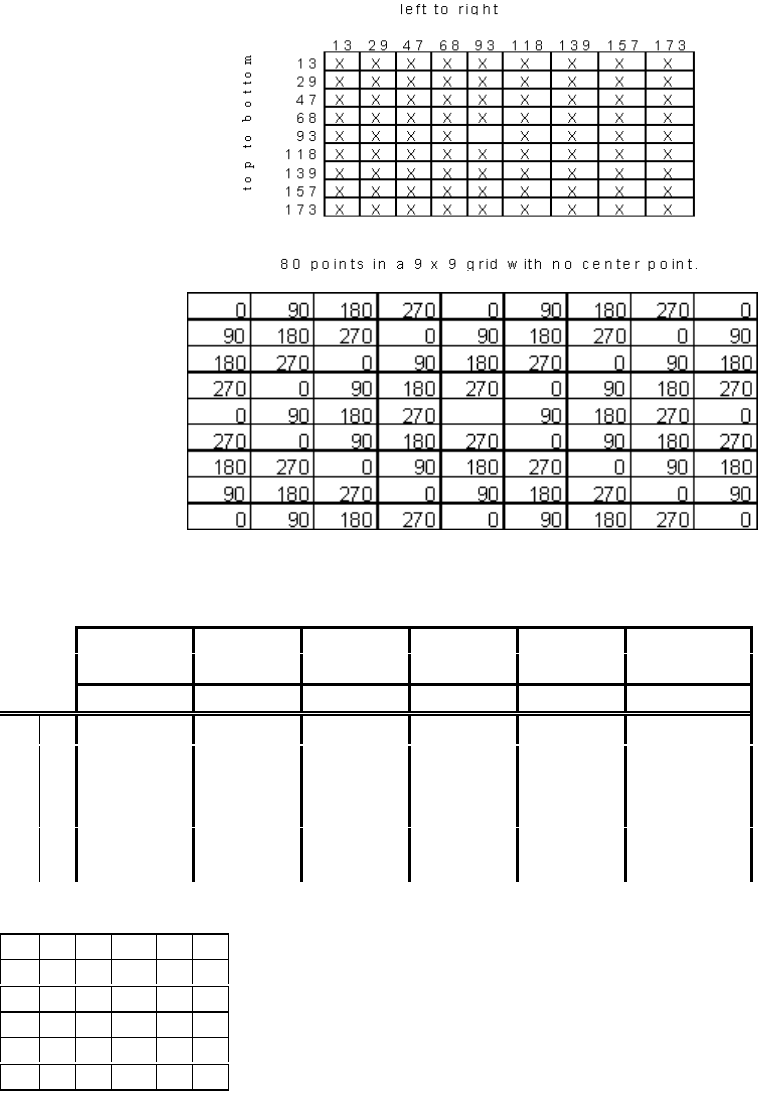
IPC-9850 Official Proposal May 2001 52 Appendix F- Component Location for Accuracy Verification Panel ( to be developed)
IPC-9850
Official Proposal
May 2001
51
IPC 9850 SOIC16 GRID LAYOUT
IPC 9850 QFP-100 & BGA-228 GRID LAYOUT
X
1
17 X
2
47 X
3
77 X
4
107 X
5
137 X
6
167
X Y
θ
X Y
θ
X Y
θ
X Y
θ
X Y
θ
X Y
θ
Y
1
17 17 17 90 47 17 270 77 17 0 107 17 180 137 17 90 167 17 0
Y
2
47 17 47 270 47 47 0 77 47 180 107 47 90 137 47 0 167 47 270
Y
3
77 17 77 0 47 77 180 77 77 90 107 77 0 137 77 270 167 77 180
Y
4
107 17 107 180 47 107 90 77 107 0 107 107 270 137 107 180 167 107 90
Y
5
137 17 137 90 47 137 0 77 137 270 107 137 180 137 137 90 167 137 270
Y
6
167 17 167 0 47 167 270 77 167 180 107 167 90 137 167 270 167 167 180
Rotation Chart
90 270 0 180 90 0
270 0 180 90 0 270
0 180 90 0 270 180
180 90 0 270 180 90
90 0 270 180 90 270
0 270 180 90 270 180
IPC 9850 QFP-208 GRID LAYOUT

IPC-9850
Official Proposal
May 2001
52
Appendix F- Component Location for Accuracy Verification Panel
(to be developed)
IPC-9850
Official Proposal
May 2001
53
Appendix G- How to Perform a GR&R Test
Instruction for Using the Gauge R&R Spreadsheet
G-1 Purpose Gauge R&R is performed to determine the reliability of the measurement process. The Gauge R&R
test sums all the possible sources of error related to having repeatable and reproducible measurements. A list of
possible sources of error are:
G-2 Inspection Measurement Machine – all inspection machines are specified to have limits on how accurately
and repeatably they can measure. This is due mostly to machine design and will vary depending quality and price of
CMM used.
G-3 Inspection Program – the user will write a program for the CMM machine that will measure different
components and different boards. These programs could possibly be a big source of error if they are not written
properly. Every program written will need to have a GR&R test done to ensure its accuracy. For this standard there
needs to be a minimum of 3 different GR&R tests:
• 1608 Capacitor Board
• SOIC16 Board
• Glass Part Board (Assumes the same program is run for both BGA and QFP part)
G-4 Error Contributed by Fixture – When the board is mounted on the CMM during measurement any movement
will cause an error. The goal of the fixture is to hold the board securely every time it is measured.
G-5 Operator Error – If different operators run the same test they should get the same results. Any variation
between the different operators is error. Note: The goal of a good inspection program and fixturing system is to
reduce this variable. If operator error is high the inspection program and/or the fixtures need to be changed.
G-6 Error Contributed by the Component
Glass Component - measurement uncertainty
Live Components
Chips - Resisters, the die cutting process. Capacitors cut with a die saw
Leaded - plastic package forming, lead finish etc.
G-7 Equipment Needed:
• CMM
• 1 Measurement Verification Panel and mounting fixture
• Parts (one of the following)
Ø 36 glass QFP-100 slugs
Ø 30 glass QFP-208 slugs
Ø 36 glass BGA slugs
• 80 SOIC16
• 400 1608C
G-8 Procedure:
1. Run one Measurement Verification Panel on any piece of equipment.
Note: This test is not testing the placement equipment in any way, so the machine that places the placement does not
matter; but the components should be placed on the board with a average amount of deviation.
2. Operator 1 then takes this board and places it on the inspection machine, run the board and logs the results. These
results are copied into the Operator 1; Test 1 area of the spreadsheet.
3. Operator 1 then removes the board from the inspection machine.
4. Operator 1 then places the board back onto the inspection machine, runs the board and gets the results. These
results are copied into the Operator 1; Test 2 area of the spreadsheet.
5. Operator 1 then removes the board from the inspection machine.
6. Operator 1 then places the board back onto the inspection machine, runs the board and gets the results. These
results are copied into the Operator 1; Test 3 area of the spreadsheet.
7. Operator 1 then removes the board and gives to Operator 2.
8. Operator 2 then runs steps 2 though 6 placing their data into the Operator 2 section of the spreadsheet.
9. When all of the data has been entered into the spreadsheet, switch screens to the analysis sheet. Press the get data
button. This will enter the data into the correct columns of the spreadsheet and calculate the result.
The calculation that is performed is the Average & Range method.