SA_HF_intern_0194307-02_eng.pdf - 第40页
3 Serv ice Gan tri es SIPL ACE HF-Ser ies Replacing the X -Drive (Prima ry) [00375245 -xx] 3-26 0019 43 07- 02 Is su e 1 1/ 2004 Copy ri gh t © 2 004 S ie m ens 2 1 Unplug the p roximity switc h cable (2) and pull it f…
SIPLACE HF-Series
Replacing the X-Drive (Primary) [00375245-xx]
Service
Gantries
3
Copyright © 2004 Siemens 00194307-02 Issue 11/2004 3-25
Disassembly
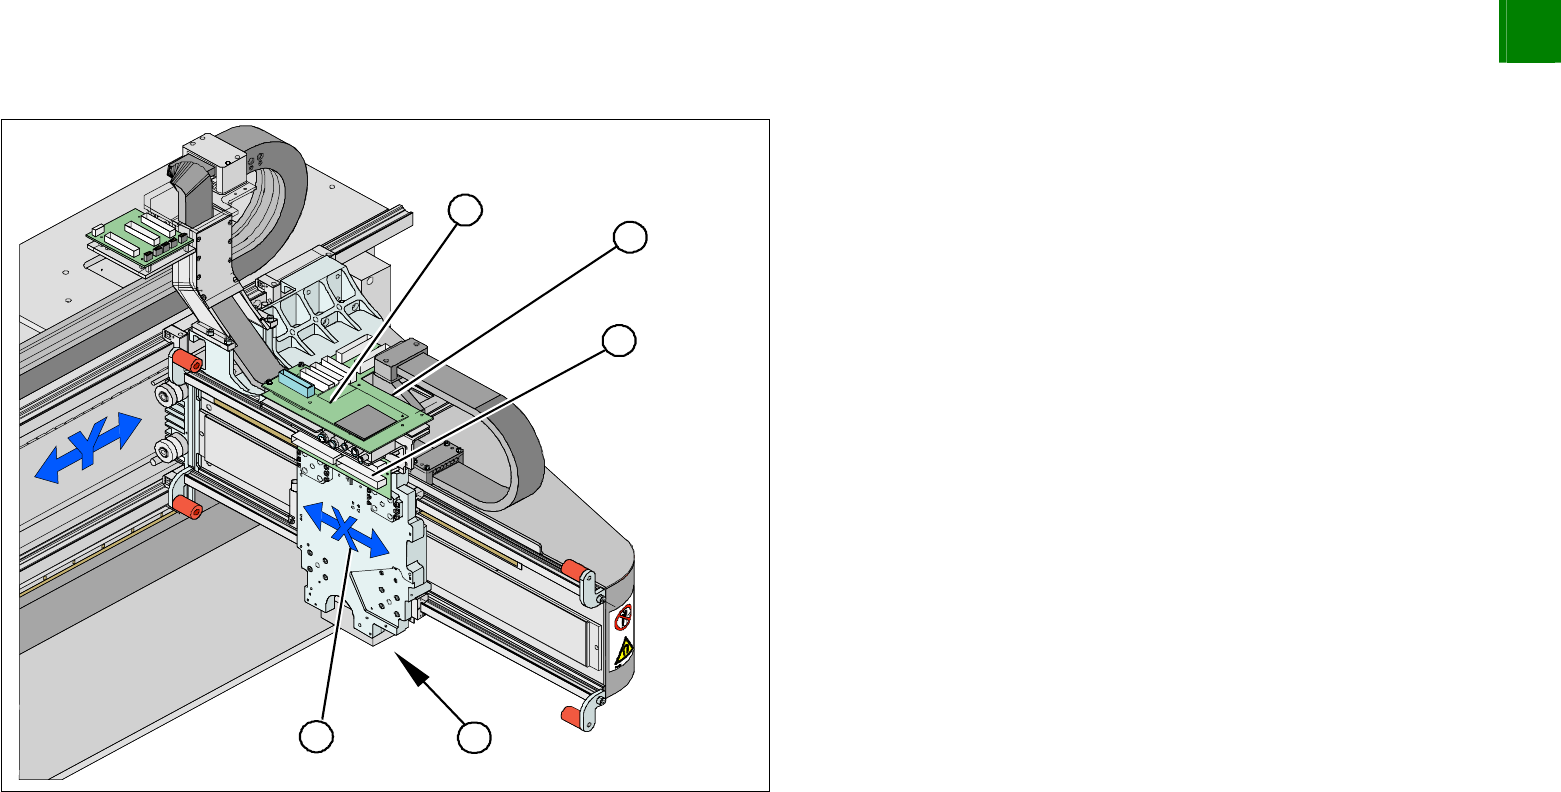
5
5
1 4
3
2
1. X-drive (primary) with head mount
2. X-mount with trailing cable
3. Head adapter board
4. Mount with PCB camera
5. Head board
Dismantle the placement head.
Remove the head adapter board (3). The X-mount fixtures are
now (2) accessible.
Unplug the following cables from the head board (5) and
remove them from the x-mount (2):
X motor cable
X-axis scanner head
Temperature sensor
3
Service
Gantries
SIPLACE HF-Series
Replacing the X-Drive (Primary) [00375245-xx]
3-26
00194307-02 Issue 11/2004 Copyright © 2004 Siemens
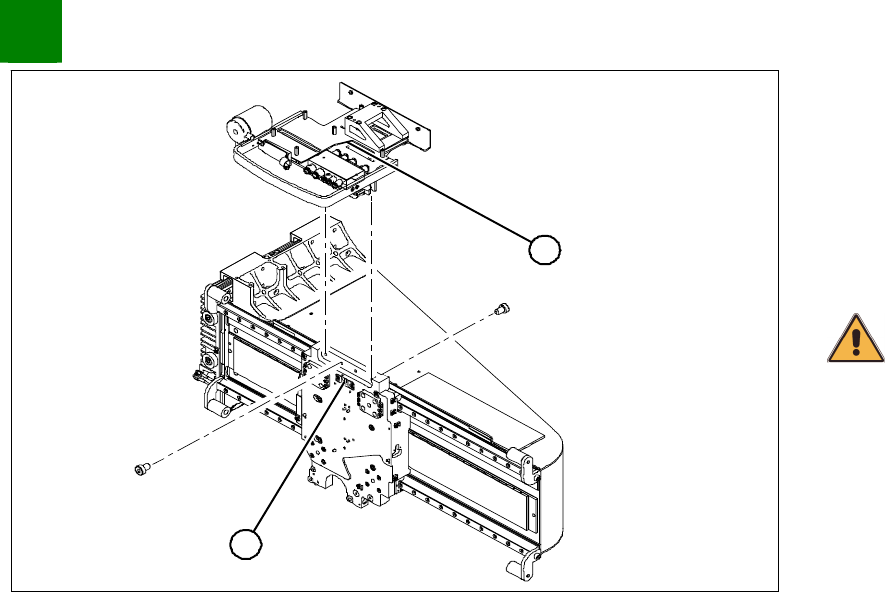
2
1
Unplug the proximity switch cable (2) and pull it forwards, out of
the head mount.
Undo the 8 screws (4 x at front / 4x at back) fastening the
x-mount (1) and pull these up and out, together with the trailing
cable.
Fasten the x-mount at a suitable point.
CAUTION
Make sure that the flat ribbon cable and the pneumatic hoses are not
rubbed against any parts or kinked. Watch out for sharp edges.
SIPLACE HF-Series
Replacing the X-Drive (Primary) [00375245-xx]
Service
Gantries
3
Copyright © 2004 Siemens 00194307-02 Issue 11/2004 3-27
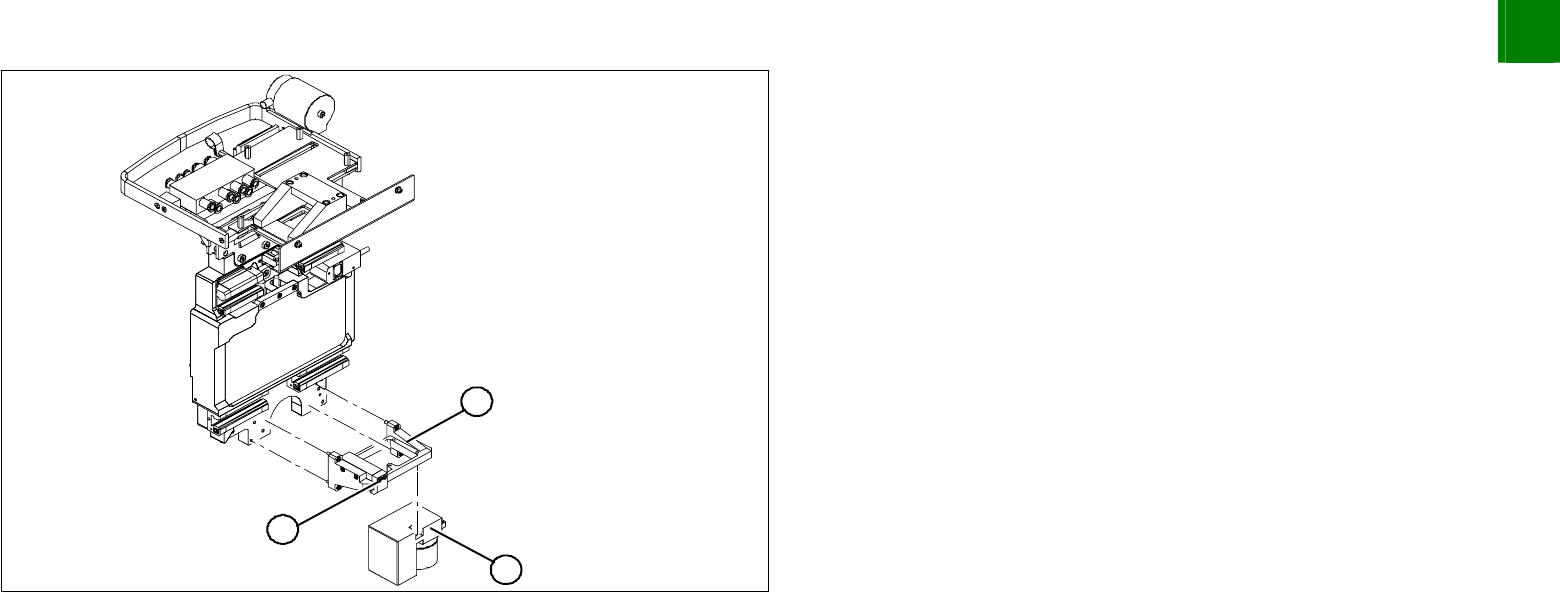
1
3
2
Undo the 4 screws fastening the PCB camera mount (1).
Remove the complete unit, including PCB camera (3) and
damping bracket (2).
Tie the mount (1) to a suitable part of the machine base. Take
care not to damage the camera.