_482615_RE1304003 8mm ZS feeder maint.pdf - 第6页
Trained Customers Service Information 6/ 27 SI 1304003E- 00 0 = 8mm ZS feeder maintenance procedures 1 2. 4 Replac e the feeder side cover Step 1 Remove the feede r side c over from the feede r by remov ing the cover’s n…
Trained Customers
Service Information
5/27
SI1304003E-000 = 8mm ZS feeder maintenance procedures 1
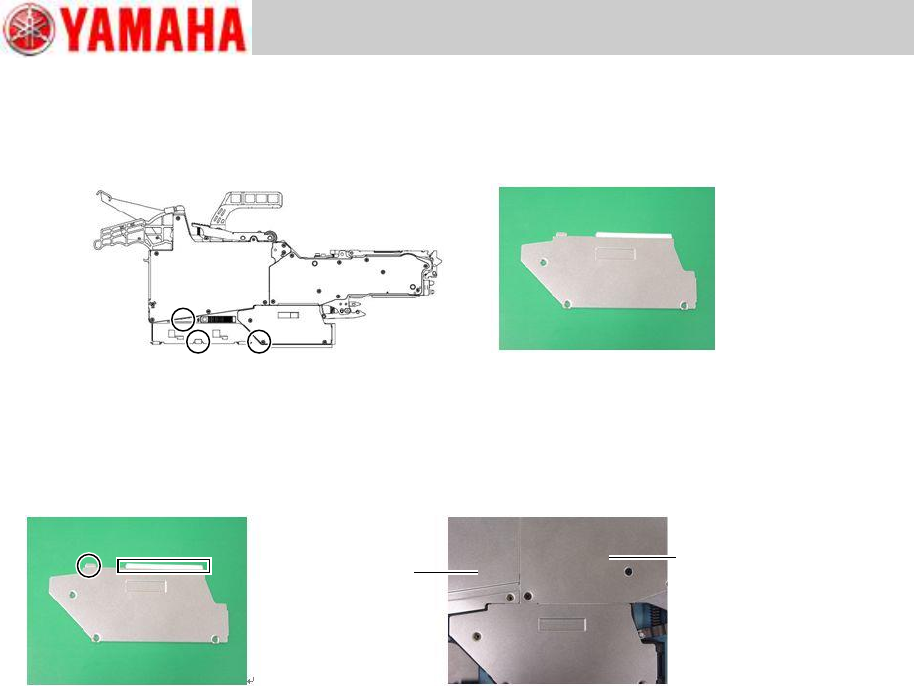
2.3 Replace the EL box cover
Step 1 Remove the EL box cover from the feeder by removing the cover’s three screws using
a Phillips screwdriver (No.1).
Step 2 Install the new EL box cover on the EL box with the screws removed in step 1. Use the
Phillips screwdriver (No.1) and tighten the screws to 40Ncm.
Note
When setting an EL box cover, portions shown in below left figure get under the feeder side
cover (COVER, FEEDER SIDE 1) and the top tape box cover (COVER, TOP TAPE BOX).
Note
The EL box cover of an 8mm wide feeder has a white sticker on its area which gets under the
feeder side cover
Feeder side cover
Top tape box cover
Trained Customers
Service Information
6/27
SI1304003E-000 = 8mm ZS feeder maintenance procedures 1
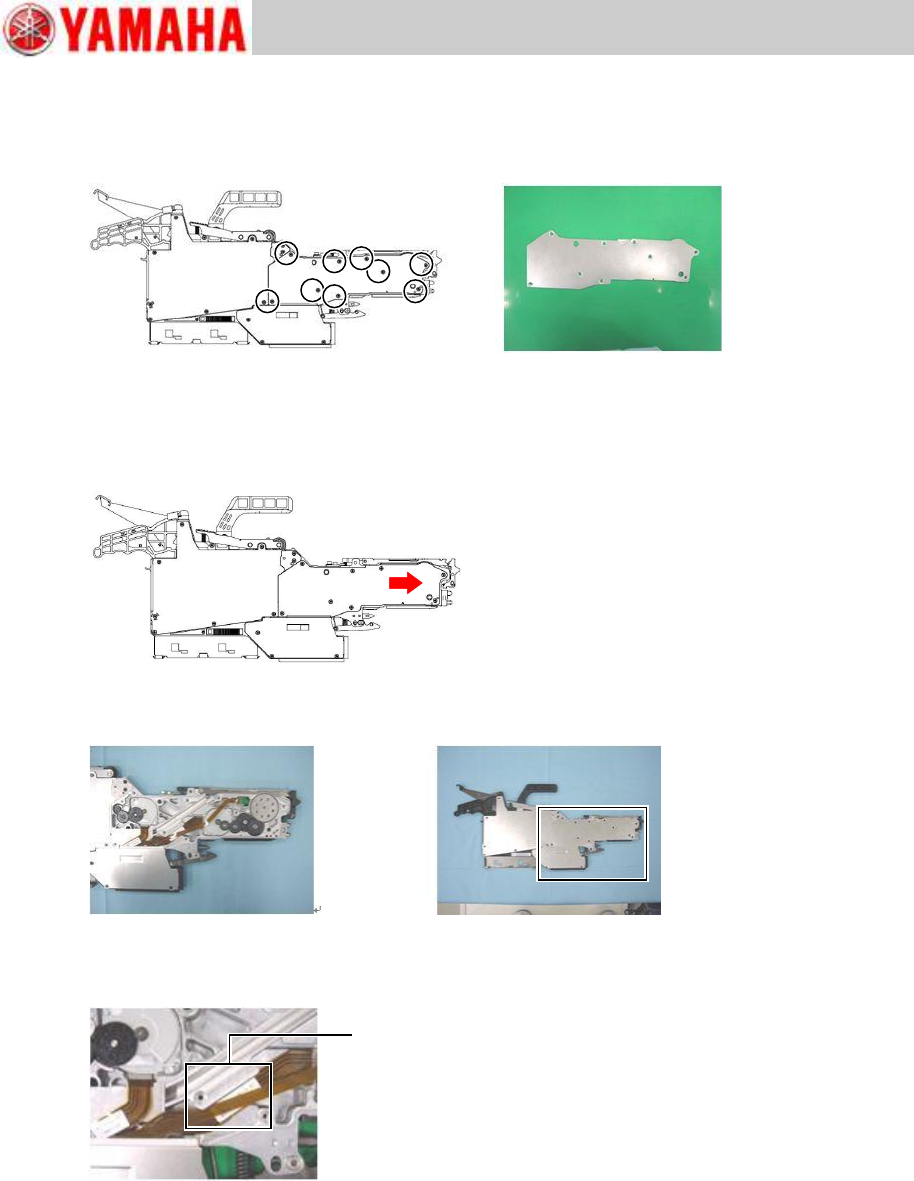
2.4 Replace the feeder side cover
Step 1 Remove the feeder side cover from the feeder by removing the cover’s nine screws
and sliding the cover forward. Use a Phillips screwdriver (No.1).
Caution
Do not lift up the side cover when removing it from the feeder body, as the peel gear, feed
gear, collar and other parts may attach to the cover and come off together with the cover. To
avoid this, slide the cover forward to remove it from the body, and check that the gears or
collars stay in position not being attached to the cover.
Step 2 Install the new feeder side cover on the feeder with the screws removed in step 1. Use
the Phillips screwdriver (No.1) and tighten the screws to 40Ncm.
Note
Before installing the feeder side cover on the feeder, check that the flexible flat cables of the
feed motor and the ABS board are fitted in the gap in the feeder body neatly.
Gap in feeder body

Trained Customers
Service Information
7/27
SI1304003E-000 = 8mm ZS feeder maintenance procedures 1
2.5 Replace the cutter
Step 1 Open the tail cover assy located at the rear of the top tape box and remove the screw
that secures the cutter by using the Phillips screwdriver (No.1), and remove the cutter
from the tail cover assy with tweezers or needle-nose pliers.
Step 2 Set the new cutter to the tail cover assy so that its blade faces up, and secure it with
the screw removed in step 1. Use the Phillips screwdriver (No.1) and tighten the screw
to 30Ncm.
Note
An off-the-shelf cutter can also be used.
Caution
Handle the blade with care when replacing the cutter.
Screw
Cutter