00194547-03.pdf - 第15页
Installation Manual Station Software Version 601.02 SP1 Edition 10/2005 15 of 82 → Insert the floppy you have created in the floppy drive of the machine controller and boot from the floppy by switching the machine on. Th…
Installation Manual Station Software Version 601.02 SP1 Edition 10/2005
14 of 82
4 Installation instructions
4.1 Automatic BIOS settings at the station computer and the
machine controller
Before the BIOS settings on the station computer and the machine controller can be performed
automatically, you must first create a setup CD for the BIOS settings on the station computer and a
setup floppy for the BIOS settings on the machine controller. To do this, you need a Windows XP
computer which has a CD drive, a CD-RW drive and a floppy drive.
The image files required for creating the setup CD/floppy are in the "BIOS-Images" folder of the CD
for version 601.02 of the software.
4.1.1 Creating a setup CD and making the BIOS settings on the station computer
→ Insert an empty writable CD in the CD-RW drive on any computer equipped with a CD writer.
→ Insert the CD for version 601.02 of the software in the CD ROM drive.
→ In the Windows Explorer, open the "BOIS-Images" folder on the CD.
→ Open the image file "CPU086_BIOS_Einstellungen.iso" using the installed CD writing program
and follow the instructions on screen.
→ Once the CD has been written, remove the CDs from the drives.
→ Insert the CD you have created in the CD ROM drive of the station computer and boot from
the CD by switching the machine on. The BIOS settings are now performed automatically.
→ After the settings have been made, remove the CD from the drive and switch the machine off
again.
4.1.2 Creating a setup floppy and making the BIOS settings on the machine
controller
→ Insert the CD for version 601 of the software in the CD ROM drive.
→ Insert a formatted floppy (3.5", 1.44MB) into the floppy drive.
→ In the Windows Explorer, open the "BOIS-Images" folder on the CD.
→ Double-click the self-extracting EXE file "CPU076_BIOS_Einstellungen.exe" and follow the
instructions on screen.
→ Once the floppy has been written, remove the floppy and the CD from the drives.

Installation Manual Station Software Version 601.02 SP1 Edition 10/2005
15 of 82
→ Insert the floppy you have created in the floppy drive of the machine controller and boot from
the floppy by switching the machine on. The BIOS settings are now performed automatically.
→ After the settings have been made, remove the floppy from the drive and switch the machine off
again.
4.2 Installing the SIPLACE software
4.2.1 Requirements
You must have installed the Windows XP Professional operating system with service pack 2
before installing the station computer version 601 (see section
3).
Caution:
When installing the RMOS operating system (see section
4.5.3 "Installing the machine
controller operating system") it is imperative that the Version 601.02 installation floppies
are used. The machine will not boot if this is not done.
The default Windows display settings must be changed and the touchscreen must be calibrated.
You must be logged on as the Administrator
in order to be able to carry out this work.
Installation Manual Station Software Version 601.02 SP1 Edition 10/2005
16 of 82
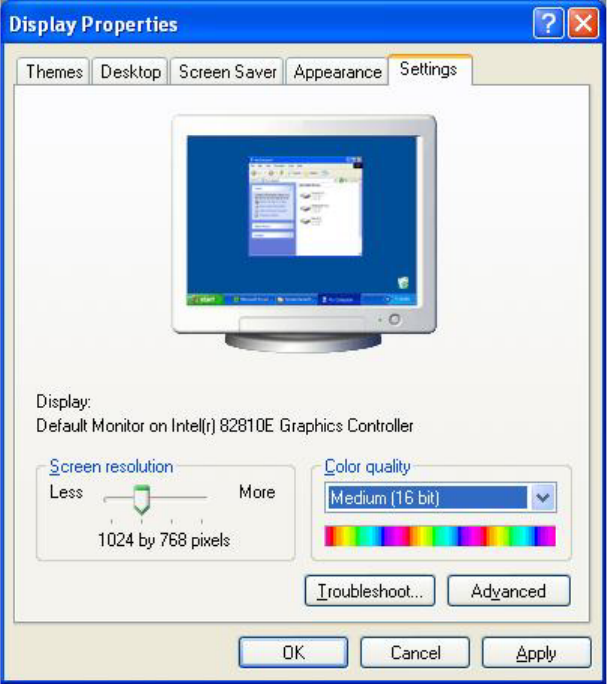
4.2.1.1 Changing the display settings
→ Select Start Æ Settings Æ Control Panel Æ Display.
→ Click the Settings tab.
→ Make the following settings here:
Fig. 4-1: Screen settings