M3plus_MaintenanceManual_e.pdf - 第45页
3- 6 3 Periodic maintenance items 2.3 Cleaning and greasing the X, Y and W-axis linear guide rails 1 Turn off the machine power switch. Quit the software operation and turn off the machine power. 2 Unplug the motor power…
3-5
3
Periodic maintenance items
2.2 Cleaning and greasing the X and Y axis ball screws
1
Turn off the machine power switch.
Quit the software operation and turn off the
machine power switch.
2
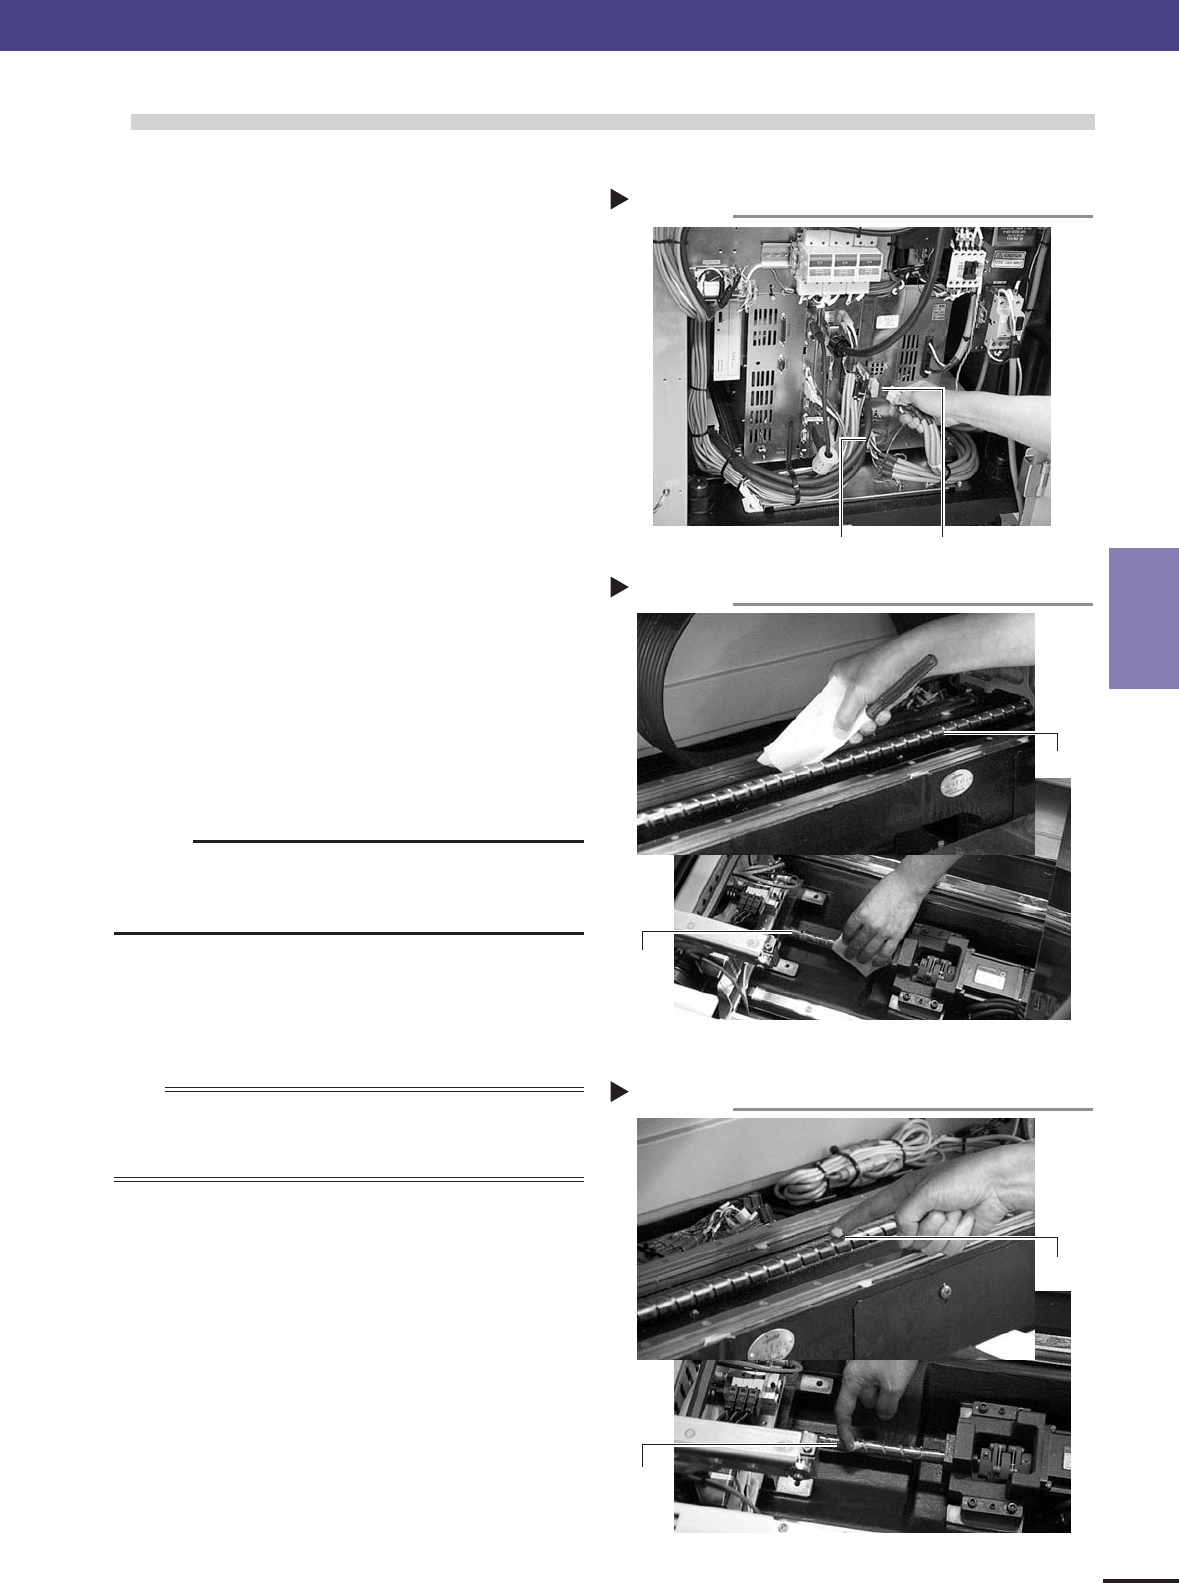
Unplug the motor power cable
connectors.
Open the front lower cover of the machine and
unplug the X-axis and Y-axis motor power cable
connectors. (Move the head and conveyor table
along the X and Y axes by hand as needed to make
this work easier.)
43316-5E-20
3
Wipe away the old grease on the ball
screw as follows.
1. Move the head (or conveyor table) to the one
end of its axis and wipe away the old grease on
the ball screw with cleaning paper or cloth that
does not leave dust or residue.
2. Move the head (or conveyor table) to the
opposite end of its axis and wipe away the old
grease on the ball screw with cleaning paper or
cloth that does not leave dust or residue.
43317-5E-20
c
CAUTION
Wipe away thoroughly the old grease in the lead groove of
the ball screw. Also check that no debris and residue remain
in the lead groove.
4
Apply grease to the ball screw.
Apply grease by hand uniformly over the surface
and lead groove of the ball screw.
43318-5E-20
n
NOTE
Only on the Y-axis ball screw, you can use a grease gun to supply
grease through the grease nipple. Open the rear cover and you will see
the grease nipple.
5
Remove excess grease.
After moving the head and conveyor table back
and forth a few times along the X and Y axes, wipe
away excess grease.
6
Reconnect the motor power cable
connectors.
Plug the motor power cable connectors into the
controller.
7
Turn on the machine power switch.
Turn on the machine and perform warm-up
operation.
Unplugging the motor power cable connectors
Step 2
Y-axis
X-axis
Cleaning the ball screw
Step 3
Y-axis
X-axis
Applying grease to the ball screw
Step 4
Y-axis
X-axis
2. Monthly or bimonthly inspection
3-6
3
Periodic maintenance items
2.3 Cleaning and greasing the X, Y and W-axis linear guide rails
1
Turn off the machine power switch.
Quit the software operation and turn off the
machine power.
2
Unplug the motor power cable
connectors.
Open the front lower cover of the machine and
unplug the motor power cable connectors. (Move
the head and conveyor table along the X and Y
axes by hand as needed to make this work easier.)
3
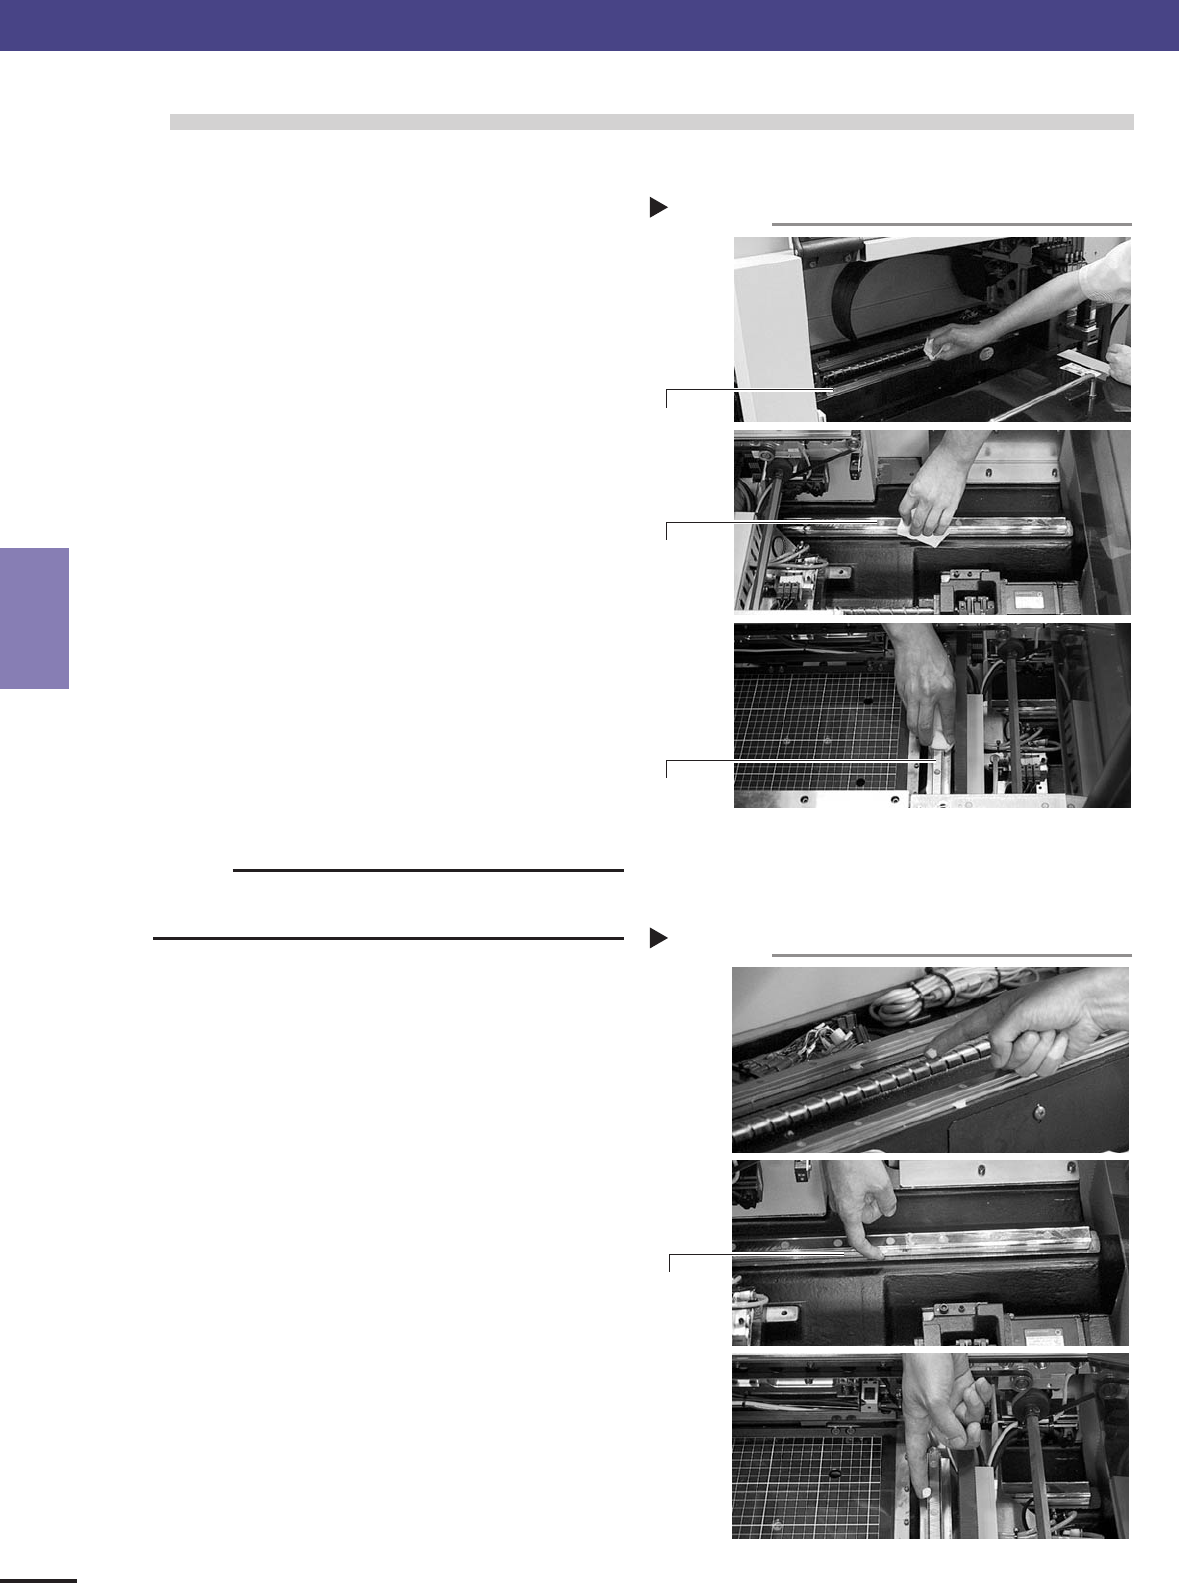
Wipe away the old grease on the linear
guide rails as follows.
1. Move the head (or conveyor table) to the one
end of its axis and wipe away the old grease on
the guide rails with cleaning paper or cloth that
does not leave dust or residue.
2. Move the head (or conveyor table) to the
opposite end of its and wipe away the old
grease on the guide rails with cleaning paper or
cloth that does not leave dust or residue.
43319-5E-20
c
CAUTION
Wipe away thoroughly the old grease in the grooves of the
guide rails.
4
Apply grease to the guide rails.
Apply grease by hand uniformly over the surface
and grooves of the guide rails.
43320-5E-20
5
Remove excess grease.
After moving the head and conveyor table back
and forth a few times along their axes, wipe away
excess grease.
6
Reconnect the motor power cable
connectors.
Plug the motor power cable connectors into the
controller.
7
Turn on the power switch of the machine.
Turn on the machine and perform warm-up
operation.
Cleaning the linear guides
Step 3
Y-axis
guide
X-axis
guide
W-axis
guide
Applying grease to the linear guides
Step 4
Linear
guide
groove
2. Monthly or bimonthly inspection
3-7
3
Periodic maintenance items
2.4 Air/mist filters
Air/mist filters are used to prevent oil, mist and other impurities in the air compressor from penetrating into the
machine. These filters should be inspected and cleaned periodically as instructed below. (The filter closer to the
air coupler is the air filter and the other one is the mist filter.)
■ Cleaning the filter cup
1
Check the inside of the filer cup.
Check for oil or water deposits in the filter cup
through the window. If the window is dirty, follow
the steps below to clean the filter cup.
Reference
The drain cock at the bottom of the filter cup is an auto-drain type. It
automatically drains the oil or water when deposited in the cup. We
recommend connecting a hose to this drain cock.
2
Disconnect the air hose from the air
coupler.
c
CAUTION
When disconnecting the air hose, be careful not to allow oil,
water or impurities to splash out.
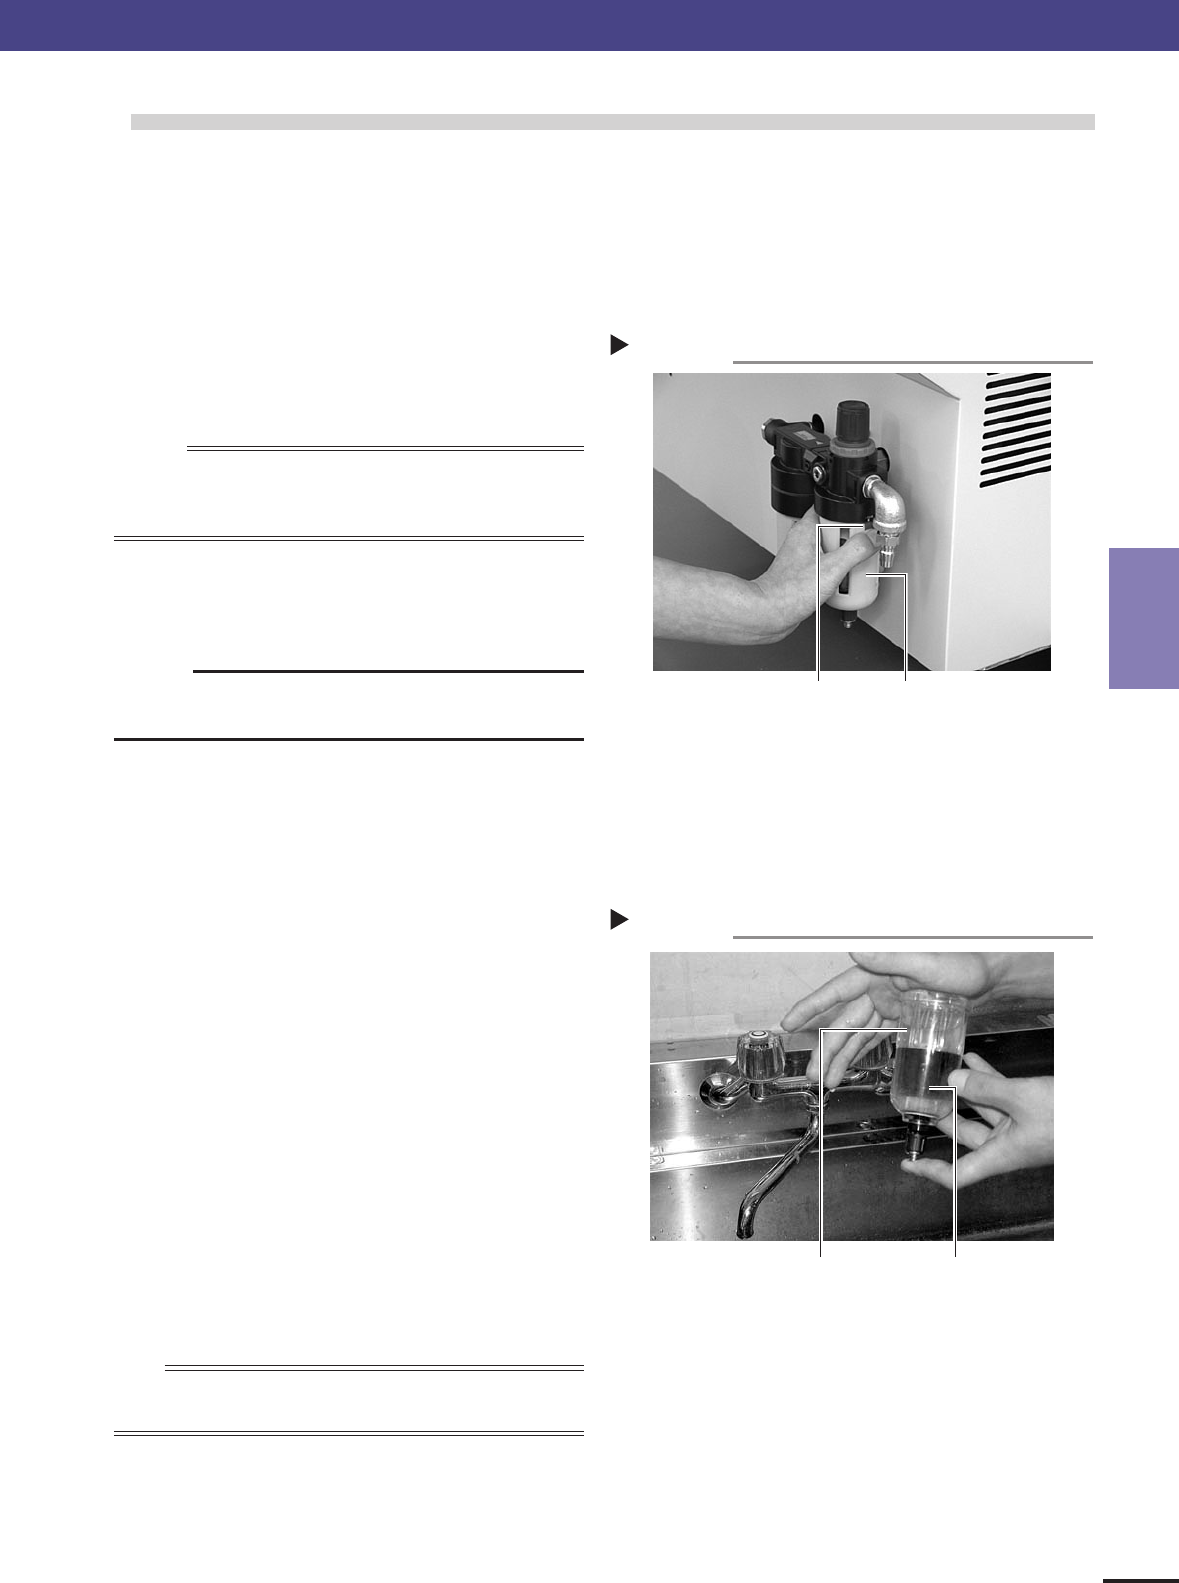
3
Remove the filter cup.
While pressing the red button on the side of the
filter cup, turn it fully towards "IN", and pull the
filter cup downwards.
43321-5E-20
4
Clean the inside of the filter cup.
1. Lightly clean the filter cup with water.
2. Then, pour water-diluted neutral detergent into
the filter cup and clean the inside while shaking
it.
3. Air blow the filter cup and wipe away any
moisture with clean cloth or paper.
43322-5E-20
5
Reattach the filter cup.
1. Align the red button on the side of the cup with
the "IN" position and push the cup upwards.
2. Turn the cup towards "LOCK" until you hear a
click.
n
NOTE
Leave the filter cup removed to clean the air filter as explained in the
next procedure.
6
Reconnect the air hose to the air coupler.
After connecting the air hose, check that no air is
leaking.
Cleaning the filter cup
Step 4
Filter cup
Water or water-diluted
neutral detergent
Removing the filter cup
Step 3
Filter cup
Red button
2. Monthly or bimonthly inspection