00198268-02_GS_SIPLACE-Pro-14.1-R17-1_EN.pdf - 第33页
Getting S tarted SIPLACE Pro 14.1 (R17-1) 3 T utorial 05/2017 Edition 3.3 Exercise 2: Creating a Component Sha pe 33 Close this component shape. Create the directory My Component Shapes\Get ting Started in the Save A…
3 Tutorial Getting Started SIPLACE Pro 14.1 (R17-1)
3.3 Exercise 2: Creating a Component Shape 05/2017 Edition
32
Enter the following data in the Configure Component Shape - Step 4 of 4 dialog box:
Click on Finish.
Result 3
The component shape will be shown in the Component Shape Editor and can be edited there. 3
3
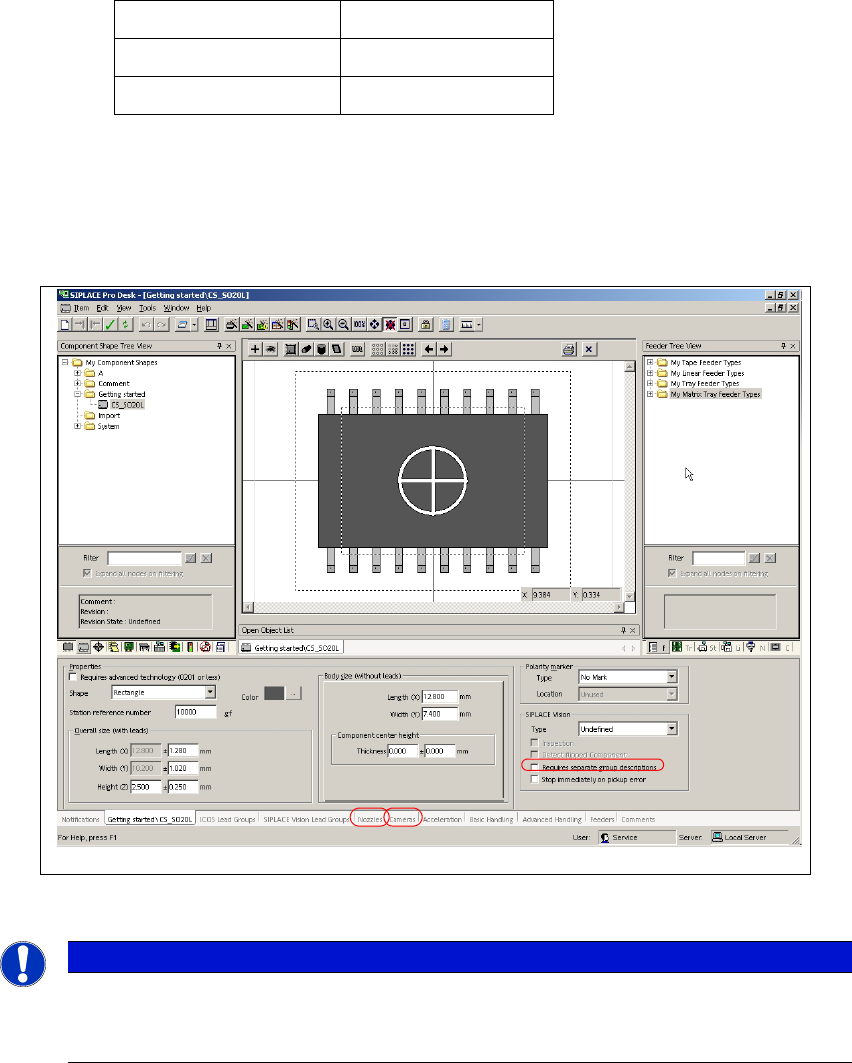
Fig. 3 - 4 Result: "Component Shape created" screen
3
Switch to the Nozzles tab (see Pos.1).
Assign nozzle 817, 917 and 920 with the Add button.
Switch to the Cameras tab (see Pos. 2).
Assign camera RV Camera X (28) 24.2x24.2 and RV Camera X (29) 32x32 with the Add
button.
Total number of leads 20
Top: 10
Bottom: 10
Note
These examples have been kept relatively simple to help new users familiarize them-
selves with the SIPLACE Pro user interface and functions.
Getting Started SIPLACE Pro 14.1 (R17-1) 3 Tutorial
05/2017 Edition 3.3 Exercise 2: Creating a Component Shape
33
Close this component shape.
Create the directory My Component Shapes\Getting Started in the Save As dialog box.
Save this component shape as CS_SO20L.
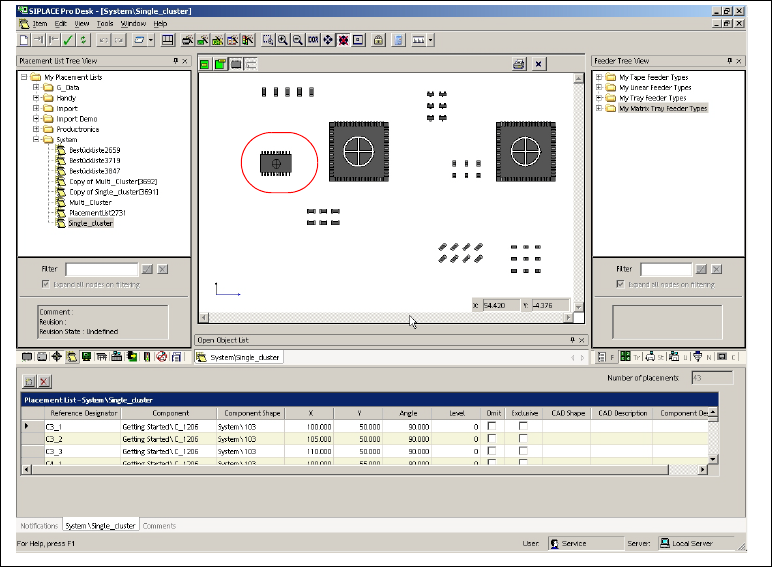
Open the placement list Getting Started\Single_Cluster and use the drag & drop function to
assign the component shape CS_SO20L to the component SO20L.
3
Fig. 3 - 5 Result: "Component Shape created" screen
The placement list has now been completed.
Close the placement list.
Result 3
The new component shape CS_SO20L has been assigned to the component SO20L. Continue
with Exercise 3: Creating a Board for the Placement List. 3
3

3 Tutorial Getting Started SIPLACE Pro 14.1 (R17-1)
3.4 Exercise 3: Creating a Board for the Placement List 05/2017 Edition
34
3.4 Exercise 3: Creating a Board for the Placement List
3.4.1 Creating a Single Board
Aim of exercise 3
To create and assign a single board for the Single_Cluster placement list. 3
Step-by-step 3
Open the Board Editor with the menu Item => New => Board.
Select the required board in the view area.
Enter the board data.
Use the drag & drop function to assign the Getting Started\Single_Cluster placement list to
the board.
Result 3
The board will be shown with the placement list in the Board Editor and can be edited there. 3
Size
Length (X) 160.000 mm
Width (Y) 100.000 mm
Height 2 mm
Paste height 0.000 mm
Offset from zero point to corner
X 0.000 mm
Y 0.000 mm
Other
Default orientation 0 degrees
Reference coordinate system Normal