00198268-02_GS_SIPLACE-Pro-14.1-R17-1_EN.pdf - 第41页
Getting S tarted SIPLACE Pro 14.1 (R17-1) 3 T utorial 05/2017 Edition 3.6 Exercise 5: Creating a Job w ith Initial Setup 41 3.6 Exercise 5: Creating a Job with Initial Setup 3.6.1 Creating an Initial Setup Aim of exercis…
3 Tutorial Getting Started SIPLACE Pro 14.1 (R17-1)
3.5 Exercise 4: Creating a Placement Line 05/2017 Edition
40
Result 3
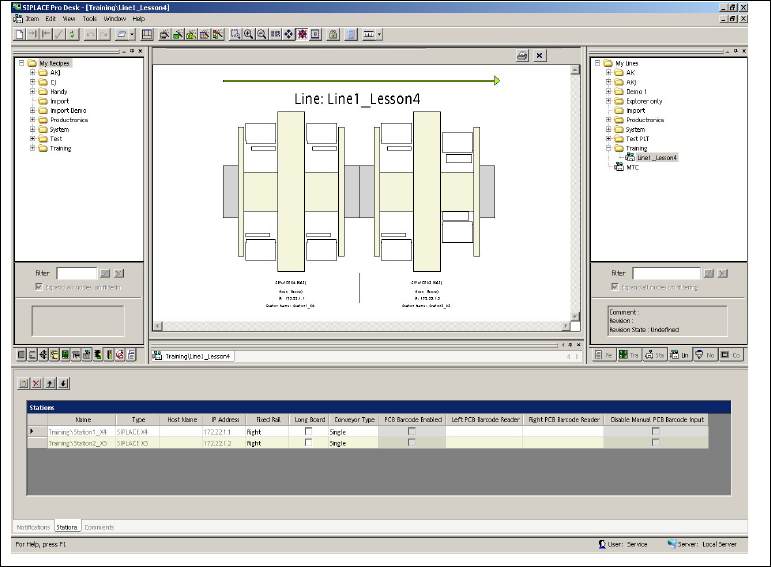
The placement line will be shown in the Line Editor. 3
3
Fig. 3 - 8 Result: "Line" screen
Close the line.
Create the directory My Lines\Getting Started for this line, in the
Save As dialog box.
Save this line as Line1_Lesson4.
You can now create an initial setup for this line. Continue with Exercise 5: Creating a Job with Ini-
tial Setup. 3
3

Getting Started SIPLACE Pro 14.1 (R17-1) 3 Tutorial
05/2017 Edition 3.6 Exercise 5: Creating a Job with Initial Setup
41
3.6 Exercise 5: Creating a Job with Initial Setup
3.6.1 Creating an Initial Setup
Aim of exercise 3
To create an initial setup for a job. An initial setup must be available in order for a job to be opti-
mized. The initial setup is set as the starting point for the optimization process. 3
How to create an initial setup 3
Open the Setup Editor with the menu Item => New => Setup.
Select the line Line1_Lesson4. at My Lines\Getting Started .
Open Station1_D4 or Station2_D3 in the tab tree view and select the appropriate location
(see also Fig. 3 - 9 on page 42)
Enter the head types and component cameras for both stations in the Head tab.
Station1_X4:
Location 1
RV 12 9xx
RV Camera X (28) 24.2x24.2
Location 2
RV 12 9xx
RV Camera X (28) 24.2x24.2
Location 3
RV 12 9xx
RV Camera X (28) 24.2x24.2
Location 4
RV 12 9xx
RV Camera X (28) 24.2x24.2
Station2_X3
Location 1
RV 12 9xx
RV Camera X (28) 24.2x24.2
Location 2 --
Location 3
Twin Head 5xx
IC Camera X (33) 66x50
Location 4
RV 6 8xx 9xx
RV Cam X (29) 32x32
3 Tutorial Getting Started SIPLACE Pro 14.1 (R17-1)
3.6 Exercise 5: Creating a Job with Initial Setup 05/2017 Edition
42
Result 3
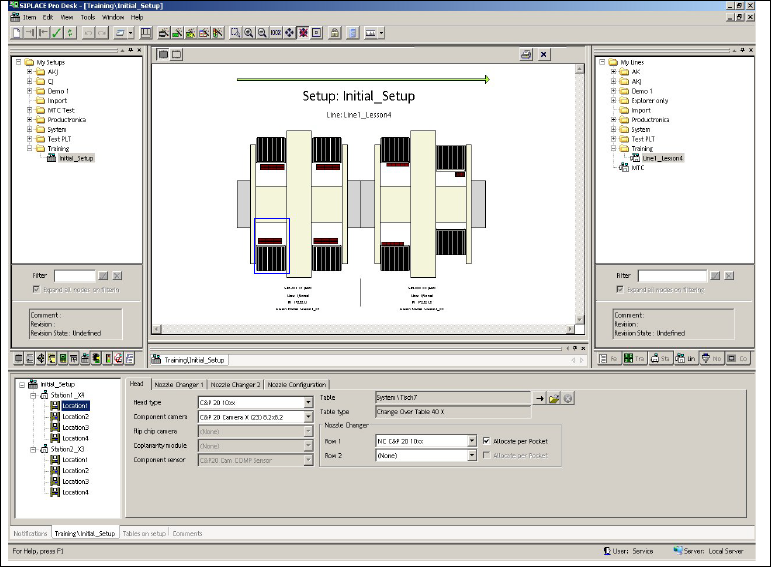
The setup will be shown in the Setup Editor. 3
3
Fig. 3 - 9 Result: "Setup" screen
Close the setup and create the directory My Setups\Getting Started for this setup, in the
Save As dialog box.
Give the name Initial_Setup.
This setup can now be assigned to a job and then optimized. Continue with
section 3.6.2 on page 43.