00198268-02_GS_SIPLACE-Pro-14.1-R17-1_EN.pdf - 第34页
3 T utorial Getting S tarted SIPLACE Pro 14.1 (R17-1) 3.4 Exercise 3: Creating a Board for the Placement List 05/2017 Edition 34 3.4 Exercise 3: Creating a Board for the Placement List 3.4.1 Creating a Single Board Aim o…
Getting Started SIPLACE Pro 14.1 (R17-1) 3 Tutorial
05/2017 Edition 3.3 Exercise 2: Creating a Component Shape
33
Close this component shape.
Create the directory My Component Shapes\Getting Started in the Save As dialog box.
Save this component shape as CS_SO20L.
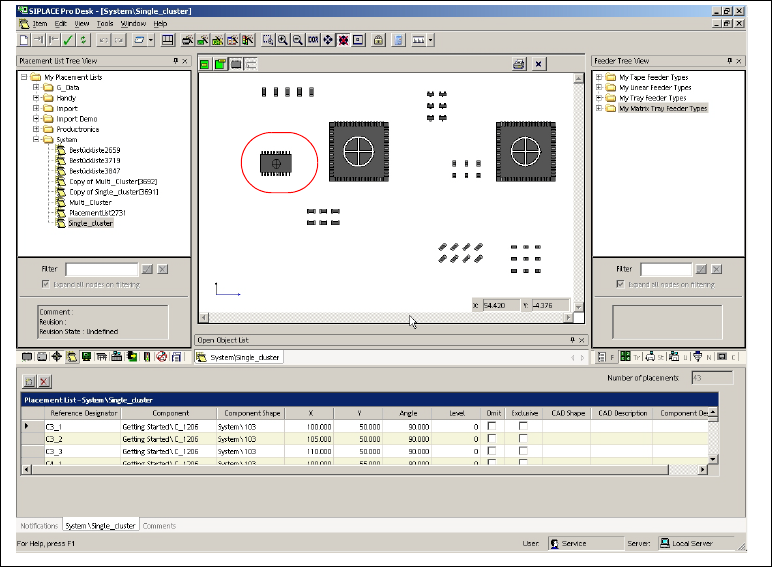
Open the placement list Getting Started\Single_Cluster and use the drag & drop function to
assign the component shape CS_SO20L to the component SO20L.
3
Fig. 3 - 5 Result: "Component Shape created" screen
The placement list has now been completed.
Close the placement list.
Result 3
The new component shape CS_SO20L has been assigned to the component SO20L. Continue
with Exercise 3: Creating a Board for the Placement List. 3
3

3 Tutorial Getting Started SIPLACE Pro 14.1 (R17-1)
3.4 Exercise 3: Creating a Board for the Placement List 05/2017 Edition
34
3.4 Exercise 3: Creating a Board for the Placement List
3.4.1 Creating a Single Board
Aim of exercise 3
To create and assign a single board for the Single_Cluster placement list. 3
Step-by-step 3
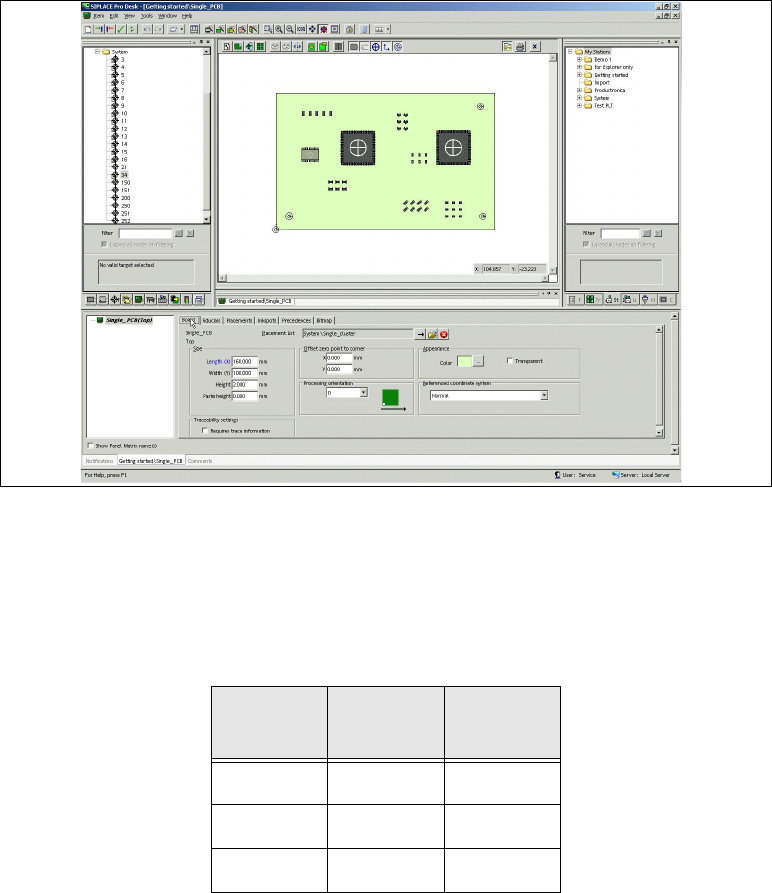
Open the Board Editor with the menu Item => New => Board.
Select the required board in the view area.
Enter the board data.
Use the drag & drop function to assign the Getting Started\Single_Cluster placement list to
the board.
Result 3
The board will be shown with the placement list in the Board Editor and can be edited there. 3
Size
Length (X) 160.000 mm
Width (Y) 100.000 mm
Height 2 mm
Paste height 0.000 mm
Offset from zero point to corner
X 0.000 mm
Y 0.000 mm
Other
Default orientation 0 degrees
Reference coordinate system Normal
Getting Started SIPLACE Pro 14.1 (R17-1) 3 Tutorial
05/2017 Edition 3.4 Exercise 3: Creating a Board for the Placement List
35
3
Fig. 3 - 6 Result: "Board with Placement List" screen
Close the board.
Now generate a new fiducial type and save it as number 99 in the fiducial’s ’System’ folder.
Add three fiducials of the type 99 to your board using the coordinates in the table below and
activate it as panel fiducial. .
Create the directory My Boards\Getting Started for this board, in the Save As dialog box.
Save this board as Single_PCB.
3
Fiducial
type
X Y
99 10.0 10.0
99 150.0 10.0
99 150.0 90.0