00198268-02_GS_SIPLACE-Pro-14.1-R17-1_EN.pdf - 第39页
Getting S tarted SIPLACE Pro 14.1 (R17-1) 3 T utorial 05/2017 Edition 3.5 Exercise 4: Creating a Placement Line 39 3.5 Exercise 4: Creating a Placement Line Aim of exercise 3 In order to create an initial setup, you firs…
3 Tutorial Getting Started SIPLACE Pro 14.1 (R17-1)
3.4 Exercise 3: Creating a Board for the Placement List 05/2017 Edition
38
Accept the data with OK.
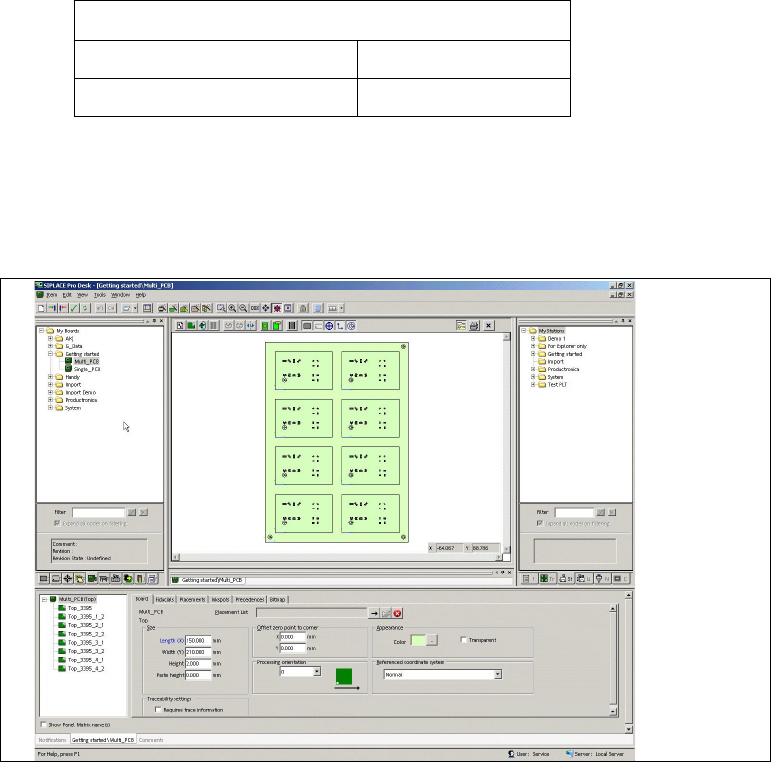
Result 3
The cluster board will be shown in the Board Editor and can be edited there. 3
3
Fig. 3 - 7 Result: "Cluster Board with Placement List" screen
3
Distance between panels
X distance 10.000
Y distance 10.000
Getting Started SIPLACE Pro 14.1 (R17-1) 3 Tutorial
05/2017 Edition 3.5 Exercise 4: Creating a Placement Line
39
3.5 Exercise 4: Creating a Placement Line
Aim of exercise 3
In order to create an initial setup, you first need to define and configure a placement line. 3
How to create a placement line 3
Open the Station Editor with the menu Item => New => Station.
Select the station type SIPLACE D4 and confirm with OK.
Enter the station parameters for this placement station.
Close the station and create the directory My Stations\Getting Started in the Save As dialog
box.
Assign the name Station1_D4.
Open the Station Editor with the menu Item => New => Station.
Select the station type SIPLACE D3 and confirm with OK.
Enter the station parameters for this placement station.
Close the station and assign the name Station2_D3 at My Stations\Getting Started .
Open the Line Editor with the menu Item => New => Line.
Move the cursor to the Stations tab.
Use the drag & drop function to move the two placement stations Station1_D4 and then Sta-
tion2_D3 into the line view area.
3
Host name <None>
IP address 172.22.1.1
Software version 605
Host name <None>
IP address 172.22.1.2
Software version 605
Note
When using the SIPLACE machines of D Serial and X Serial, the GF data must be con-
verted before using with the digital vision system. Therefor please contact your regional
service technican.
3 Tutorial Getting Started SIPLACE Pro 14.1 (R17-1)
3.5 Exercise 4: Creating a Placement Line 05/2017 Edition
40
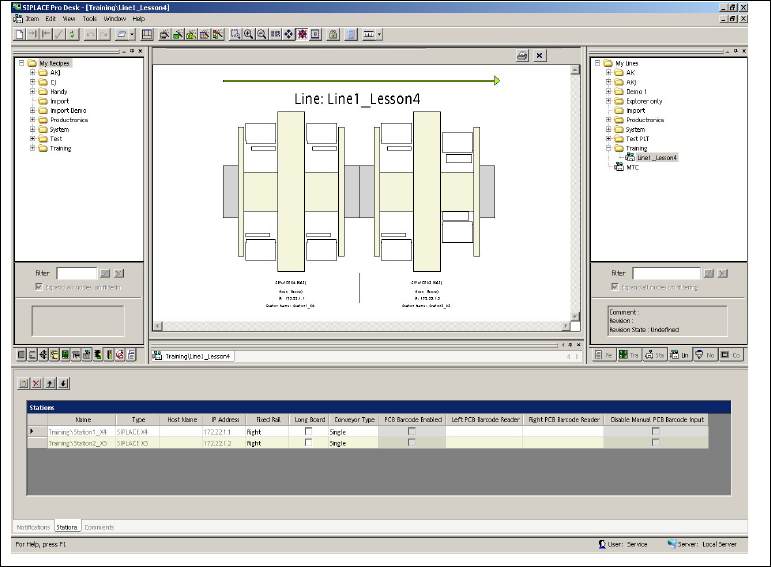
Result 3
The placement line will be shown in the Line Editor. 3
3
Fig. 3 - 8 Result: "Line" screen
Close the line.
Create the directory My Lines\Getting Started for this line, in the
Save As dialog box.
Save this line as Line1_Lesson4.
You can now create an initial setup for this line. Continue with Exercise 5: Creating a Job with Ini-
tial Setup. 3
3