00196351-06_UM_ACT_DE_EN.pdf - 第109页
ACT - Accurac y Check Tool / User Manual 09/2015 Edition 19 3.2.4 Importing Boards i n SIPLACE Pro ► Select the appropriat e folder to your s oftware. ► Click on the file with the board prog rams on the ACT CD ( Figu re …
ACT - Accuracy Check Tool / User Manual 09/2015 Edition
18
3.2.3 Importing the SIPLACE Pro Data - Procedure
The import of boards and tables is described below:
► Insert the ACT CD into the appropriate drive on the SIPLACE Pro computer.
(Alternatively, you can provide the data from a USB stick).
► Start the SIPLACE Pro Desktop software.
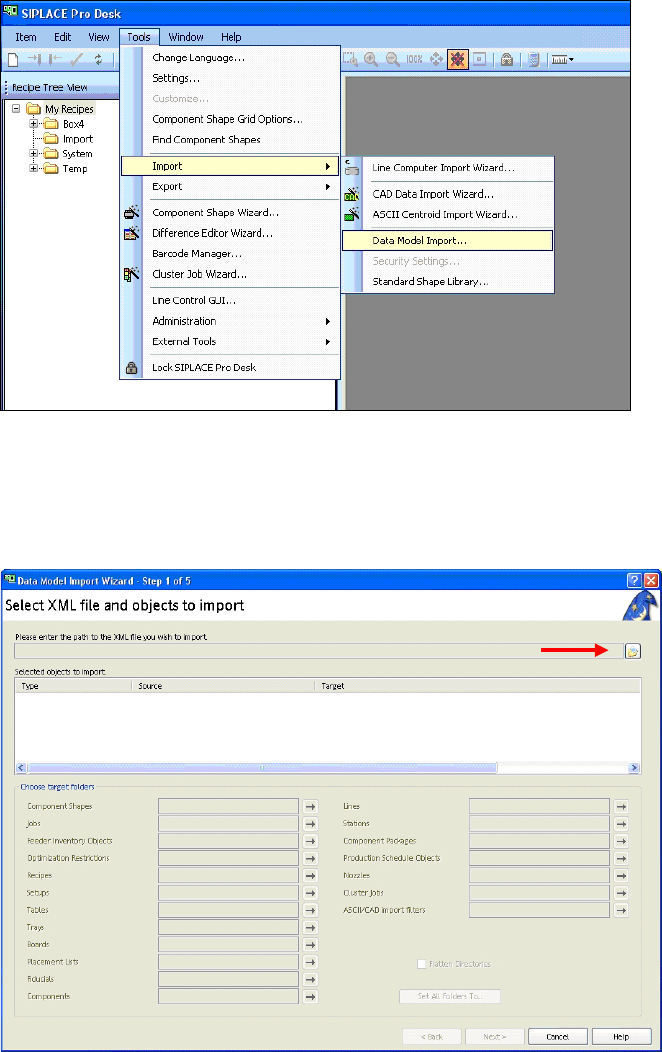
Figure 3-9: SIPLACE Pro view: Menu for importing the placement programs
► Select the Data model import function as shown in Figure 3-9:
Tools – Import – Data Model Iimport
View on screen:
Figure 3-10: Data import screen
► Click on the folder next to the red arrow (Figure 3-10).
ACT - Accuracy Check Tool / User Manual 09/2015 Edition
19
3.2.4 Importing Boards in SIPLACE Pro
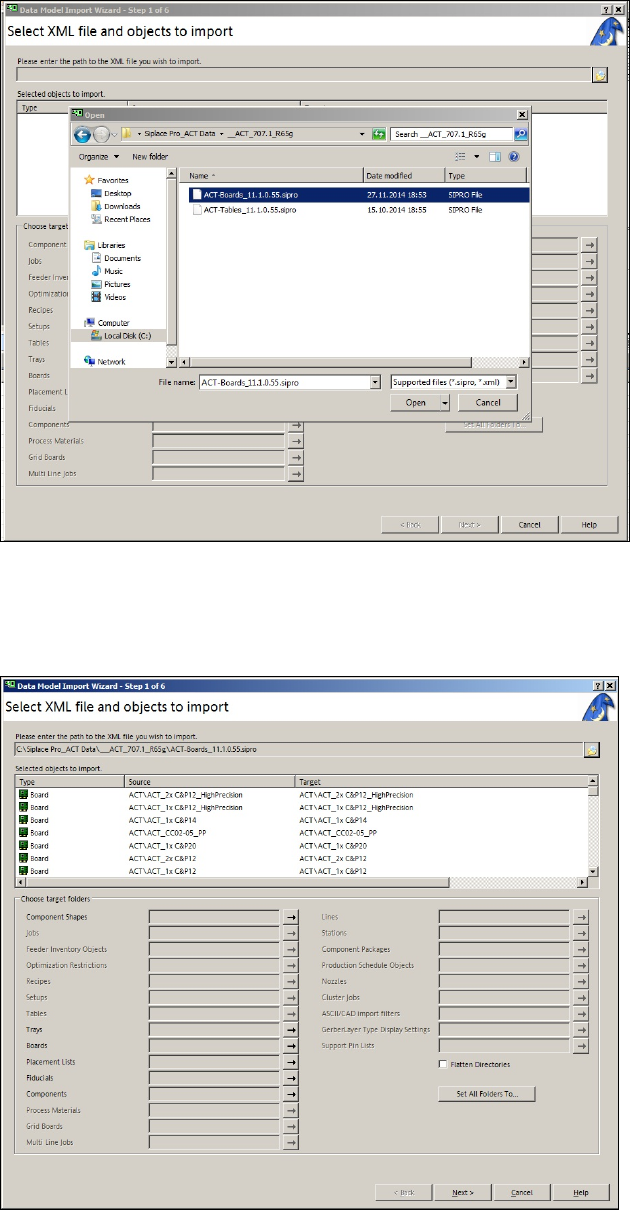
► Select the appropriate folder to your software.
► Click on the file with the board programs on the ACT CD (Figure 3-11).
Figure 3-11: ACT board import screen
► Click Open (Figure 3-11).
► Click Next (Figure 3-12).
Figure 3-12: XML file import screen
ACT - Accuracy Check Tool / User Manual 09/2015 Edition
20
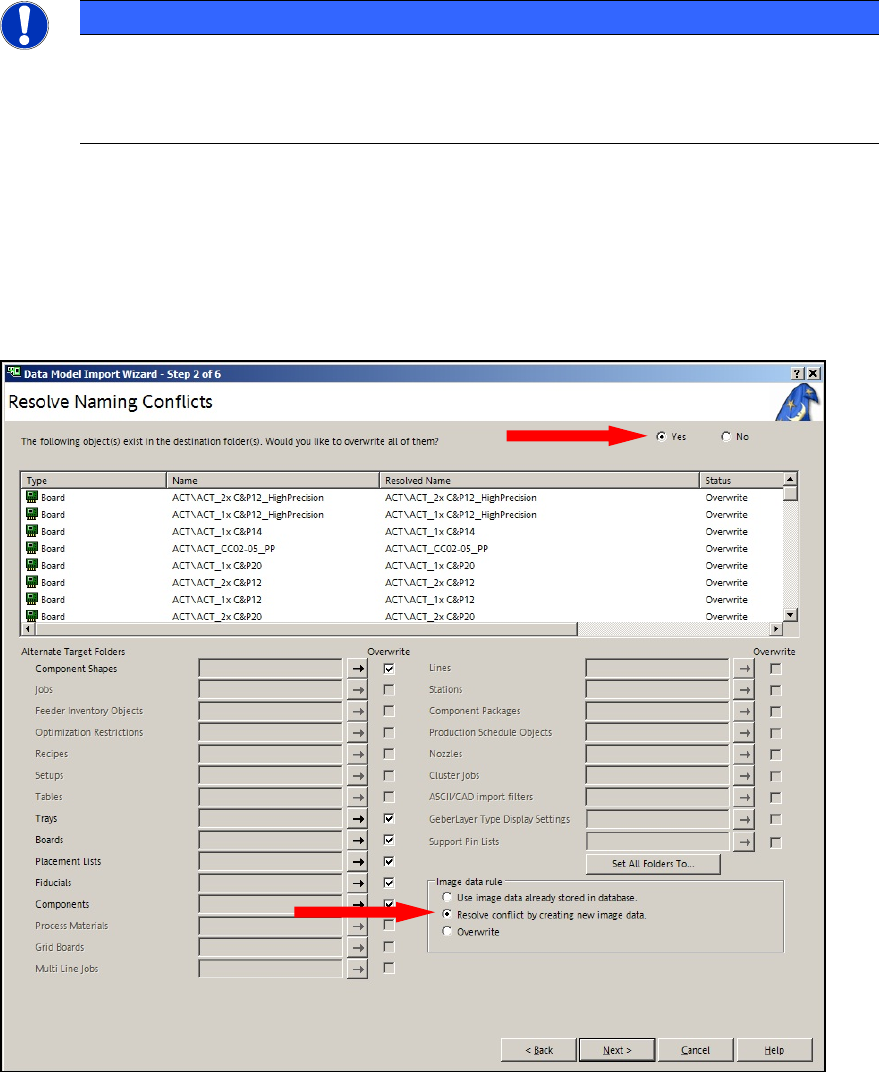
NOTICE
Import of data
► Please do not change the destination folder.
► Do not select the Flatten directories check box.
If ACT data has already been imported, the following screen will be displayed (Figure 3-13).
► To overwrite the objects, set the option The following object(s) exist in the destination
folder(s). Would you like to overwrite them? to Yes.
► Enable the option Resolve conflict by creating new image data.
► Click Weiter (Next).
Figure 3-13: Information screen: Resolve conflict by creating new image data