00196351-06_UM_ACT_DE_EN.pdf - 第173页
ACT - Accurac y Check Tool / User Manual 09/2015 Edition 83 5.3 Restriction s Tray in Conveyor for ACT for X - tabl es only The Tray in Conveyor for ACT option is only po ssible for mac hines with X - tabl es. The option…
ACT - Accuracy Check Tool / User Manual 09/2015 Edition
82
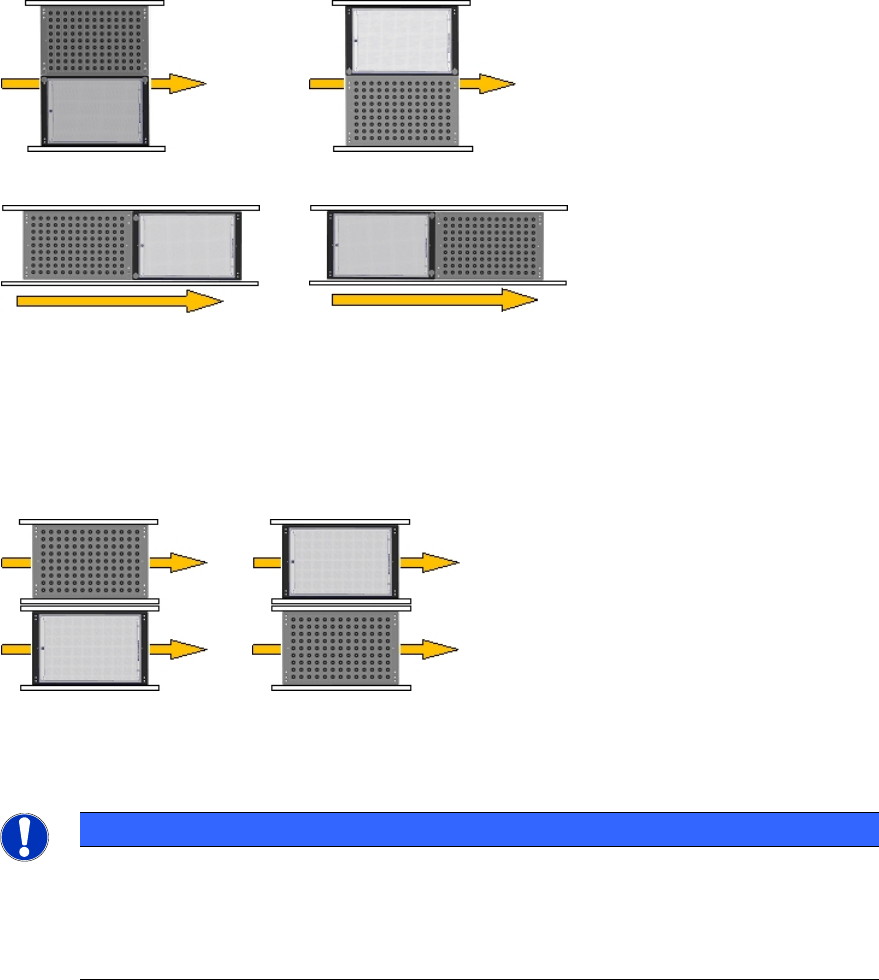
Position on Conveyor
This parameter is required for the single conveyor mode.
To the left of Board To the right of Board
Behind Board In front of Board
Figure 5-11: Position in single conveyor moder
Lane
This parameter is required for the dual conveyor mode.
Left conveyor lane (2) Right conveyor lane (1)
Figure 5-12: Position in dual conveyor mode
NOTICE
Pickup position
You do not have to enter any offset values.
By using the Conveyor Carrier X tray carrier, the pickup position is automatically
specified by the board reference corner in the machine.
ACT - Accuracy Check Tool / User Manual 09/2015 Edition
83
5.3 Restrictions
Tray in Conveyor for ACT for X-tables only
The Tray in Conveyor for ACT option is only possible for machines with X-tables.
The option cannot be set up for S-tables.
Reason:
– Station software 60x is not equipped with the new functions.
– Station software 70x cannot operate S-tables.
Possible: X-series S, SX-series, DX-series, X-series with X-tables.
Not possible: D-series, X-series with S-tables.
Number and position of the components in the tray
Feeding the tray In front of Board or Behind Board (see the Position on Conveyor parameter) is
only possible with SX1/2 and DX1/2 machines.
► Make sure that the components are correctly inserted into the tray.
► Adapt the tray description, because pickup will only be possible from a few rows.
Additionally, a "short adapter" [03055995S01] is required to connect the glass plate with the tray on
the short side.
ACT - Accuracy Check Tool / User Manual 09/2015 Edition
84
6 Installing the ACT on Stations with Station
Software 605.xx
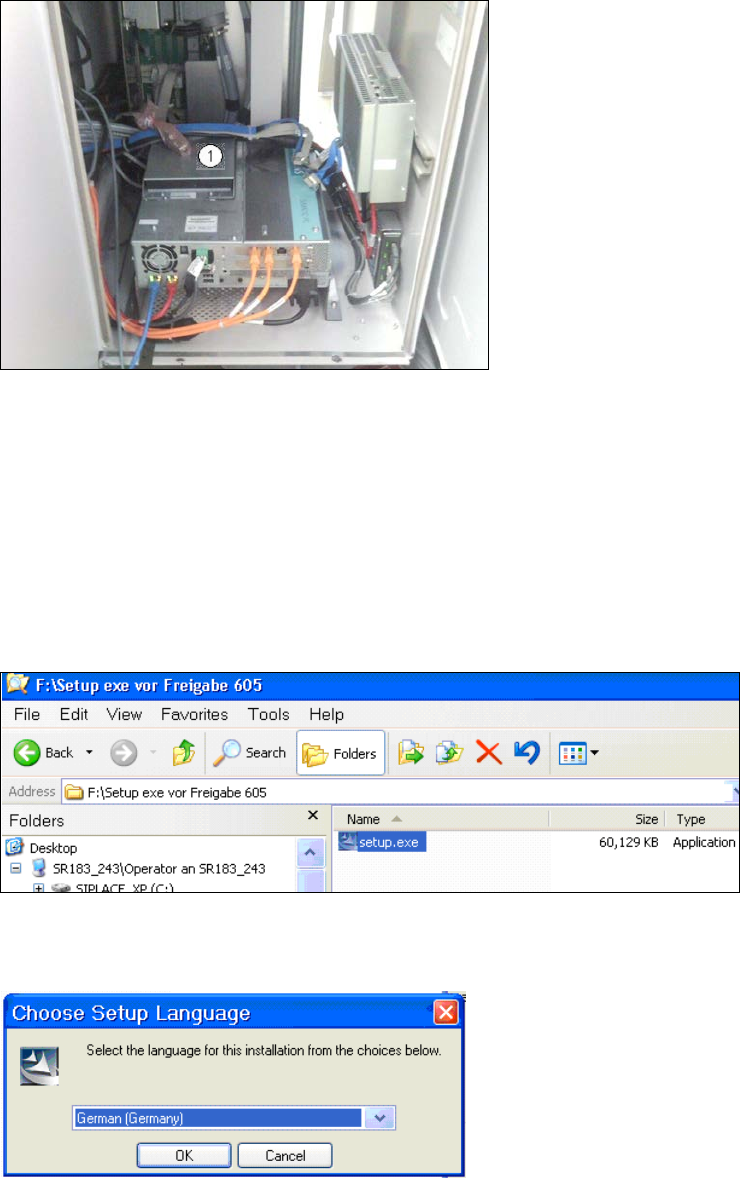
► Place the CD provided with the package in the machine drive.
Figure 6-1: CD drive on the station
Key:
(1) Station CD drive.
► Switch on the SIPLACE placement station.
► Log on to the station computer as administrator.
(Keep the Shift key pressed as soon as the Windows logo is displayed).
► Insert the USB stick into the station computer or insert the CD into the drive.
Figure 6-2: Double-clicking the setup.exe file on the CD
► Double-click on the setup.exe file.
Figure 6-3: Installation program with prompt to enter language