ASM_Guide To Adhesive Dot Dispensing_Stinger_en_0321_online.pdf - 第36页
2 STINGER, A GUIDE TO ADHESIVE DOT DISPENSING 2.3 SOFTWARE INTERFACE 36 GUIDE TO ADHESIVE DOT DISPENSING STINGER 03/2021 mm 5. Assign a Dispense Mode to the site Options are: None, Measure Only, Dispense Only, Measure an…
2 STINGER, A GUIDE TO ADHESIVE DOT DISPENSING
2.3 SOFTWARE INTERFACE
GUIDE TO ADHESIVE DOT DISPENSING STINGER 03/2021 35
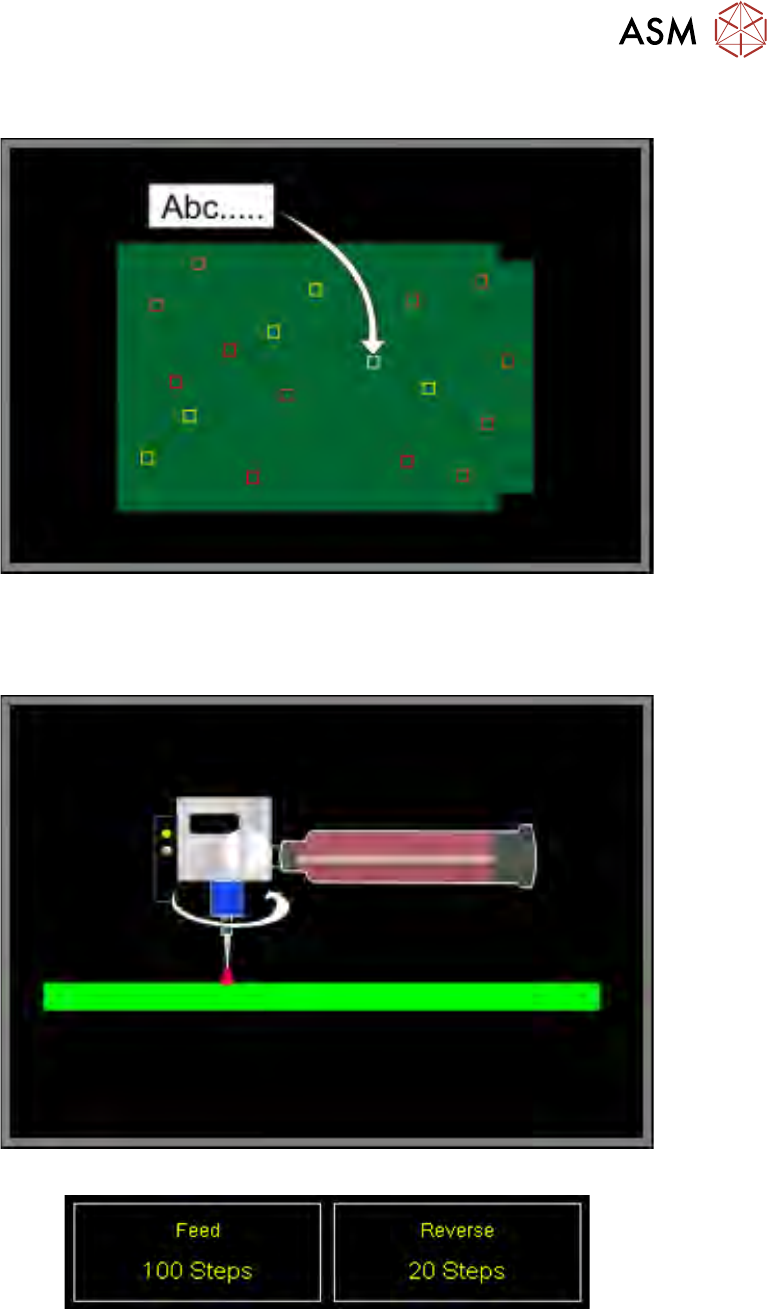
2. Assign a unique Site Name to each site
3. Programme for each site, the number of forward (Feed) and reverse auger feed steps.
When sites are selected, the parameter indicators Feed and Reverse show the number of
programmed steps for the auger movements.
4. Set the Stinger Dispense Gap
The dispense gap is the height between the nozzle tip and the upper surface of the product. It
is the height at which dispensing takes place. This can be any value in the range; 0 to 5mm;
zero is the top of the board. The larger the gap, the higher the adhesive dot dispensed. Typic-
ally the gap is set to between 1.5 and 2 times the nozzle inside diameter. For information on
nozzle inside diameters refer to nozzles in the introduction section of this manual.

2 STINGER, A GUIDE TO ADHESIVE DOT DISPENSING
2.3 SOFTWARE INTERFACE
36 GUIDE TO ADHESIVE DOT DISPENSING STINGER 03/2021
mm
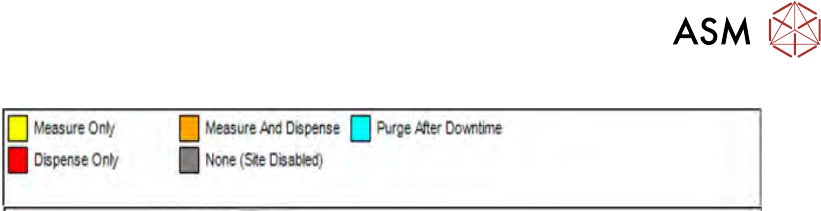
5. Assign a Dispense Mode to the site
Options are: None, Measure Only, Dispense Only, Measure and Dispense, Purge After Down-
time
A key at the bottom of the product image view shows the colour code for dispense, measure and
purge settings.
2 STINGER, A GUIDE TO ADHESIVE DOT DISPENSING
2.3 SOFTWARE INTERFACE
GUIDE TO ADHESIVE DOT DISPENSING STINGER 03/2021 37
The Dispense and Measure options are: None (grey) - site measurement is disabled; Measure
Only (yellow) - the laser measures the site at the given co-ordinates to output height corrections;
Dispense Only (red) - adhesive is dispensed at the programmed dispense gap; and Measure and
Dispense (amber) - the site is measured by laser to give height corrections before dispensing
takes place. There is also an option to place sites where a purge operation can take place. Purge
After Downtime sites are programmed as sacrificial sites, and are used to clear the nozzle of any
adhesive, which may have hardened after a downtime period; the sites are denoted by a blue
rectangle; they are the first sites to be added.
Navigation controls are available on the create site page these include:
●
Zoom In - Control zooms in to selected site one step at a time
●
Zoom Out - Reverses the zoom in levels in single steps
●
Full Zoom Out - Zooms out to top level in a single step
●
Load Image - Loads a Bitmap (.bmp) or extended Gerber Image (.gbx)
●
Hide Image / Show Image - Hiding the image leaves the programmed sites displayed
without the product data image. A useful feature to quickly assess how many sites are set
to: dispense only; measure only; or dispense and measure.
6. Select Accept.
7. When a site has been placed and adjusted select Confirm to save settings and exit the create
sites page. Or, select Cancel
to exit the page without saving.