ASM_Guide To Adhesive Dot Dispensing_Stinger_en_0321_online.pdf - 第55页
2 STINGER, A GUIDE TO ADHESIVE DOT DISPENSING 2.6 BEST WORKING PRACTICES GUIDE TO ADHESIVE DOT DISPENSING STINGER 03/2021 55 Warp occurs in the Y direction due to board clamps pulling the product down over the tooling; f…
2 STINGER, A GUIDE TO ADHESIVE DOT DISPENSING
2.6 BEST WORKING PRACTICES
54 GUIDE TO ADHESIVE DOT DISPENSING STINGER 03/2021
2.6.2 The Adhesive
Many factors have an affect upon the performance of the adhesive and its use in dispensing applic-
ations.
The adhesive is stored in a refrigerator prior to being used. These cooler conditions alter the nor-
mal viscosity of the material and it may need to be brought to ambient temperature, over a period
of time, before use. The exact heat ramp figures vary for different adhesive types; check manufac-
turer’s data sheets for details.
The ambient conditions of the factory may also influence the success or not, of the ability to dis-
pense adhesives. If the humidity is too high, this may introduce moisture absorption which in-turn
degrades adhesion.
Voids can be formed due to water absorption; air entrapment; and solvent loss. Voids not only cre-
ate weak spots they can, if the condition is left long enough, cause the adhesive to dry out.
Each nozzle has a process window; there is a minimum and maximum dot each nozzle size can
create. While it’s possible to dispense more adhesive through the nozzle, this may lead to other
process problems. It is better to dispense several dots next to each other than it is to dispense one
large dot.
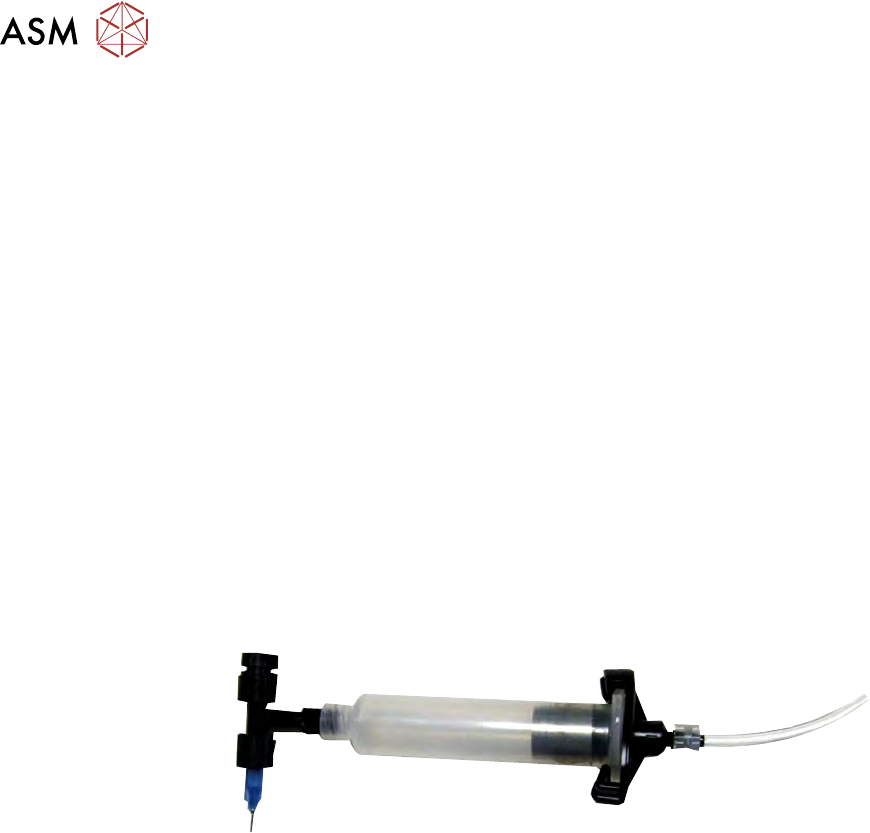
In the system, Stinger utilises a fully enclosed delivery system. Product changeover is a simple pro-
cedure, which in general takes little more than a minute to complete. The assembly is replaced as
a single unit - the nozzle, syringe, auger and feed path. In this way many of the problems associ-
ated with breaking the system apart for cleaning are eliminated.
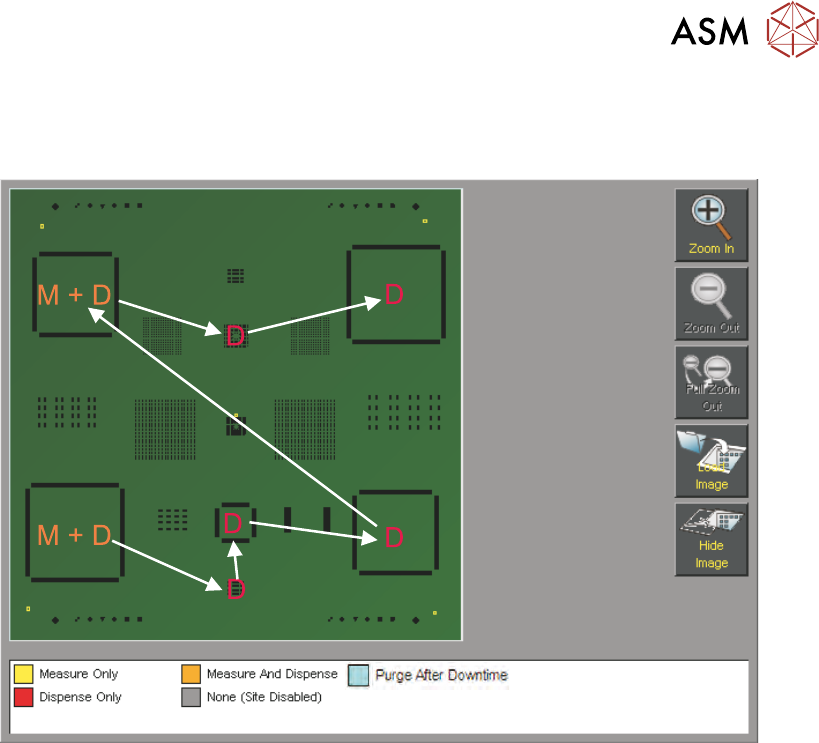
A useful tip is to program sacrificial sites (1 or 2) before the production deposit sites; these sacrifi-
cial sites allow the system to ‘work’ the adhesive, before laying down the crucial production sites -
this gives greater stability at the production sites.
2.6.3 The System
Ensure that all calibrations are carried out and that they are repeated if:
●
The feed path has been changed
●
The nozzle has been changed
●
The current product has significantly different properties to the previous product, i.e. board ri-
gidity, thickness and warp
●
During calibration there is any movement of the product
●
Any of the calibrations have been adjusted
Calibration should be carried out under the same conditions and with the same tooling as that used
for production. The calibration board must be typical for production.
Z-Axis idle position is the height that Stinger moves between dispensing. The height should be set
to ensure the nozzle does not drag adhesive strings during camera axis moves. A higher idle
height ensures paste drag does not occur and promotes ‘snap off’; setting it too high adds a small
amount to the cycle time.
Offset calibration is used to calibrate the difference between the nozzle and the laser; it is a once
only calibration and should not be used to move dispense dot locations.
The laser retains measurement information from the previously measured site. It is recommended
that at least the first site in the process is measured. This ensures that product-to-product vari-
ations are compensated for.
2 STINGER, A GUIDE TO ADHESIVE DOT DISPENSING
2.6 BEST WORKING PRACTICES
GUIDE TO ADHESIVE DOT DISPENSING STINGER 03/2021 55
Warp occurs in the Y direction due to board clamps pulling the product down over the tooling; for
this reason it is recommended that any large changes in Y site coordinates is accompanied by an
initial laser measure.
2 STINGER, A GUIDE TO ADHESIVE DOT DISPENSING
2.7 ERROR RECOVERY
56 GUIDE TO ADHESIVE DOT DISPENSING STINGER 03/2021
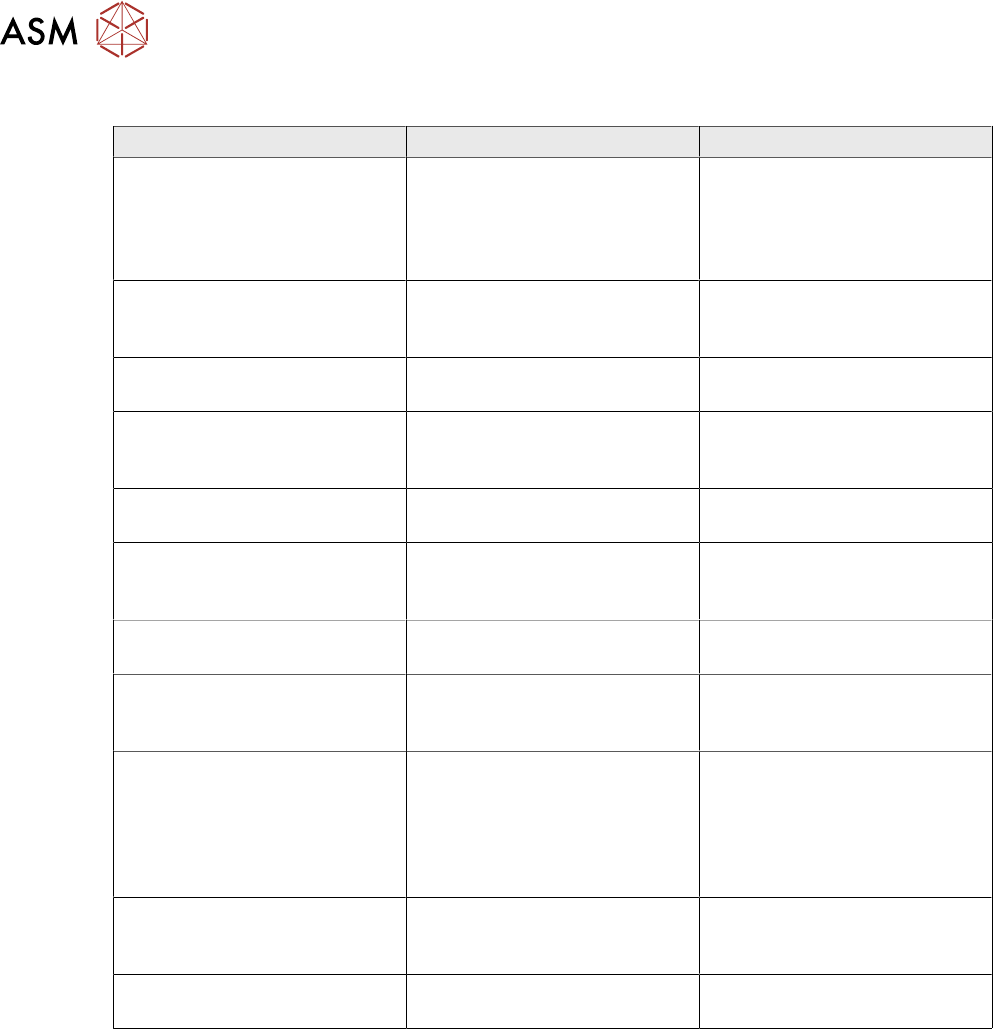
2.7 ERROR RECOVERY
Symptom Possible Cause Solution
Product surface being pushed
down during dispense
Contact height incorrectly calib-
rated
Re-calibrate Contact Height.
Ensure that the product is not
deflected and that the cali-
bration board is representative
of the production boards
Inconsistent deposit Product warpage is present but
laser correction is not being
used
Switch on laser measurement
for deposit sites
Inconsistent deposit Product warpage is greater
than +\- 1mm
Use vacuum tooling or a
product that is within tolerance
Dispense motor is turning, but
no material is being dispensed
System needs purging, pos-
sible drying of adhesive
Purge the system, if the condi-
tion persists change the dis-
pense feed path assembly
Dispense motor not turning Dispense motor belt tension too
tight
Reduce belt tension
Dispense motor timed out Dispense motor stalled due to
adhesive drying out and form-
ing a blockage
Discard and replace the dis-
pense feed path assembly
No feed Adhesive dried in feed path Discard and replace the dis-
pense feed path assembly
Inconsistent delivery, particu-
larly during a purge
No air Ensure that the syringe is being
pressurised (pulsed) during dis-
pense and purge routines
Dispense site outside of board
area error
Site location incorrectly pro-
grammed
Continue, and ignore the warn-
ing. Skip the offending site or
Stop the print run, and re pro-
gramme the site location for the
correct location; or remove the
site altogether
Auto-Calibrate Fails Calibrate X and Y location
incorrectly set
Locate the calibration point so
that neither the laser nor the
nozzle are over board cut-outs
Auto-Calibrate Fails Vision height or other variable
has been changed
Perform a manual calibrate to
reset the laser range