00198521-01_UM_LDU_E_EN.pdf - 第39页
4 Operation 4.2 Handling User Manual SIPLACE Linear Dipping Unit E 12/2018 39 4.2 Handling Always carry the LDUE with both hands holding it as upright and horizontal as possible. ► Take the handle (1) of the LDU E with…
4 Operation
4.1 Settings in the line software
38 User Manual SIPLACE Linear Dipping Unit E 12/2018
4.1.9 Setting the cicatrization time of the flux
If longer standstill (inactive) times during the production run can be expected, you should set the ci-
catrization time of the flux used. The LDU will then perform an application run after this period has
expired.
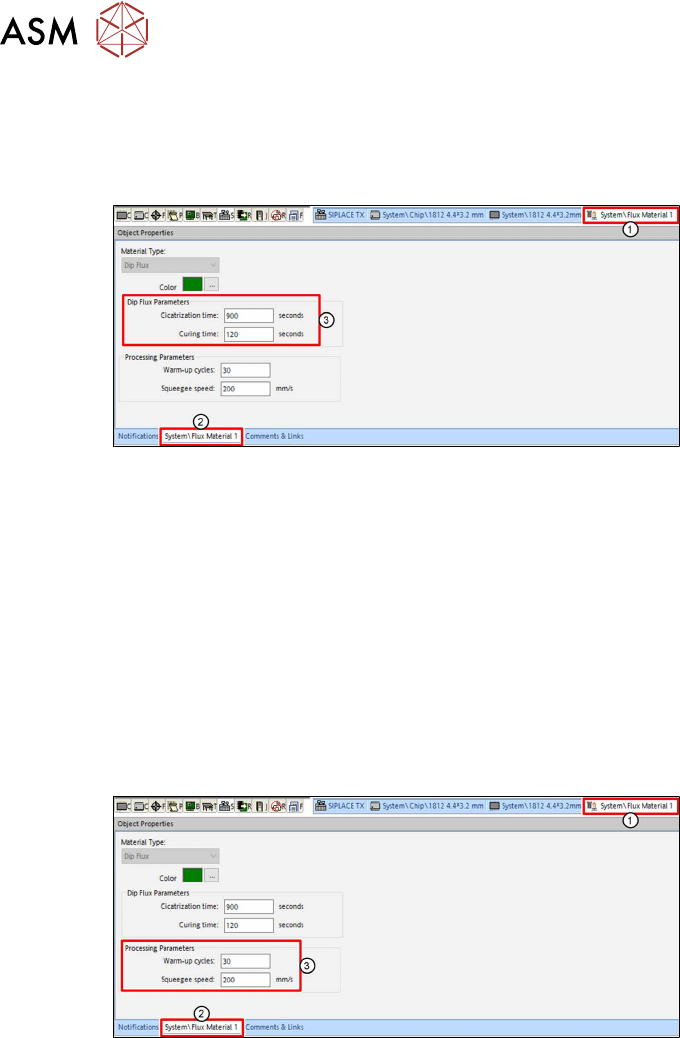
► In the line software, click on the tab of the relevant flux(1).
► Click on the tab of the flux(2) in the Object Properties view.
► Enter the cicatrization time of the flux used in seconds [s] in the Cicatrization time entry field
in the Dip Flux Parameters area(3).
► Enter the curing time of the flux used in seconds[s] in the Curing time entry field in the Dip
Flux Parameters area(3).
For more information on the cicatrization time of fluxes, see chapter 3.3.3 "Cicatrization time" [}30].
4.1.10 Setting the warm-up cycle and the squeegee speed
During the warm-up cycle, the LDU performs a set number of squeegee processes to prepare the
flux.
The squeegee speed is the speed with which the squeegee axis applies the flux in the cavity.
► In the line software, click on the tab of the relevant flux(1).
► Click on the tab of the flux(2) in the Object Properties view.
► Enter the number of squeegee processes which are to be performed during the warm-up
cycle in the Warm-up cycles entry field in the Processing Parameters area (3).
► Enter the squeegee speed in millimeter per second [mm/s] in the Squeegee speed entry field
in the Processing Parameters area (3).
4 Operation
4.2 Handling
User Manual SIPLACE Linear Dipping Unit E 12/2018 39
4.2 Handling
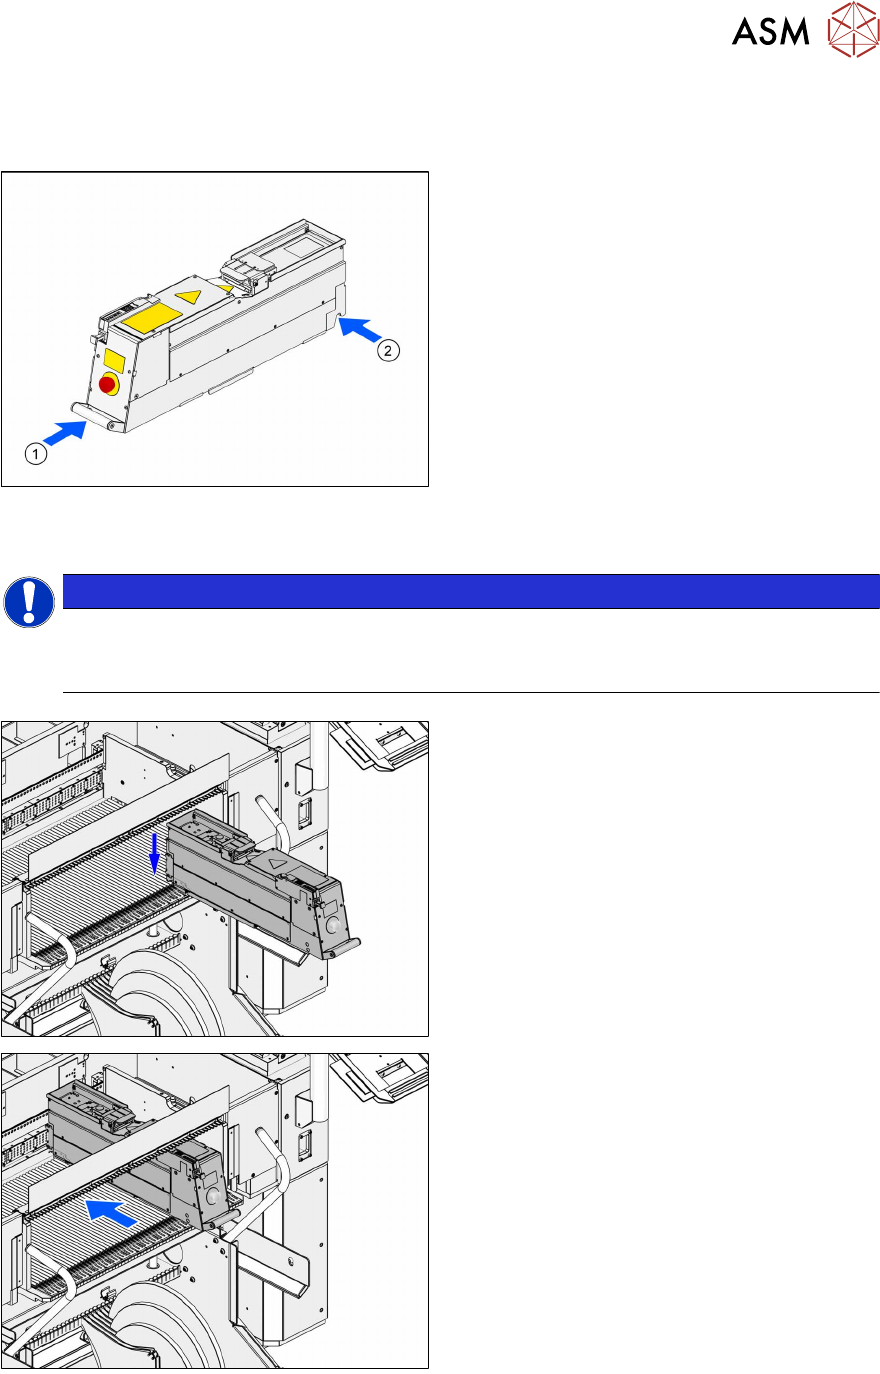
Always carry the LDUE with both hands holding it as upright and horizontal as possible.
► Take the handle(1) of the LDU E with one
hand and support the housing with the
other hand(2).
4.3 Positioning the LDU and logging on
NOTICE
Positioning the LDU on the correct track
► Position the LDU on the track of the changeover table which you defined during setup
(see chapter 4.1.1 "Setting up the LDU" [}33]).
► Place the LDU E horizontally in the track of
the changeover table.
.
► Push the LDU E forward against the fixed
stop of the track.
The LDU E will be automatically locked,
switched on and logged on at the machine.
4 Operation
4.4 Starting a reference run
40 User Manual SIPLACE Linear Dipping Unit E 12/2018
4.4 Starting a reference run
After logging on, it is mandatory to perform a reference run so that the LDU can be set up and
used. During the reference run the axes are initialized. In the process, the end positions of the axes
are determined and moved to a defined position.
Requirements:
●
The squeegee must be positioned over the park plate at the rear fixed stop.
► If required, push the squeegee manually over the park plate to the rear fixed stop.
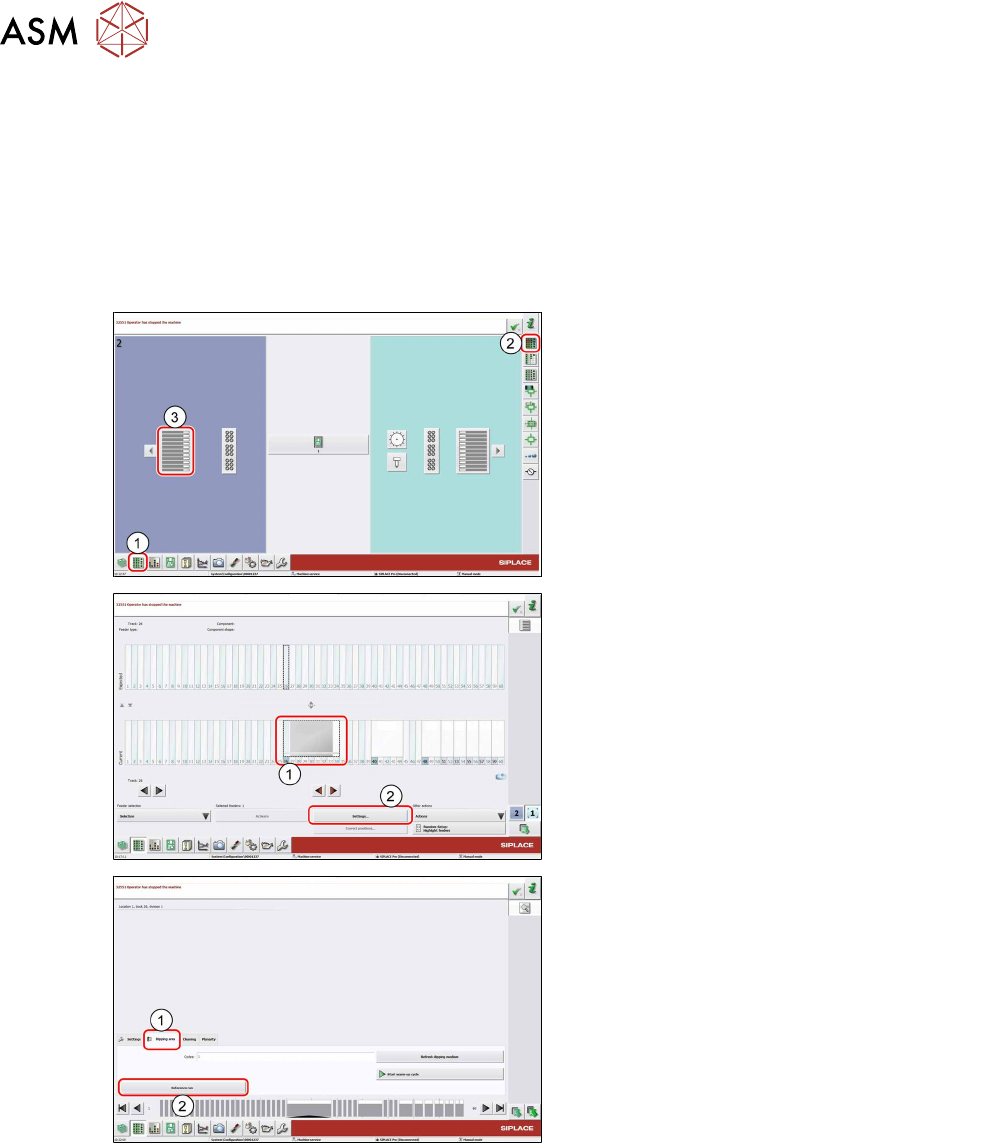
► In the station software, select the Setup
view(1) and then the Locations area (2).
► Select the Table (3) on which the LDU is
set up.
► Select the icon of the LDU(1).
► Click on the Settings... button (2).
► Select the Dipping area tab (1).
► Click on the Reference run button (2).
The LDU performs a reference run.