00198521-01_UM_LDU_E_EN.pdf - 第63页
5 Cleaning 5.3 Cleaning the dip components User Manual SIPLACE Linear Dipping Unit E 12/2018 63 5.3 Cleaning the dip components CAUTION Scratching of parts The parts to be cleaned are sensitive and scratch easily. ► Do n…
5 Cleaning
5.2 Removing the parts to be cleaned
62 User Manual SIPLACE Linear Dipping Unit E 12/2018
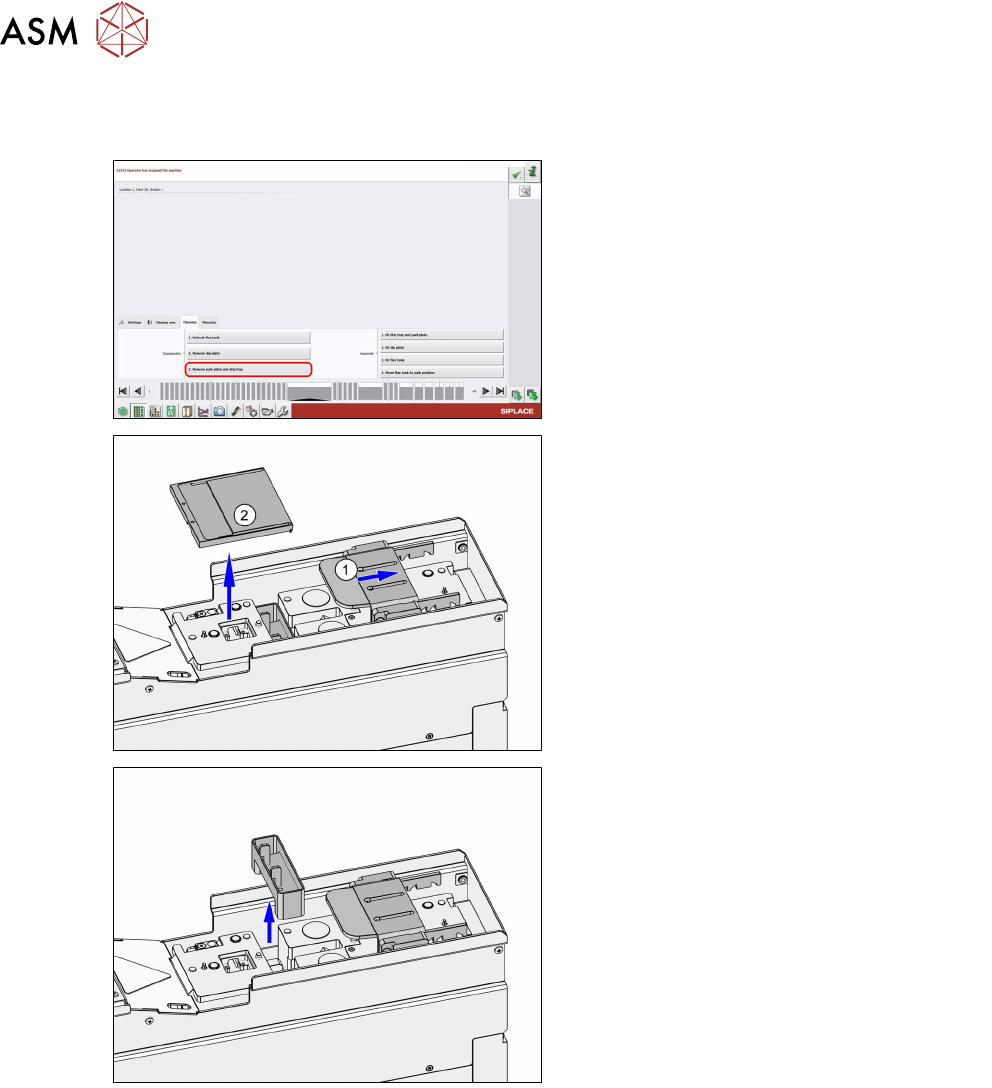
Removing the park plate and the drip tray
Prerequisites: The park plate and drip tray are fitted. The dip plate is removed.
► Click on the Remove drip tray and park
plate button.
(1) The LDU moves the lift axis backwards and
the squeegee to the front.
(2) Remove the park plate.
► Remove the drip tray.
5 Cleaning
5.3 Cleaning the dip components
User Manual SIPLACE Linear Dipping Unit E 12/2018 63
5.3 Cleaning the dip components
CAUTION
Scratching of parts
The parts to be cleaned are sensitive and scratch easily.
► Do not use any spatulas or scrapers made of metal.
► Do not use sharp-edged tools.
Rough cleaning
► Remove any excess flux. Use a wooden or plastic spatula or scraper and cleansing tissues.
Fine cleaning
► Place the parts in a tub.
► Clean the parts thoroughly with a brush and cleaning agent.
► Take the parts out of the tub.
► Dry the parts with lint-free cleansing tissues.
5.4 Refitting the cleaned parts
NOTICE
Observe the exact order
It is important to perform the steps for fitting the parts in the order described here.
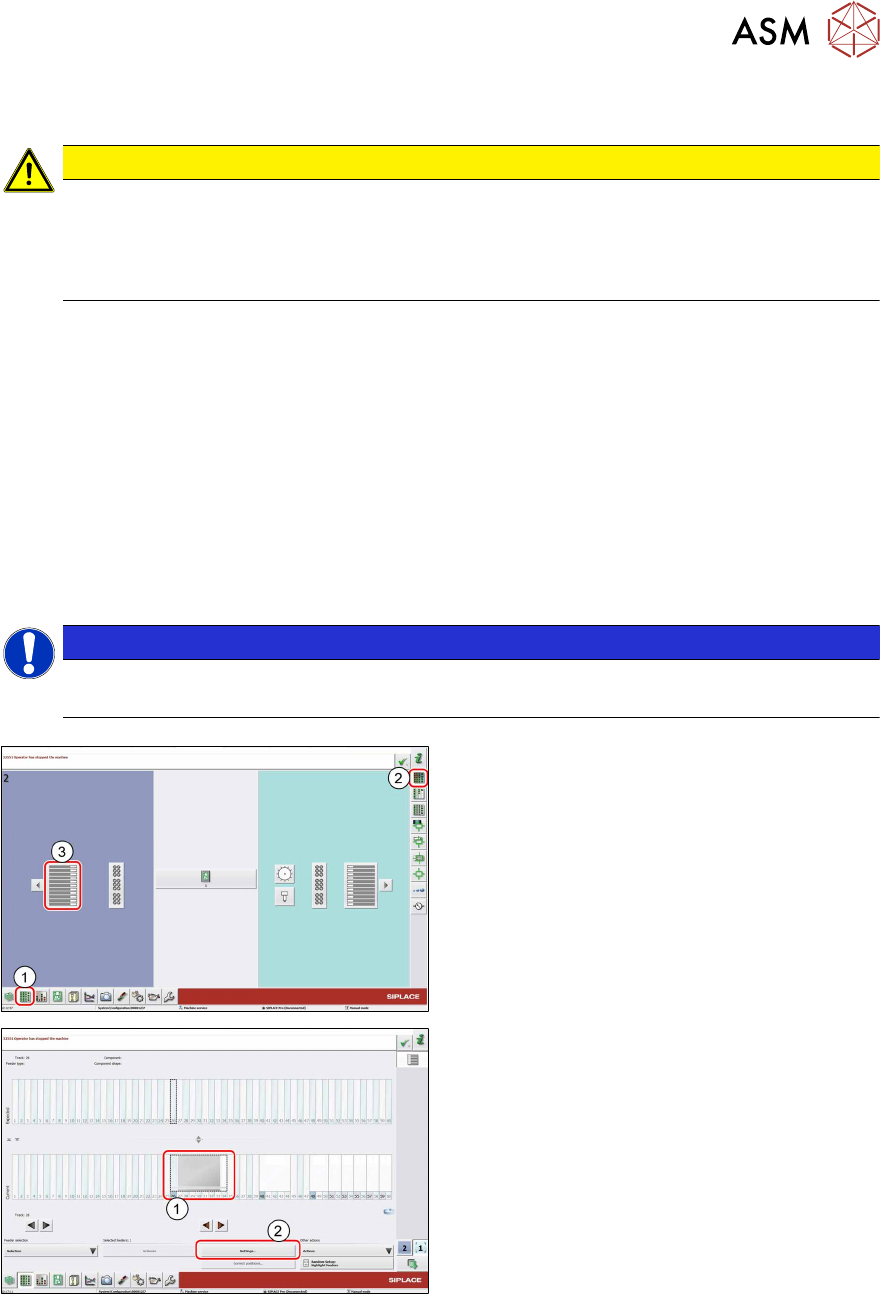
► In the station software, select the Setup
view(1) and then the Locations area (2).
► Select the Table (3) on which the LDU is
set up.
► Select the icon of the LDU(1).
► Click on the Settings... button (2).
5 Cleaning
5.4 Refitting the cleaned parts
64 User Manual SIPLACE Linear Dipping Unit E 12/2018
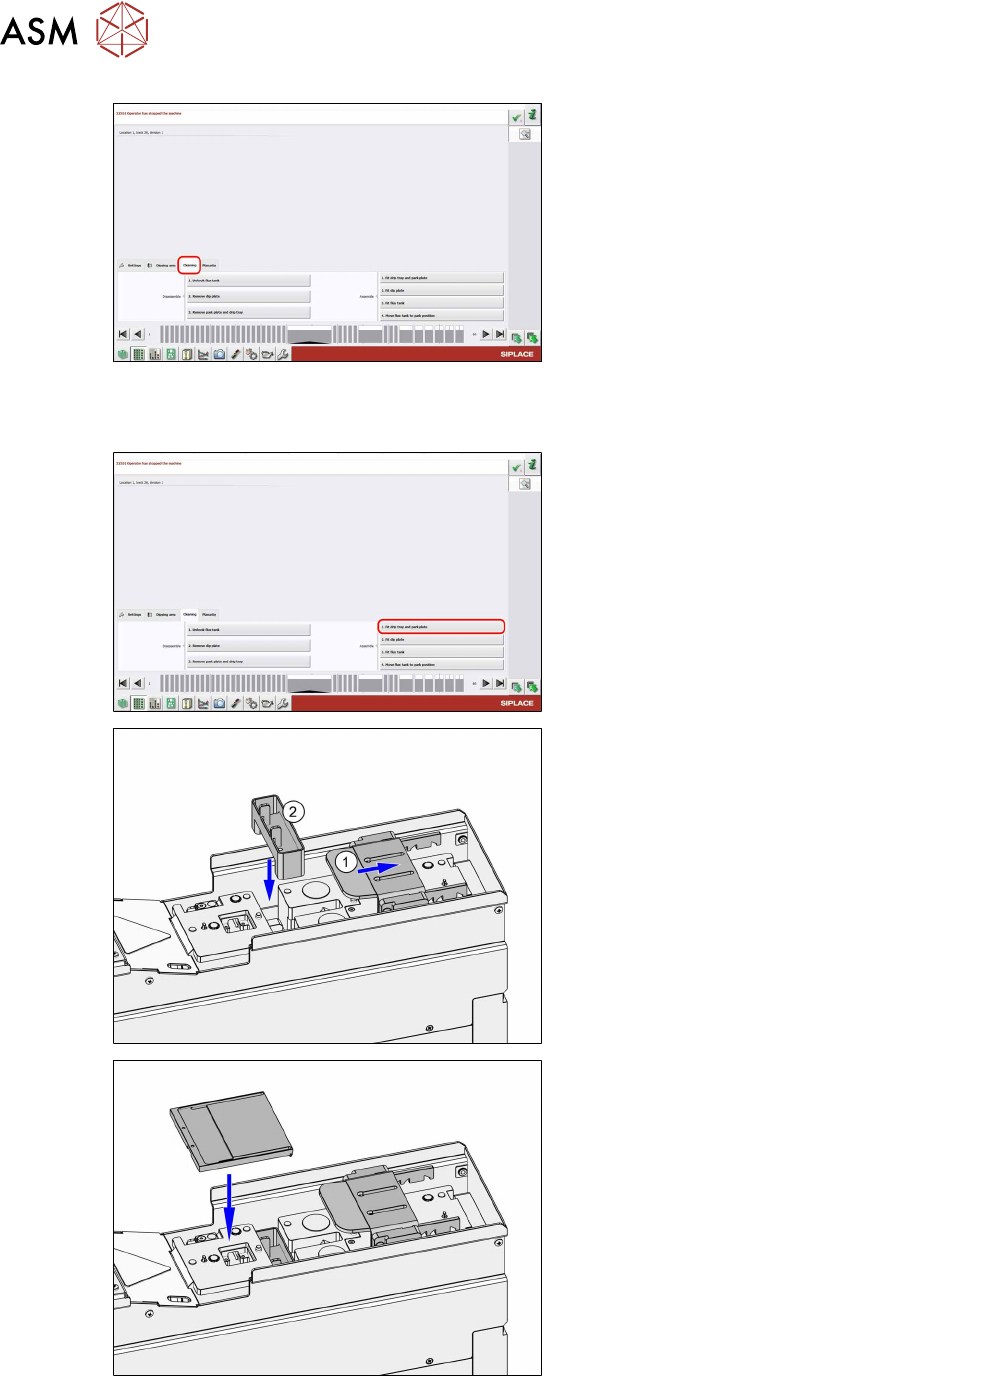
► Select the Cleaning tab.
Fitting the drip tray and the park plate
Prerequisites: The park plate and the drip tray are not yet fitted.
► Click on the Fit drip tray and park plate
button.
(1) The LDU moves the squeegee axis to the
front over the lift axis.
► (2) Fit the drip tray.
► Fit the park plate.