Nordson_EFD_P-Jet_SolderPlus_Operating_Manual.pdf - 第16页
Liquidyn P-Jet SolderPlus Jet Valve 16 www.nordsonefd.com info@nordsonefd.com +1-401-431-7000 Sales and service of Nordson EFD dispensing systems are available worldwide. Change the Fluid Body or T appet (Optional) Follo…
Liquidyn P-Jet SolderPlus Jet Valve
15www.nordsonefd.com info@nordsonefd.com +1-401-431-7000 Sales and service of Nordson EFD dispensing systems are available worldwide.
Assemble the Valve (Initial Assembly)
Follow this procedure to assemble the valve before mounting it. You will need the following items:
• Hex wrench, size 10
• Hex wrench, size 2.5
• Nozzle
• Nozzle retaining nut
• Optional: Heater key (if installing a nozzle heater)
Refer to “Replacement Parts” on page36 for component part numbers.
NOTE: The steps provided in this manual are based on a valve with a syringe barrel.
1. • Remove the protective covers.
• Optional: To use a different fluid body and / or tappet,
go to “Change the Fluid Body or Tappet (Optional)” on
page16. Return here to continue.
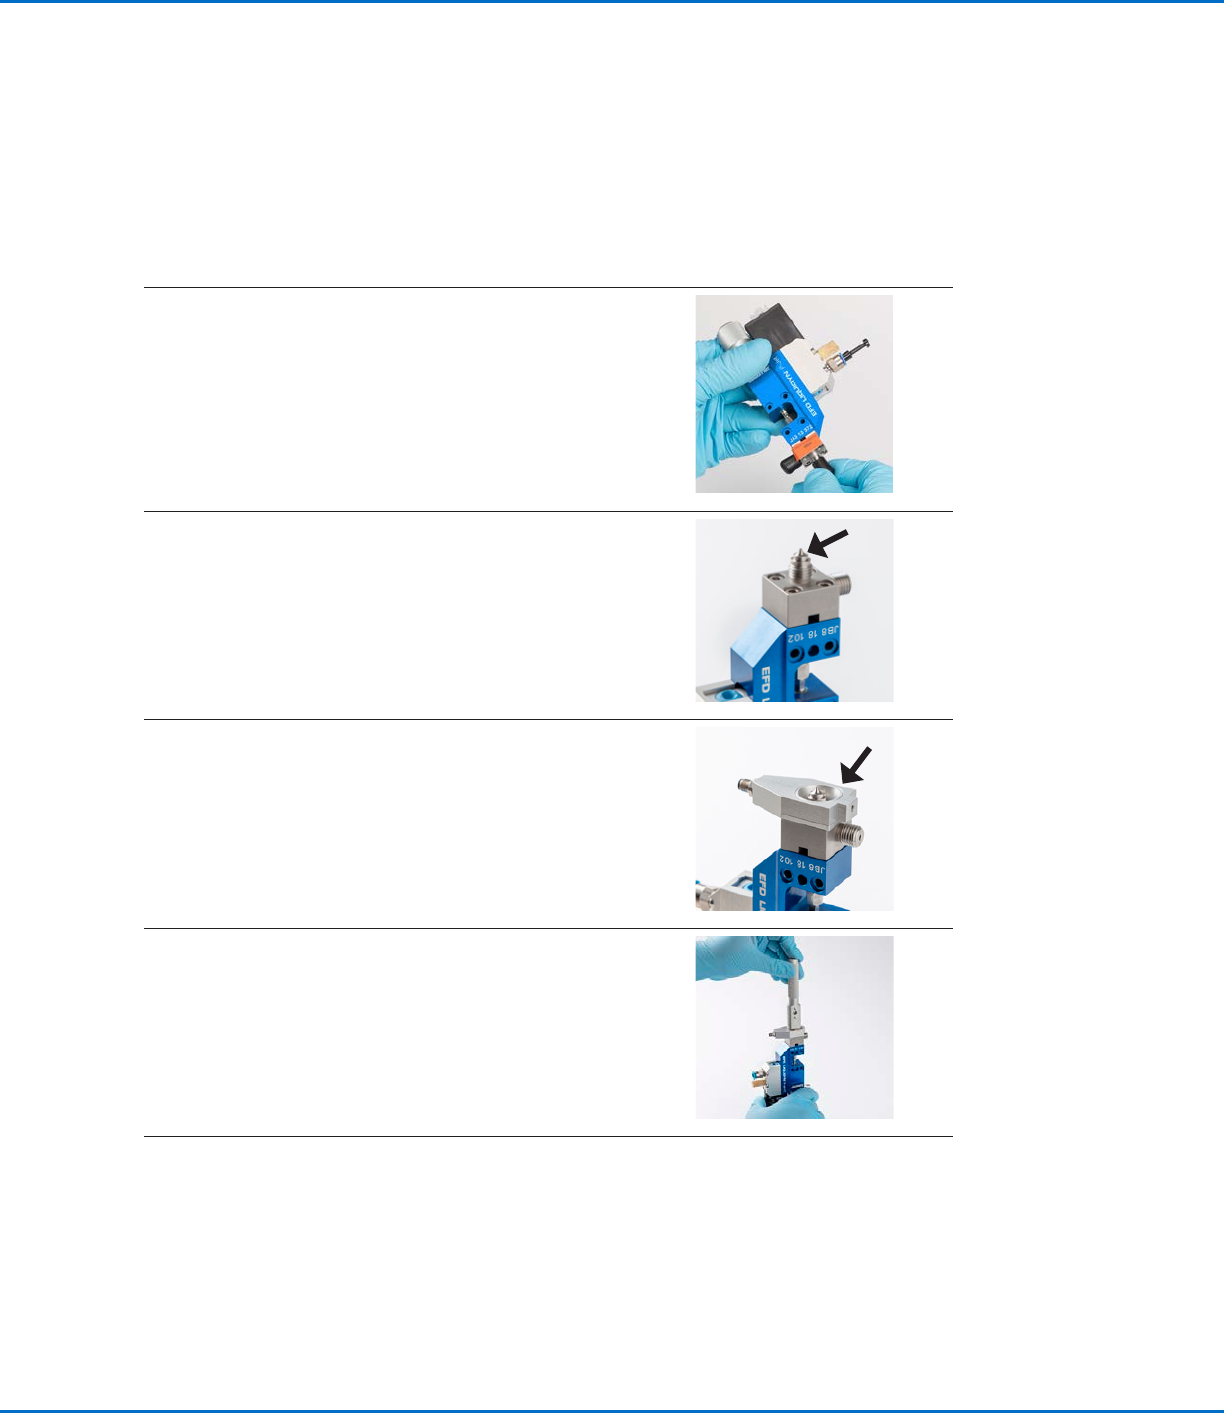
2. • Install the nozzle.
3. • Recommended: Install a nozzle heater.
NOTE: The nozzle heater is an optional component;
however, it is included as a step in this manual because
most solder applications require a nozzle heater.
NOTE: The nozzle is only minimally secured by a nozzle
heater. The nozzle is fully secured by the retaining nut.
4. • Position the nozzle retaining nut in the nozzle heater and
then use the heater key to tighten the nozzle retaining nut.
Continued on next page
Liquidyn P-Jet SolderPlus Jet Valve
16 www.nordsonefd.com info@nordsonefd.com +1-401-431-7000 Sales and service of Nordson EFD dispensing systems are available worldwide.
Change the Fluid Body or Tappet (Optional)
Follow this procedure to use an optional fluid body or tappet. You will need the following items:
• Replacement fluid body
• Replacement tappet
• Tappet alignment tool
• Barrier grease
• Wooden pick
1. • Unscrew and remove the four screws that secure the fluid
body.
• Carefully remove the fluid body without damaging the
tappet.
Continued on next page
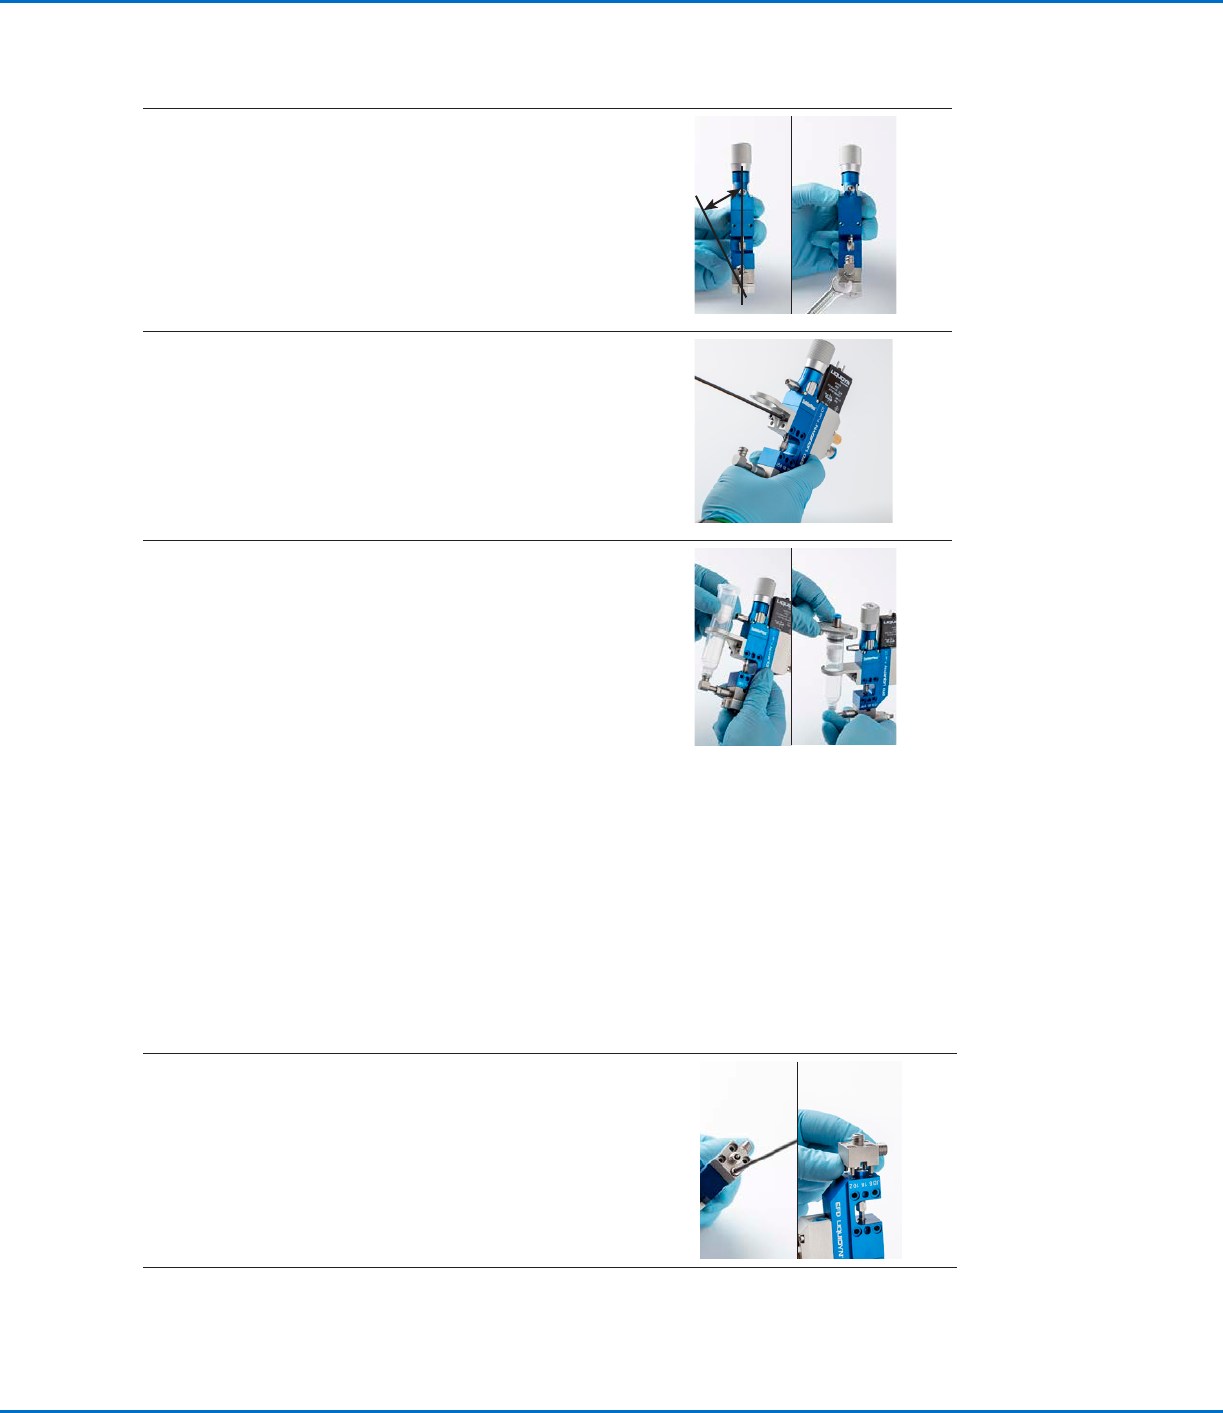
5. • By hand, thread the luer lock adapter loosely onto the
fluid body, positioning it at a 15° angle from its end
position.
• Tighten the nut with a wrench so that the adapter is
parallel to the straight axis of the valve.
Torque: 5 N•m (3.7 ft-lb) maximum
~15°
6. • Mount the syringe barrel holder.
7. • Install the syringe barrel and syringe barrel adapter.
Assemble the Valve (Initial Assembly) (continued)
Liquidyn P-Jet SolderPlus Jet Valve
17www.nordsonefd.com info@nordsonefd.com +1-401-431-7000 Sales and service of Nordson EFD dispensing systems are available worldwide.
Change the Fluid Body or Tappet (Optional) (continued)
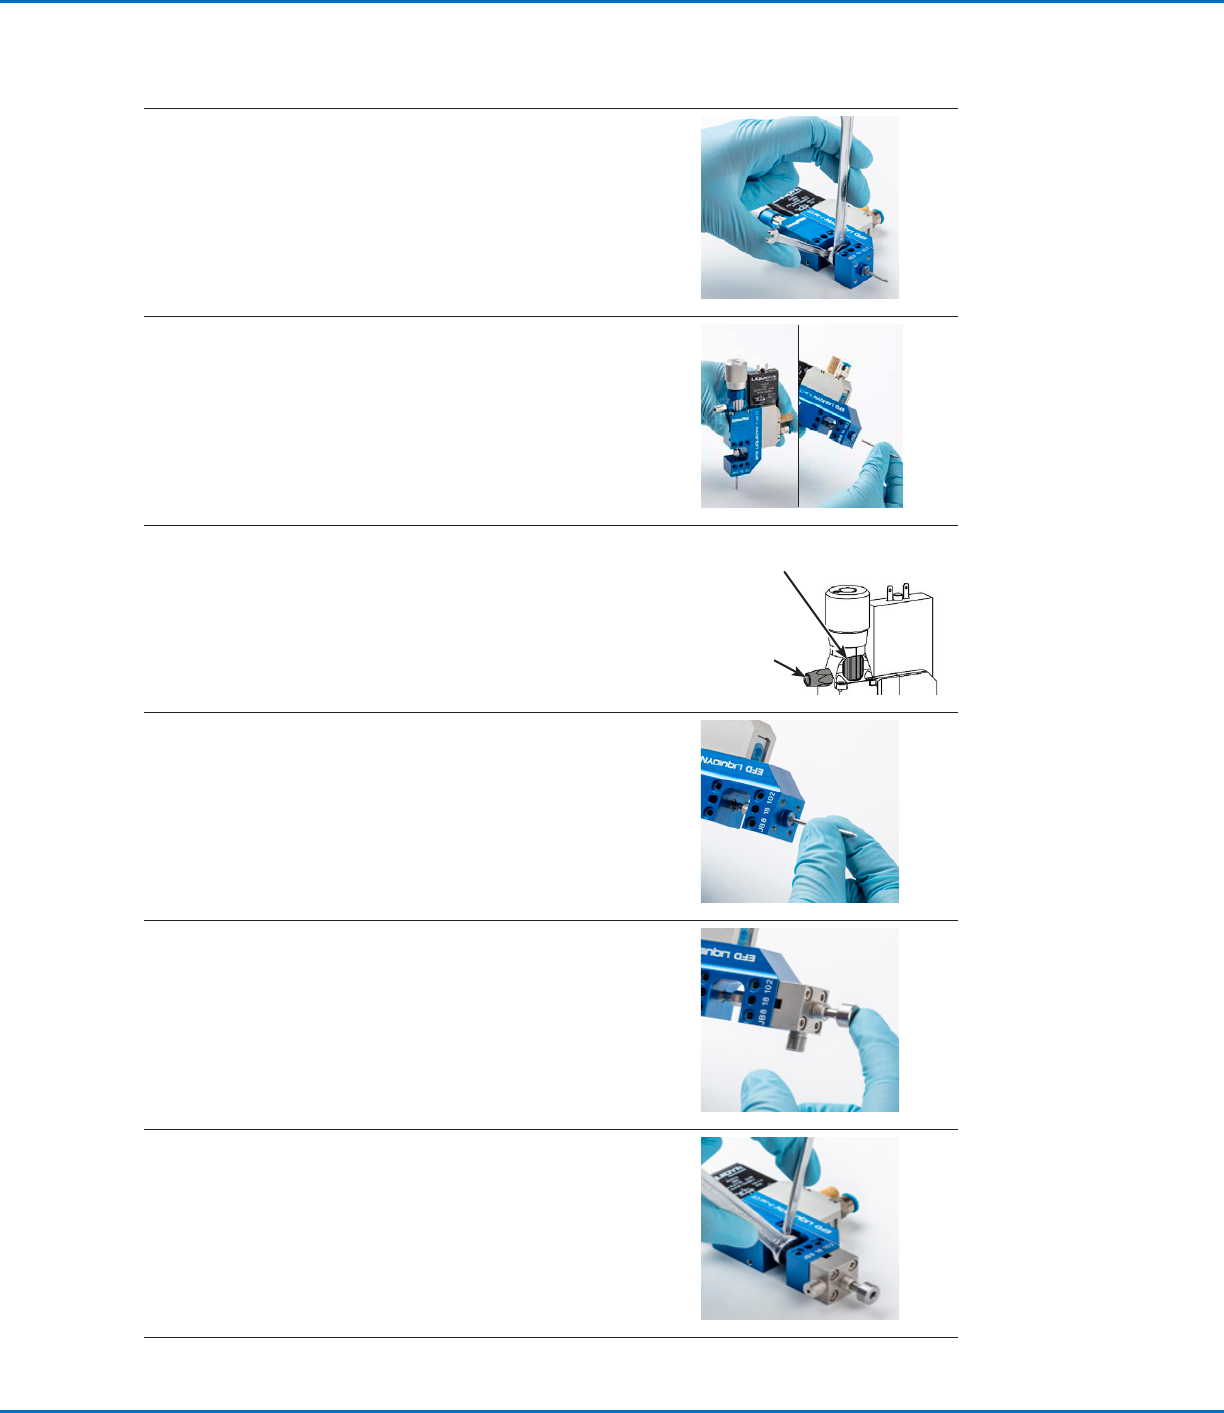
2. • Loosen the tappet nut with a wrench (6 mm to loosen the
tappet nut; 3.5 mm to hold the tappet rod steady).
3. • Press in the tappet with controlled pressure until the
clamping sleeve between the tappet and nut loosens. A
piece of wood or hard rubber is suitable to press against.
• Remove the tappet.
4. Turn the force screw fully counterclockwise as follows (to
eliminate any spring force on the tappet):
• Completely loosen the raster element.
• Turn the force screw counterclockwise until it stops.
• Completely tighten the raster element to secure the force
screw.
Force
screw
Raster
element
5. • Insert the replacement tappet until the tappet stops.
6. • Insert the tappet alignment tool into the fluid body and
around the tappet; push the tool in until it is firmly held in
place by its tapered sides.
7. • Using the same technique described in step 2, tighten
the tappet nut (while the tappet alignment tool is still
installed).
Torque: 0.1 N•m (0.7 ft-lb) maximum
• Remove the tappet alignment tool from the fluid body.
Continued on next page