Nordson_EFD_P-Jet_SolderPlus_Operating_Manual.pdf - 第31页
Liquidyn P-Jet SolderPlus Jet Valve 31 www.nordsonefd.com info@nordsonefd.com +1-401-431-7000 Sales and service of Nordson EFD dispensing systems are available worldwide. Disassemble the V alve CAUTION Do not open the co…
Liquidyn P-Jet SolderPlus Jet Valve
30 www.nordsonefd.com info@nordsonefd.com +1-401-431-7000 Sales and service of Nordson EFD dispensing systems are available worldwide.
Service
Regularly perform maintenance on your micro-dispensing valve. Regular maintenance will save you cost-intensive
repairs and is a requirement for long valve lifespan. Nordson EFD valves are designed to be maintained easily. All
the material-carrying parts can be removed, cleaned, and maintained by the customer.
NOTE: Customers should service only the material-carrying components. For any service not related to the material-
carrying components, contact your Nordson EFD support representative.
Recommended Maintenance Schedule
Cleaning and maintenance intervals vary based your operating conditions (dispensing frequency, frequency of use,
dispensing material, etc.). The following table provides recommendations only.
Variable Perform Weekly Valve Cleaning
Perform Daily Valve Cleaning (or at the end
of the pot life)
Dispensing frequency Less than 20Hz Greater than 20Hz
Dispensing material
• Oil
• Grease
• UV glue
• Dispersions
• Reactive adhesives
• Epoxies
NOTE: The sealing effectiveness of the tappet O-rings can be compromised if the replacement intervals are too long
(causing worn or damaged O-rings). Worn or damaged O-rings can cause dispensing material to enter the drive
system, thus compromising valve operation.
Valve Cleaning
You will need the following items:
• Protective clothing
• Hex wrench, size 10
• Hex wrench, size 2
• Toothpick
• Cleaning material
• Container
• Compressed air
• Lint-free cloth
• Optional: Ultrasonic bath
• Optional: Microscope
WARNING
• Before any component change or service activity, relieve air pressure from the fluid reservoirs and switch off
heater control (if applicable).
• Disconnect the system from the power supply before beginning work on electrical or electronic system
components or opening the switchgear cabinet.
• Disconnect the mains power plug to isolate the system from the power supply. Check for safe isolation from the
power supply using suitable measuring instruments. Only perform maintenance work on a system that is safely
isolated from the power supply.
• Wear appropriate personal protective equipment, including, but not limited to, gloves, safety goggles, and
breathing protection.
• Switch off the compressed air supply before disconnecting the system from the pneumatic connections.
• Read and understand the SDS for the dispensing material and the risk of the associated health hazards so that
suitable safety measures can be taken for the correct handling of the dispensing material.
Liquidyn P-Jet SolderPlus Jet Valve
31www.nordsonefd.com info@nordsonefd.com +1-401-431-7000 Sales and service of Nordson EFD dispensing systems are available worldwide.
Disassemble the Valve
CAUTION
Do not open the color-sealed screws. Unauthorized modifications and the breaking of the sealed screws void the
warranty and guarantee.
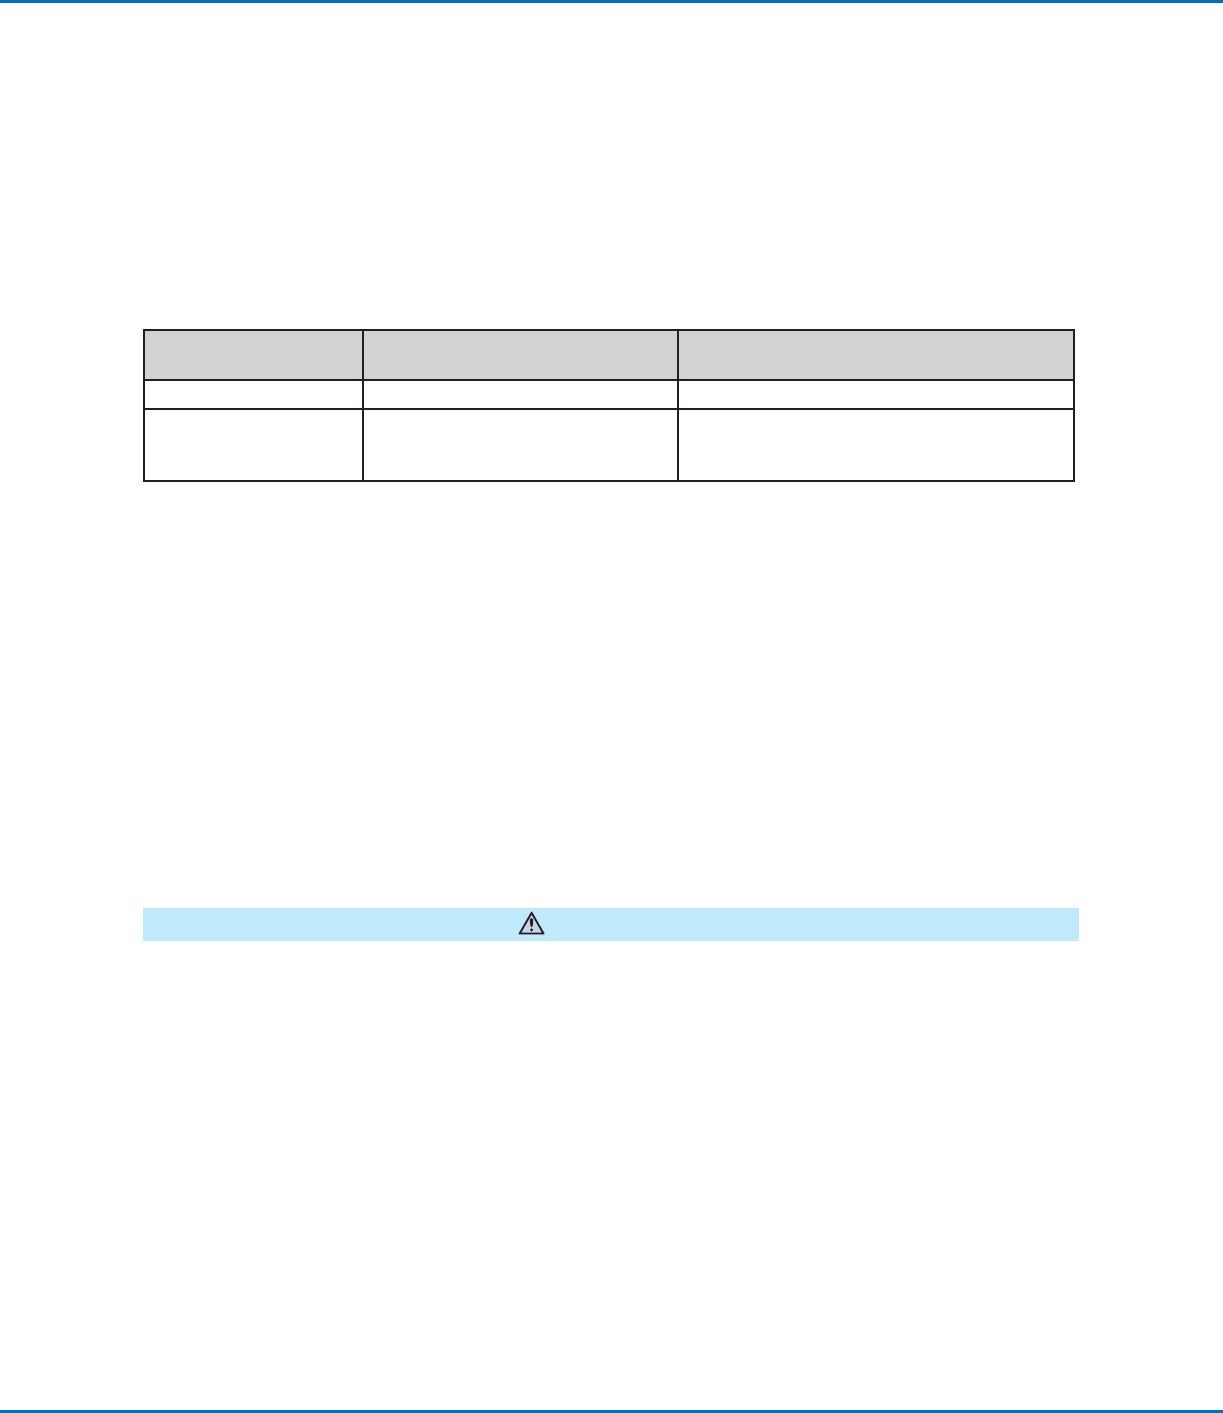
1. • Remove the syringe barrel and mounting bracket from
the valve.
2. • Disconnect the luer lock adapter from the fluid body.
3. • Use the heater key to remove the nozzle retaining nut.
Continued on next page
Service (continued)
Shut Down the System
1. Shut off the air supply.
2. Switch off the power of every control unit, then switch off power to the valve.
3. Disconnect all tubing and cables.
4. Disconnect the material supply.
5. Continue with the procedures in this section to disassemble and clean the valve.
Liquidyn P-Jet SolderPlus Jet Valve
32 www.nordsonefd.com info@nordsonefd.com +1-401-431-7000 Sales and service of Nordson EFD dispensing systems are available worldwide.
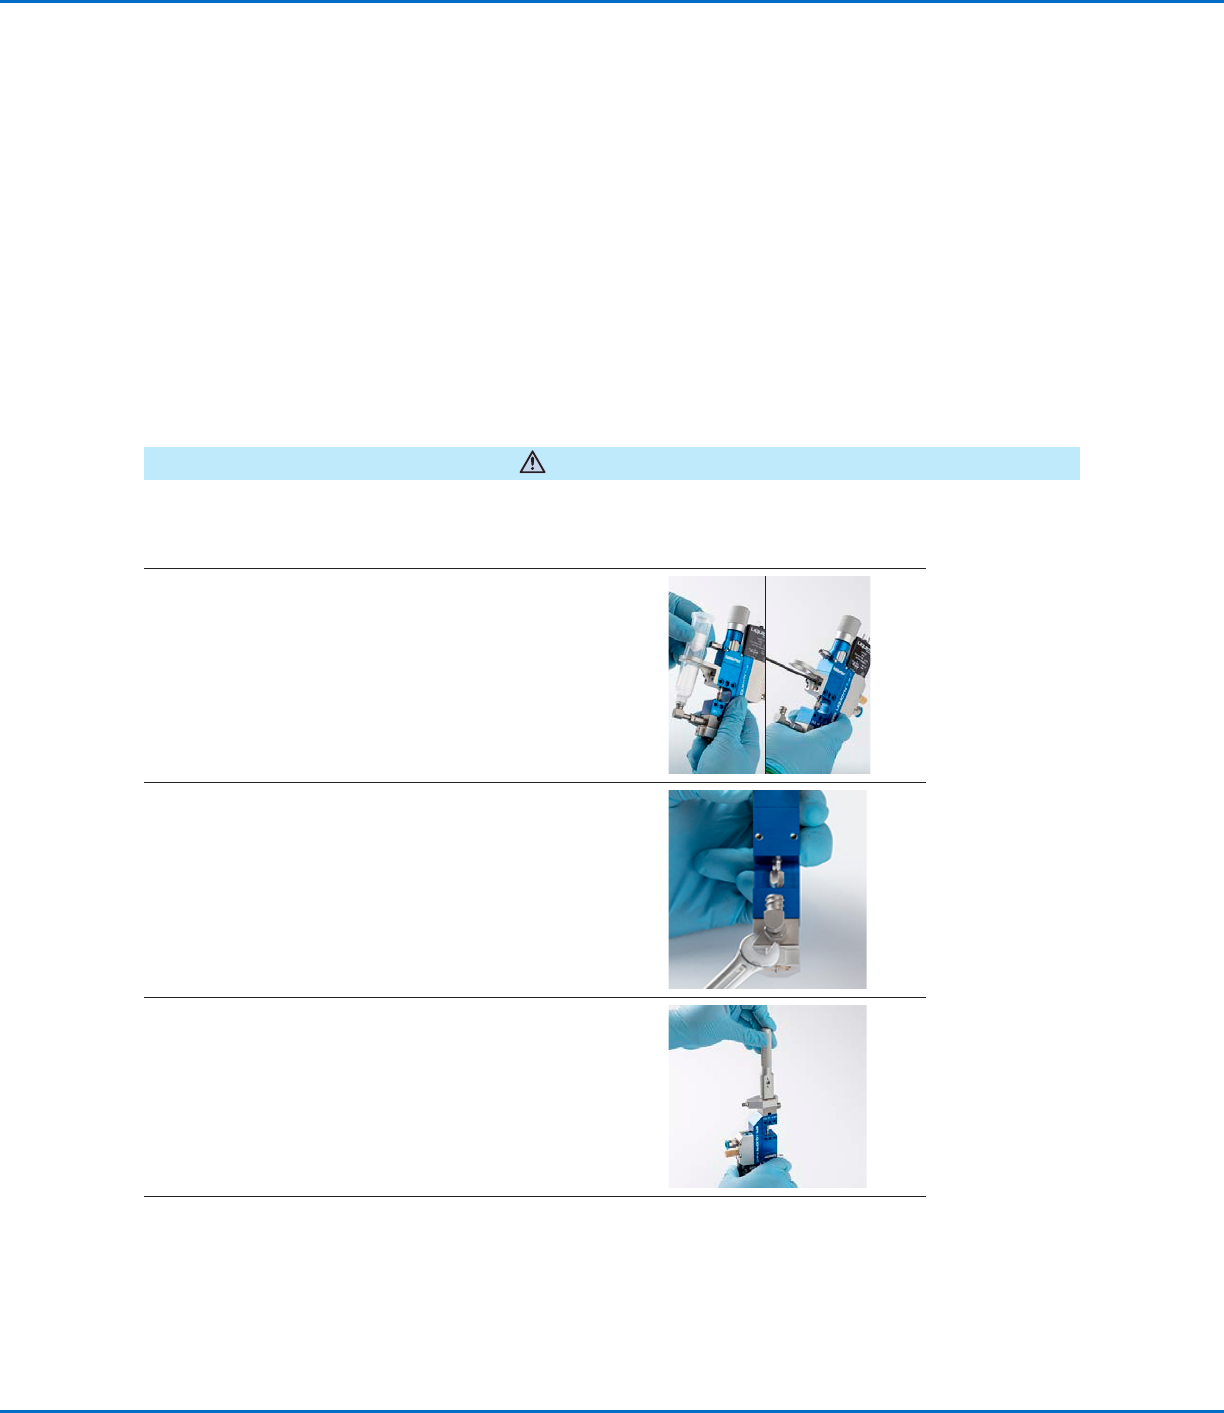
4. • Remove the nozzle from the fluid body.
5. • Unscrew and remove the four screws that secure the
fluid body.
• Carefully remove the fluid body without damaging the
tappet.
6. • Use a toothpick to remove the O-ring from the fluid
body.
7. • Remove the second O-ring from the tappet.
• Clean the tappet and annulus with lint-free paper.
Service (continued)
Disassemble the Valve (continued)
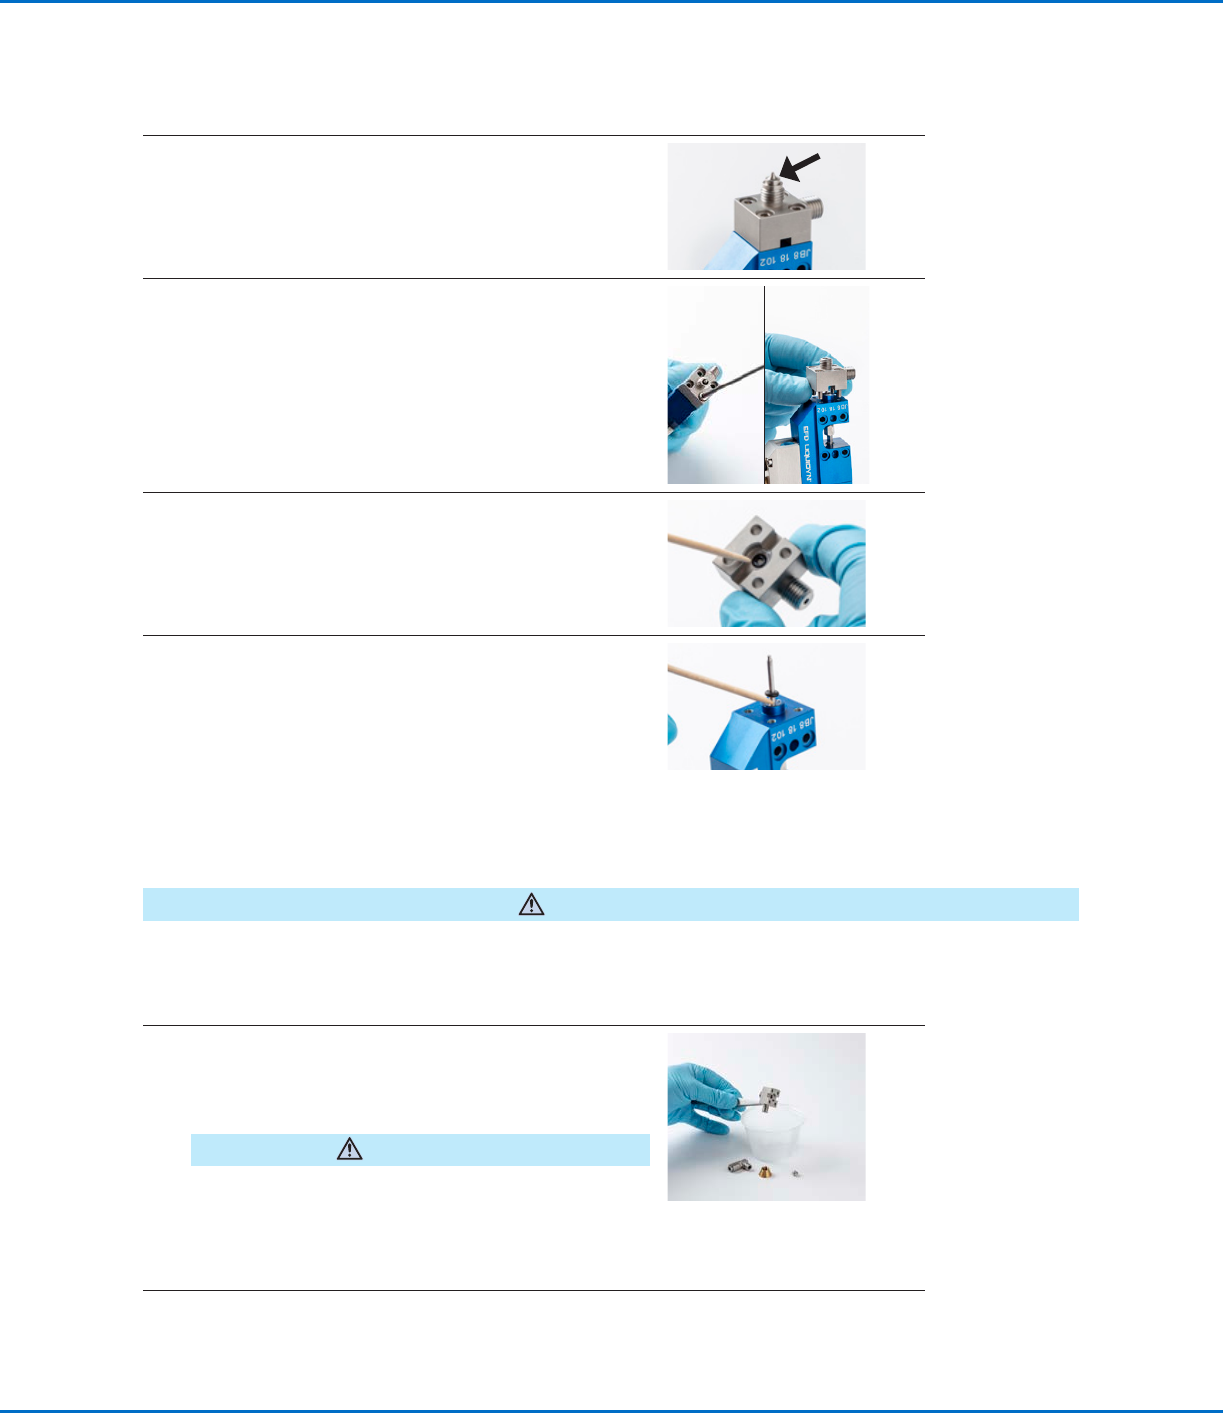
Clean the Valve Components
CAUTION
Never use solvents or cleaning agents that contain halogenated hydrocarbons (such as trichloroethane, methyl
chloride, or dichloromethane). Halogenated hydrocarbons can dissociate, causing an explosion upon contact with
aluminum and galvanized surfaces. Before using a solvent or cleaning agent, check its ingredients.
1. • Submerge all the components in a container filled with
cleaning fluid.
• After 3–5 minutes, remove the components from the
container and clean them with a lint-free cloth.
CAUTION
Do not damage the holes on the sealing faces of the
material carrying components.
• Optional: Use an ultrasonic bath to clean the
components.
Continued on next page