Nordson_EFD_P-Jet_SolderPlus_Operating_Manual.pdf - 第29页
Liquidyn P-Jet SolderPlus Jet Valve 29 www.nordsonefd.com info@nordsonefd.com +1-401-431-7000 Sales and service of Nordson EFD dispensing systems are available worldwide. Adjusting the Stroke CAUTION When dispensing sold…
Liquidyn P-Jet SolderPlus Jet Valve
28 www.nordsonefd.com info@nordsonefd.com +1-401-431-7000 Sales and service of Nordson EFD dispensing systems are available worldwide.
Tappet Adjustment
The valve is equipped with two mechanisms for tappet
adjustment:
• Force screw (non-slip knurled screw) — sets the dynamic
of the tappet movement.
• Stroke adjustment knob (fine diamond knurl screw) —
sets the tappet stroke.
The factory settings for both mechanisms are appropriate for
most applications. However, depending on the dispensing
task and on the material, each can be adjusted to fine-tune the
dispensing result.
CAUTION
When dispensing solder paste, do not adjust the tappet of a wetted and closed valve. Doing so can grind material
into the nozzle, causing nozzle clogging and other related problems. Refer to “Appendix C, Special Instructions for
Solder Paste Dispensing” on page47 for steps that apply only to solder paste dispensing.
Adjusting the Force Screw
Adjust the raster element (see NOTE below) and then turn the force screw clockwise (as seen from an aerial view)
to change the dynamic of the tappet movement. In most cases, simultaneously increasing the operating pressure is
helpful.
NOTE: Use the spring-loaded raster element as follows:
• Completely loosen the element to turn the force
screw.
• Half-tighten the element to hear a clicking sound
when you turn the force screw.
• Completely tighten the element to secure the force
screw.
To return the force screw to the factory setting:
1. Completely loosen the raster element.
2. Turn the force screw counterclockwise until it stops.
3. Turn the force screw clockwise for 25 clicks (15 clicks = one full turn).
4. Completely tighten the raster element to secure the force screw.
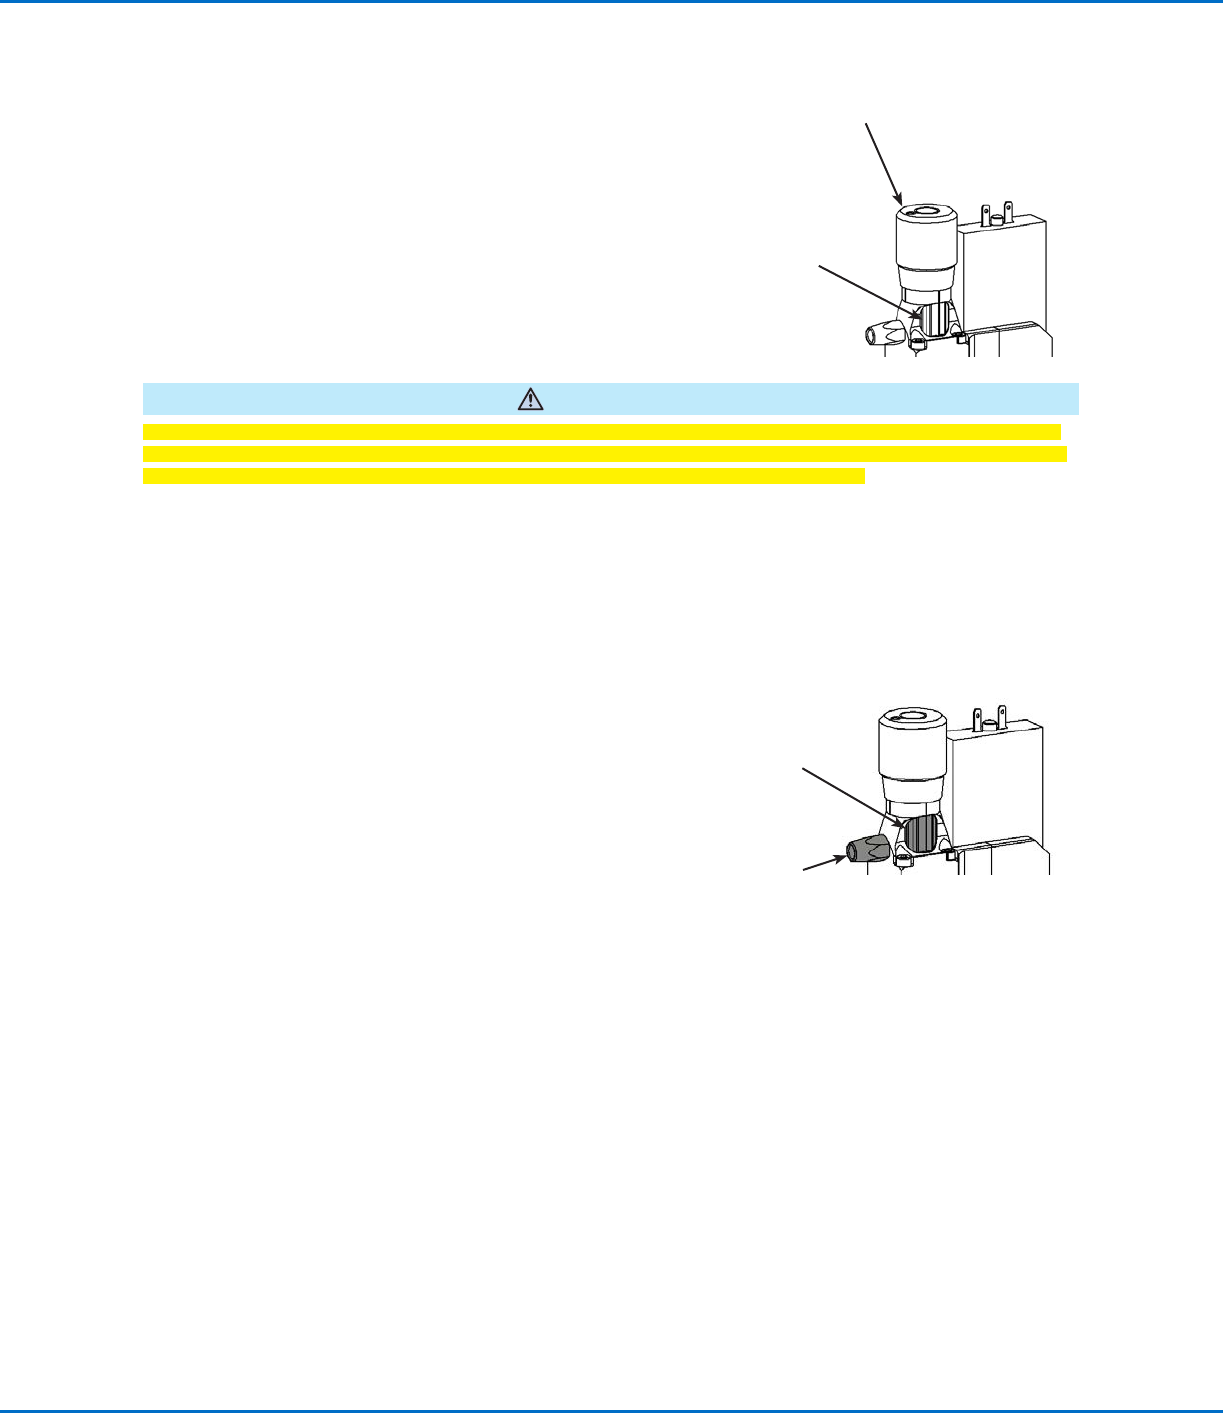
Stroke adjustment
knob
Force screw
Force screw
Spring-loaded
raster element
Liquidyn P-Jet SolderPlus Jet Valve
29www.nordsonefd.com info@nordsonefd.com +1-401-431-7000 Sales and service of Nordson EFD dispensing systems are available worldwide.
Adjusting the Stroke
CAUTION
When dispensing solder paste, do not adjust the tappet of a wetted and closed valve. Doing so can grind material
into the nozzle, causing nozzle clogging and other related problems. Refer to “Appendix C, Special Instructions for
Solder Paste Dispensing” on page47 for steps that apply only to solder paste dispensing.
CAUTION
Do not keep turning the stroke adjustment knob after you feel the torque elevate. Doing so can damage the valve.
1. Use a hex wrench to loosen the locking set screw.
2. Turn the stroke adjustment knob clockwise (as seen from an aerial view) to reduce the stroke.
3. Tighten the locking set screw to secure the knob.
Torque: 0.3 N•m (2.7 in.-lb) maximum
NOTE: For very fine adjustment of the tappet stroke, loosen the
locking screw 2 turns, turn the stroke adjustment knob + 90° / - 90°
from its factory position, and observe the deposit cut-off or shape.
When the desired dispensing result is achieved, tighten the locking
screw. Note that in this situation the maintenance intervals described
under “Service” on page30 will need to be adapted depending on
the dispensed material and on the stroke.
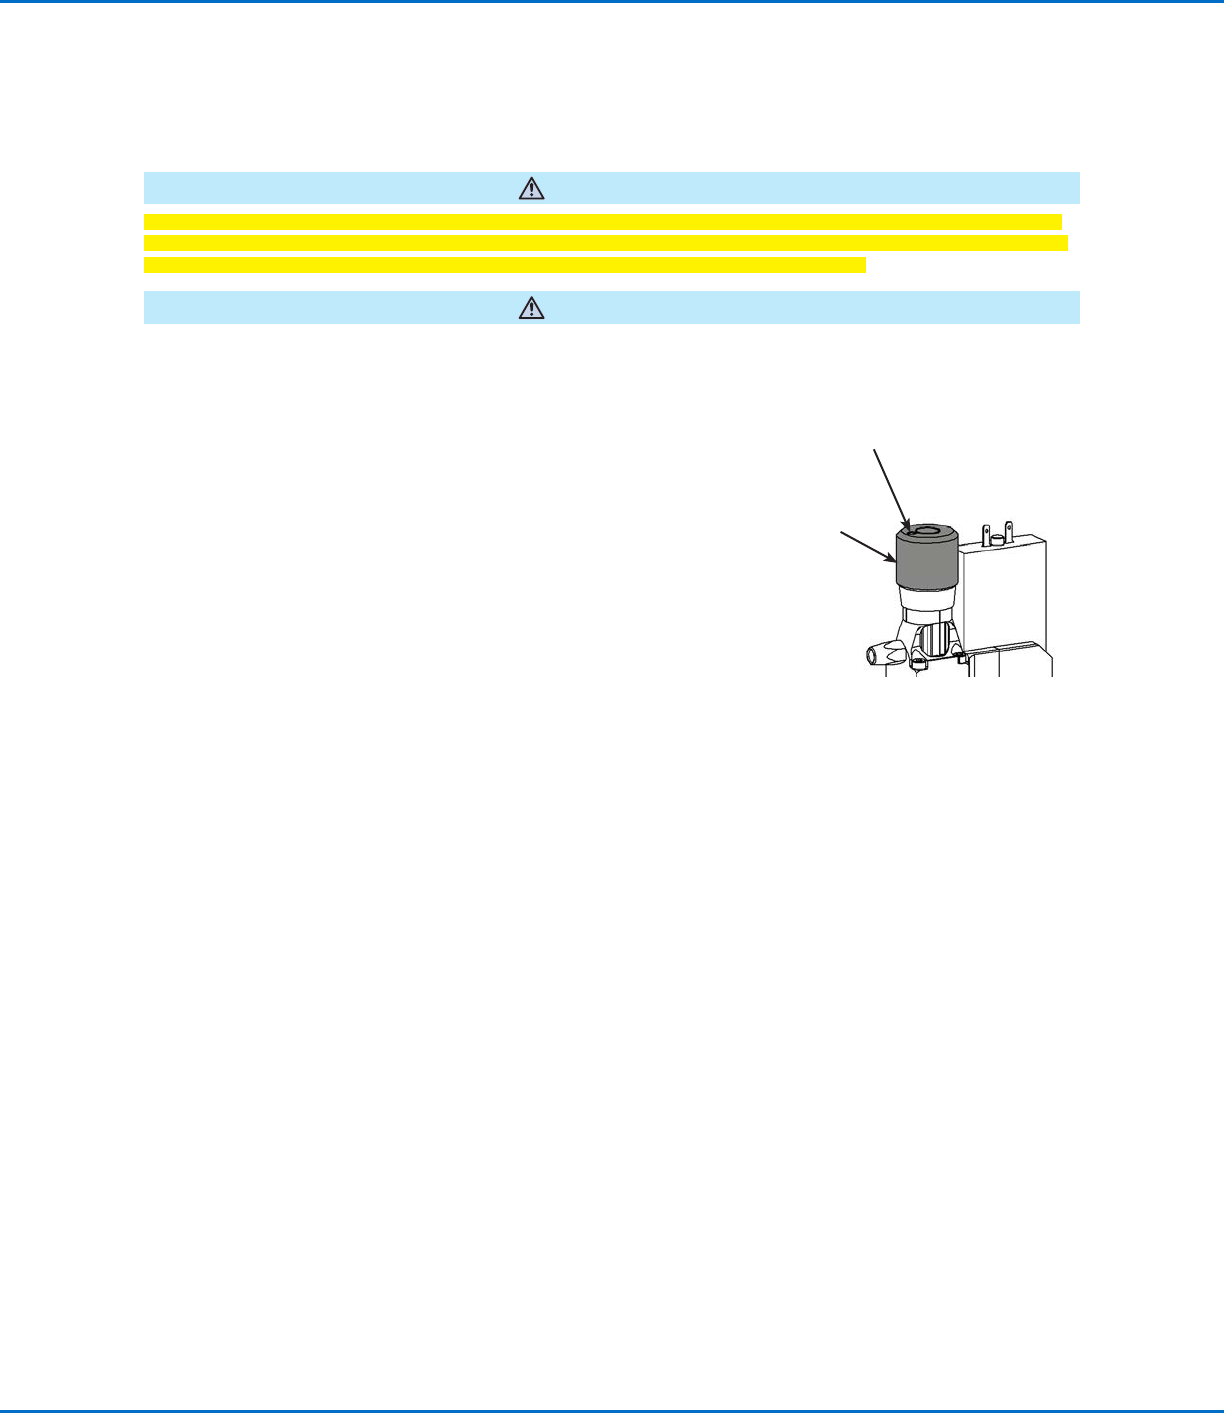
Locking set screw
Stroke adjustment
knob
To return the stroke adjustment knob to the factory setting:
1. Loosen the locking set screw.
2. Turn the stroke adjustment knob clockwise (as seen from an aerial view) until
the stroke stop lies flat against the valve tappet. This can be felt when the
torque elevates.
3. Turn the knob 270° counterclockwise.
4. Tighten the locking set screw to prevent accidental turning of the knob.
Torque: 0.3 N•m (2.7 in.-lb) maximum
Tappet Adjustment (continued)
Liquidyn P-Jet SolderPlus Jet Valve
30 www.nordsonefd.com info@nordsonefd.com +1-401-431-7000 Sales and service of Nordson EFD dispensing systems are available worldwide.
Service
Regularly perform maintenance on your micro-dispensing valve. Regular maintenance will save you cost-intensive
repairs and is a requirement for long valve lifespan. Nordson EFD valves are designed to be maintained easily. All
the material-carrying parts can be removed, cleaned, and maintained by the customer.
NOTE: Customers should service only the material-carrying components. For any service not related to the material-
carrying components, contact your Nordson EFD support representative.
Recommended Maintenance Schedule
Cleaning and maintenance intervals vary based your operating conditions (dispensing frequency, frequency of use,
dispensing material, etc.). The following table provides recommendations only.
Variable Perform Weekly Valve Cleaning
Perform Daily Valve Cleaning (or at the end
of the pot life)
Dispensing frequency Less than 20Hz Greater than 20Hz
Dispensing material
• Oil
• Grease
• UV glue
• Dispersions
• Reactive adhesives
• Epoxies
NOTE: The sealing effectiveness of the tappet O-rings can be compromised if the replacement intervals are too long
(causing worn or damaged O-rings). Worn or damaged O-rings can cause dispensing material to enter the drive
system, thus compromising valve operation.
Valve Cleaning
You will need the following items:
• Protective clothing
• Hex wrench, size 10
• Hex wrench, size 2
• Toothpick
• Cleaning material
• Container
• Compressed air
• Lint-free cloth
• Optional: Ultrasonic bath
• Optional: Microscope
WARNING
• Before any component change or service activity, relieve air pressure from the fluid reservoirs and switch off
heater control (if applicable).
• Disconnect the system from the power supply before beginning work on electrical or electronic system
components or opening the switchgear cabinet.
• Disconnect the mains power plug to isolate the system from the power supply. Check for safe isolation from the
power supply using suitable measuring instruments. Only perform maintenance work on a system that is safely
isolated from the power supply.
• Wear appropriate personal protective equipment, including, but not limited to, gloves, safety goggles, and
breathing protection.
• Switch off the compressed air supply before disconnecting the system from the pneumatic connections.
• Read and understand the SDS for the dispensing material and the risk of the associated health hazards so that
suitable safety measures can be taken for the correct handling of the dispensing material.