YC8_Mainte_E.pdf - 第50页
3-1 3 Periodic maintenance items 1. W eekly inspection This section mainly describes weekly inspection and cleaning. 1.1 Head 1.1.1 Cleaning T ype 63A nozzle n Required tools • Air blow tool (option) • IP A (isopropyl al…
Chapter 3 Periodic maintenance items
Contents
1. Weekly inspection 3-1
1.1 Head 3-1
1.1.1 Cleaning Type 63A nozzle 3-1
1.1.2 Cleaning Type 64A and 65A nozzles 3-2
1.1.3 Inspecting the nozzle holding force 3-3
1.2 Checking the conveyor sensor condition and operation 3-4
1.2.2 Checking the board clamp condition 3-5
1.2.3 Checking the board clamp operation 3-5
6
2.1 Head 3-6
2.1.1 Cleaning the nozzle air path 3-6
7
2.2.1 Cleaning and greasing the ball screw 3-8
2.2.2 Cleaning and greasing the guides 3-11
2.3 Conveyor 3-13
2.3.1 Inspecting and cleaning the conveyor belt 3-13
2.3.2 Cleaning and greasing the hexagon spline 3-14
2.3.3
Inspecting, cleaning and greasing the PU (push-up) shaft (option) 3-15
3. Three-month inspection 3-17
3.1 Head 3-17
3.1.1 Cleaning and replacing the ejector filter 3-17
3.1.2 Checking the ejector vacuum pressure 3-18
3.1.3 Checking the blow valve operation (each head) 3-19
3.1.4 Checking the cleaning blow valve operation (for all heads) 3-19
3.1.5 Cleaning the inside of the spline shaft 3-20
3.1.6 Checking the negative pressure 3-22
3.1.7 Cleaning and greasing the Z and CZ axis ball screws 3-23
4
3.2.1 Inspecting and cleaning the air/mist filters 3-24
4. Six-month or one-year inspection 3-26
6
4.1.1 Cleaning the camera lighting units 3-26
7
4.2.1 Checking the R-axis spline belt 3-27
3-1
3
Periodic maintenance items
1. Weekly inspection
This section mainly describes weekly inspection and cleaning.
1.1 Head
1.1.1 Cleaning Type 63A nozzle
n
Required tools
• Air blow tool (option)
• IPA (isopropyl alcohol)
• Fine brush (toothbrush, etc.)
c
e
1
Remove the nozzle from the head.
Always first press the emergency stop button
and then remove the nozzle from the head.
The machine must be in emergency stop to
ensure safety during work.
2
Clean the nozzle.
Immerse the nozzle in isopropyl alcohol and
then clean it with a fine brush.
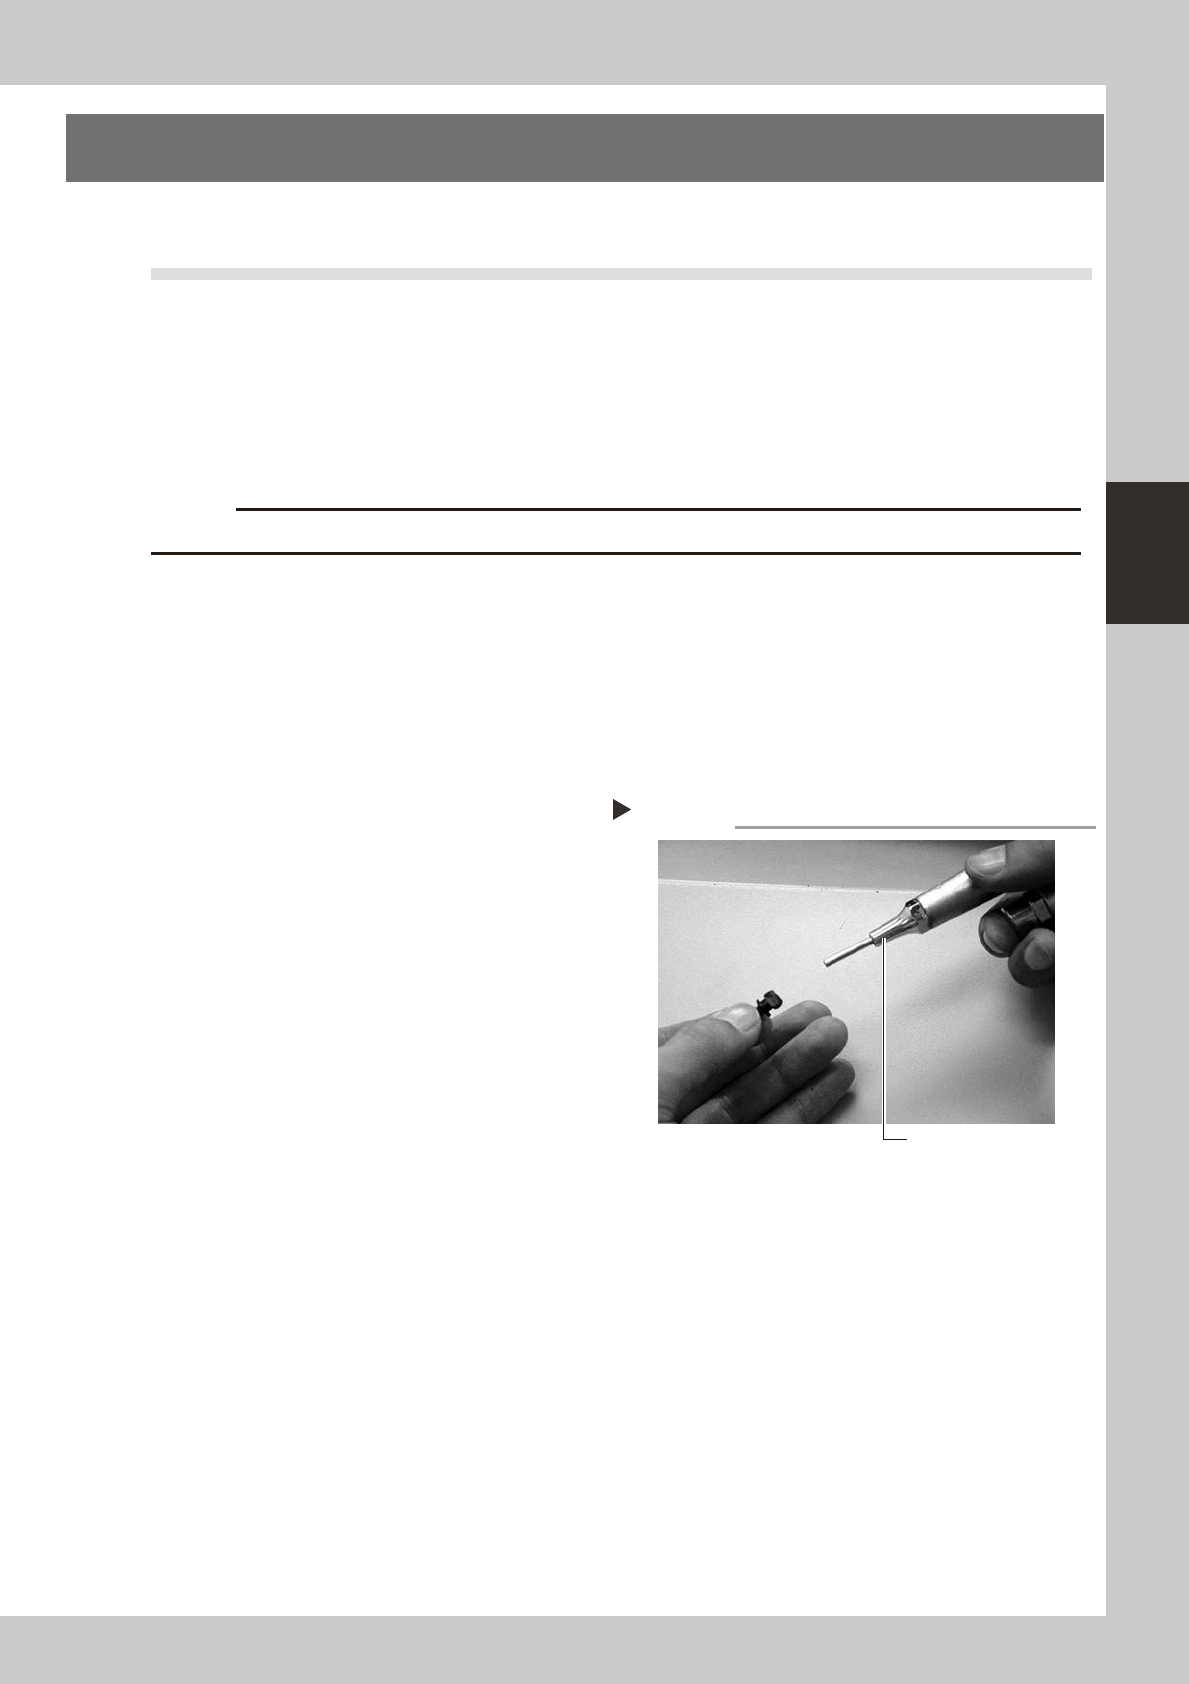
3
Blow air through the nozzle.
Using an air blow tool, blow air through the
nozzle.
53301-N8-00
Blowing air through the nozzle
Step 3
Air blow tool
3-2
3
Periodic maintenance items
1.1.2 Cleaning Type 64A and 65A nozzles
n
Required tools
• Air blow tool (option)
• IPA (isopropyl alcohol)
• Fine brush (toothbrush, etc.)
• Cleaning rag (clean rag)
• Precision slotted screwdriver
c
e
1
Remove the nozzle from the head.
Always first press the emergency stop button
and then remove the nozzle from the head.
The machine must be in emergency stop to
ensure safety during work.
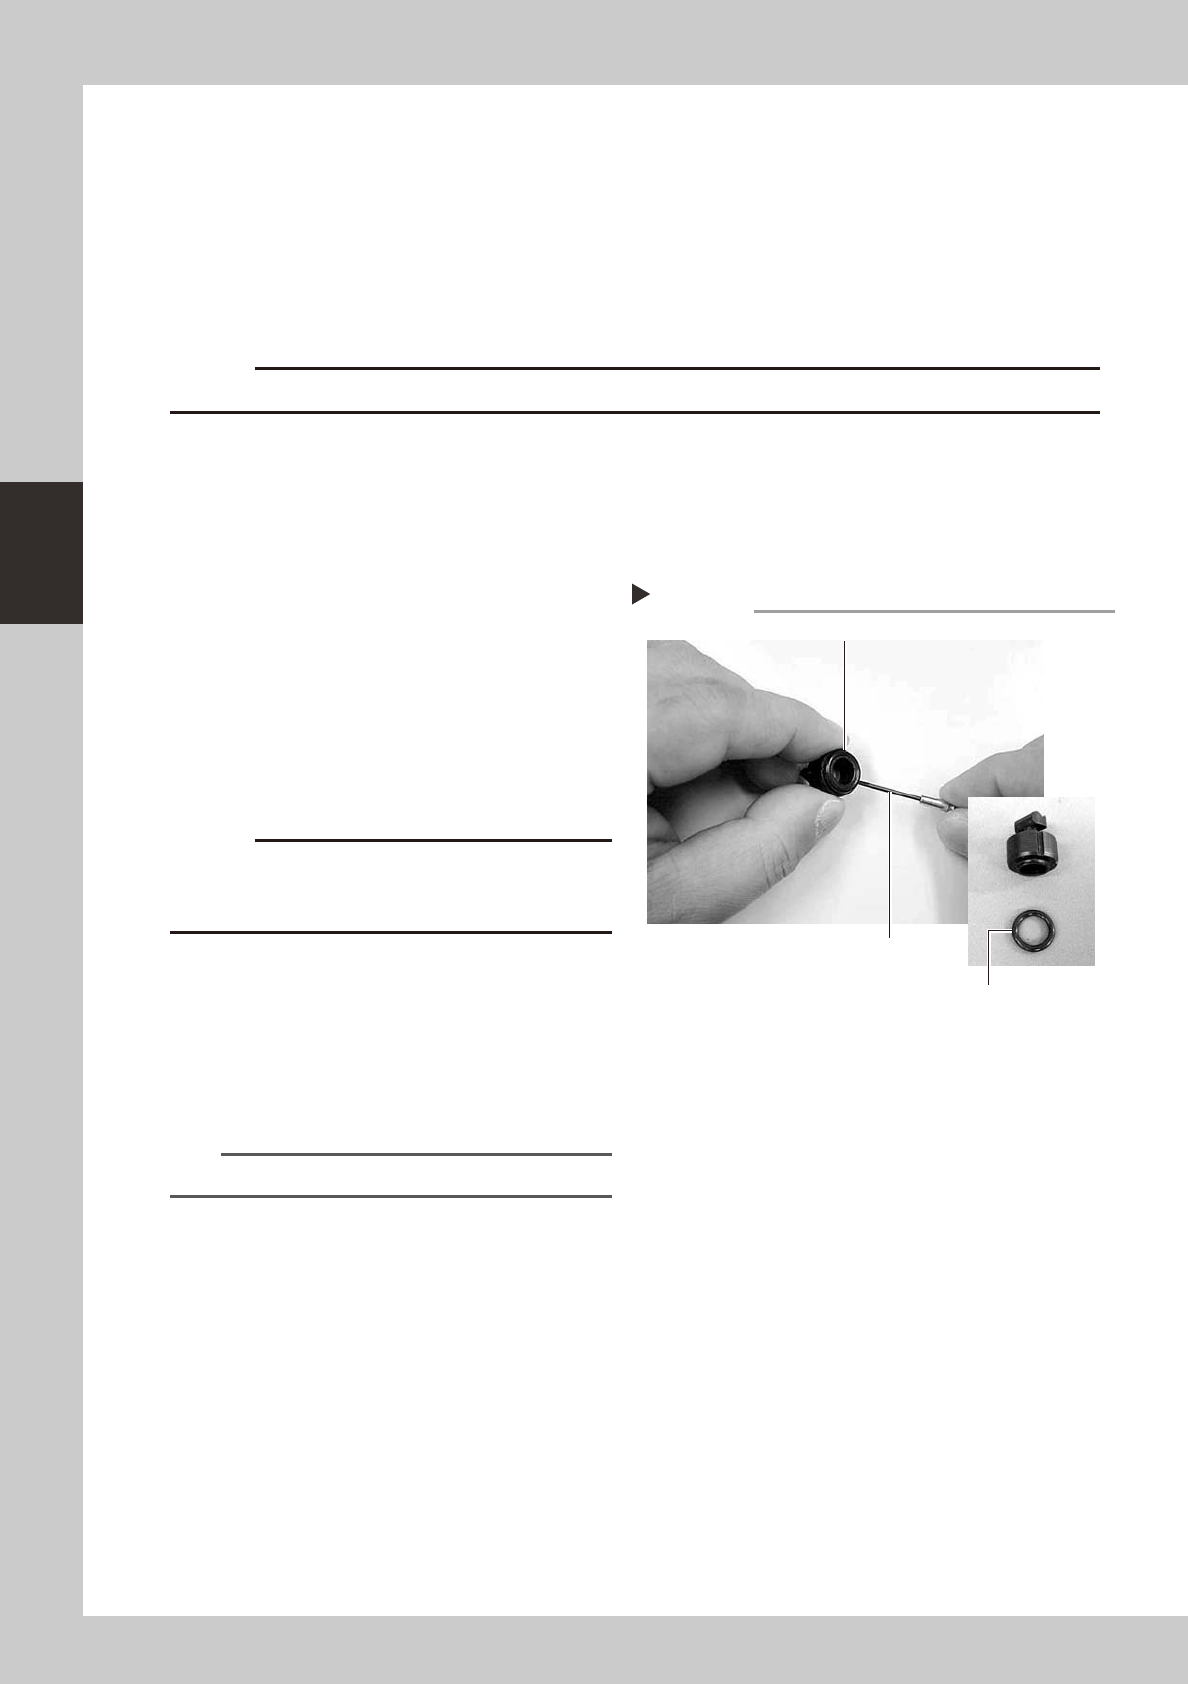
2
Remove the O-ring.
Using a precision slotted screwdriver, remove
the O-ring from the nozzle tip while being
careful not to damage the O-ring.
53308-L6-00
3
Clean the nozzle.
Immerse the nozzle in isopropyl alcohol and
then clean it with a fine brush. Wipe the
O-ring with a cleaning rag.
c
when immersed in alcohol.
4
Blow air through the nozzle.
Using an air blow tool, blow air through the
nozzle.
5
Reattach the nozzle to the head.
Fit the O-ring to the nozzle tip and reattach
the nozzle to the head.
n
NOTE
Replace the O-ring if it is worn or damaged.
Removing O-ring from the nozzle
Step 2
Removed O-ring
Precision slotted screwdriver
Remove O-ring.