YC8_Mainte_E.pdf - 第61页
3-12 3 Periodic maintenance items 3 Apply new grease to the guide r ails. 1. X axis Use the grease gun to supply the specified grease to the X-axis guide grease nipples. The grease nipples are located behind the head ass…
3-11
3
Periodic maintenance items
2.2.2 Cleaning and greasing the guides
n
Required tools
• Phillips screwdriver
• Lint-free cleaning cloth or paper towel
• Grease gun
• Specified grease: NSL
• Square cloth
c
Always wear protective goggles and gloves when using grease.
e
1
Make the preparations for the
work.
1. Press the emergency stop button to put
the machine in the emergency stop
state.
2. Put a square cloth on the conveyor
plate.
2
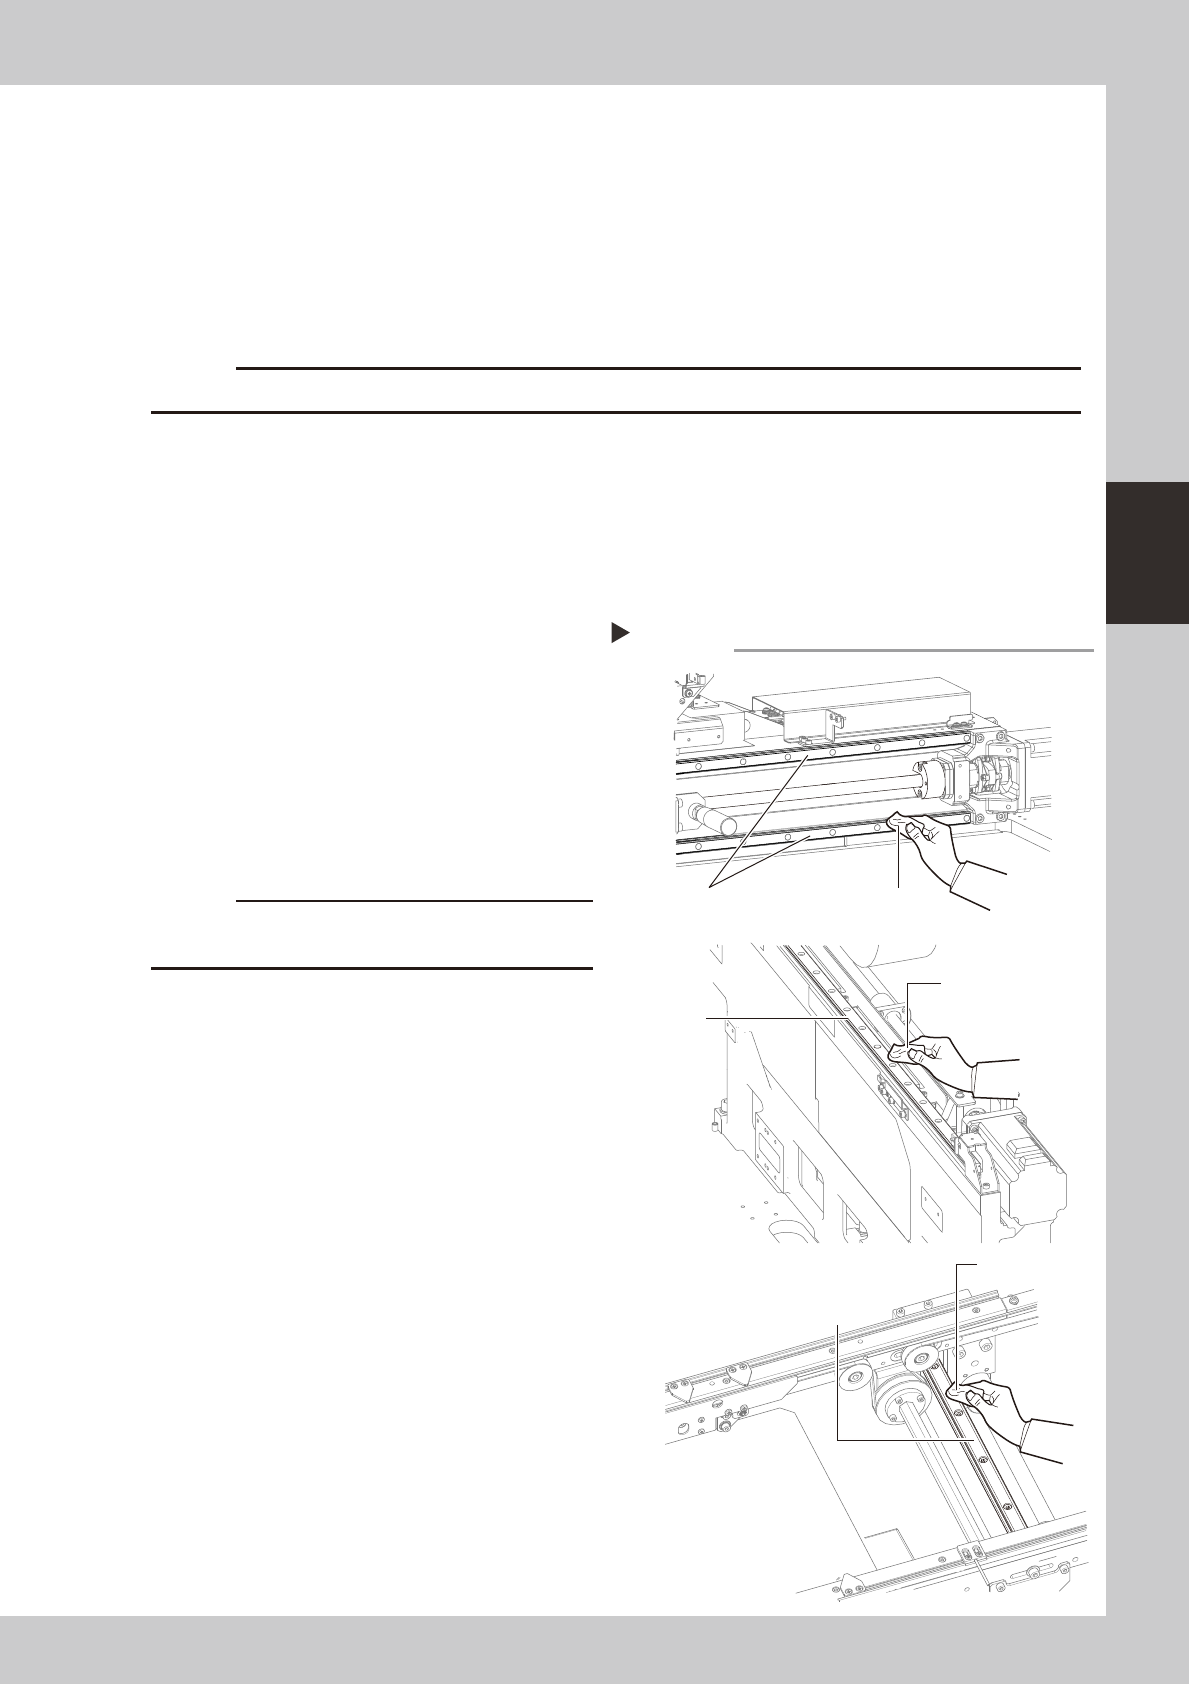
Clean the guides.
1. Move the head (or conveyor rails) to one
end of each axis (X, Y and W axes) and
wipe the entire guide with a lint-free
cleaning cloth or paper towel.
2. Move the head (or conveyor rails) to the
opposite side of each axis (X, Y and W
axes) and wipe the guide.
53311-N8-00
c
Wipe away thoroughly the old grease in the grooves of
the guide rails.
Cleaning the guide
Step 2
Guide
Guide
(left and right)
lint-free cleaning cloth
lint-free cleaning cloth
Guide
lint-free cleaning
cloth
X-axis
Y-axis
W-axis
3-12
3
Periodic maintenance items
3
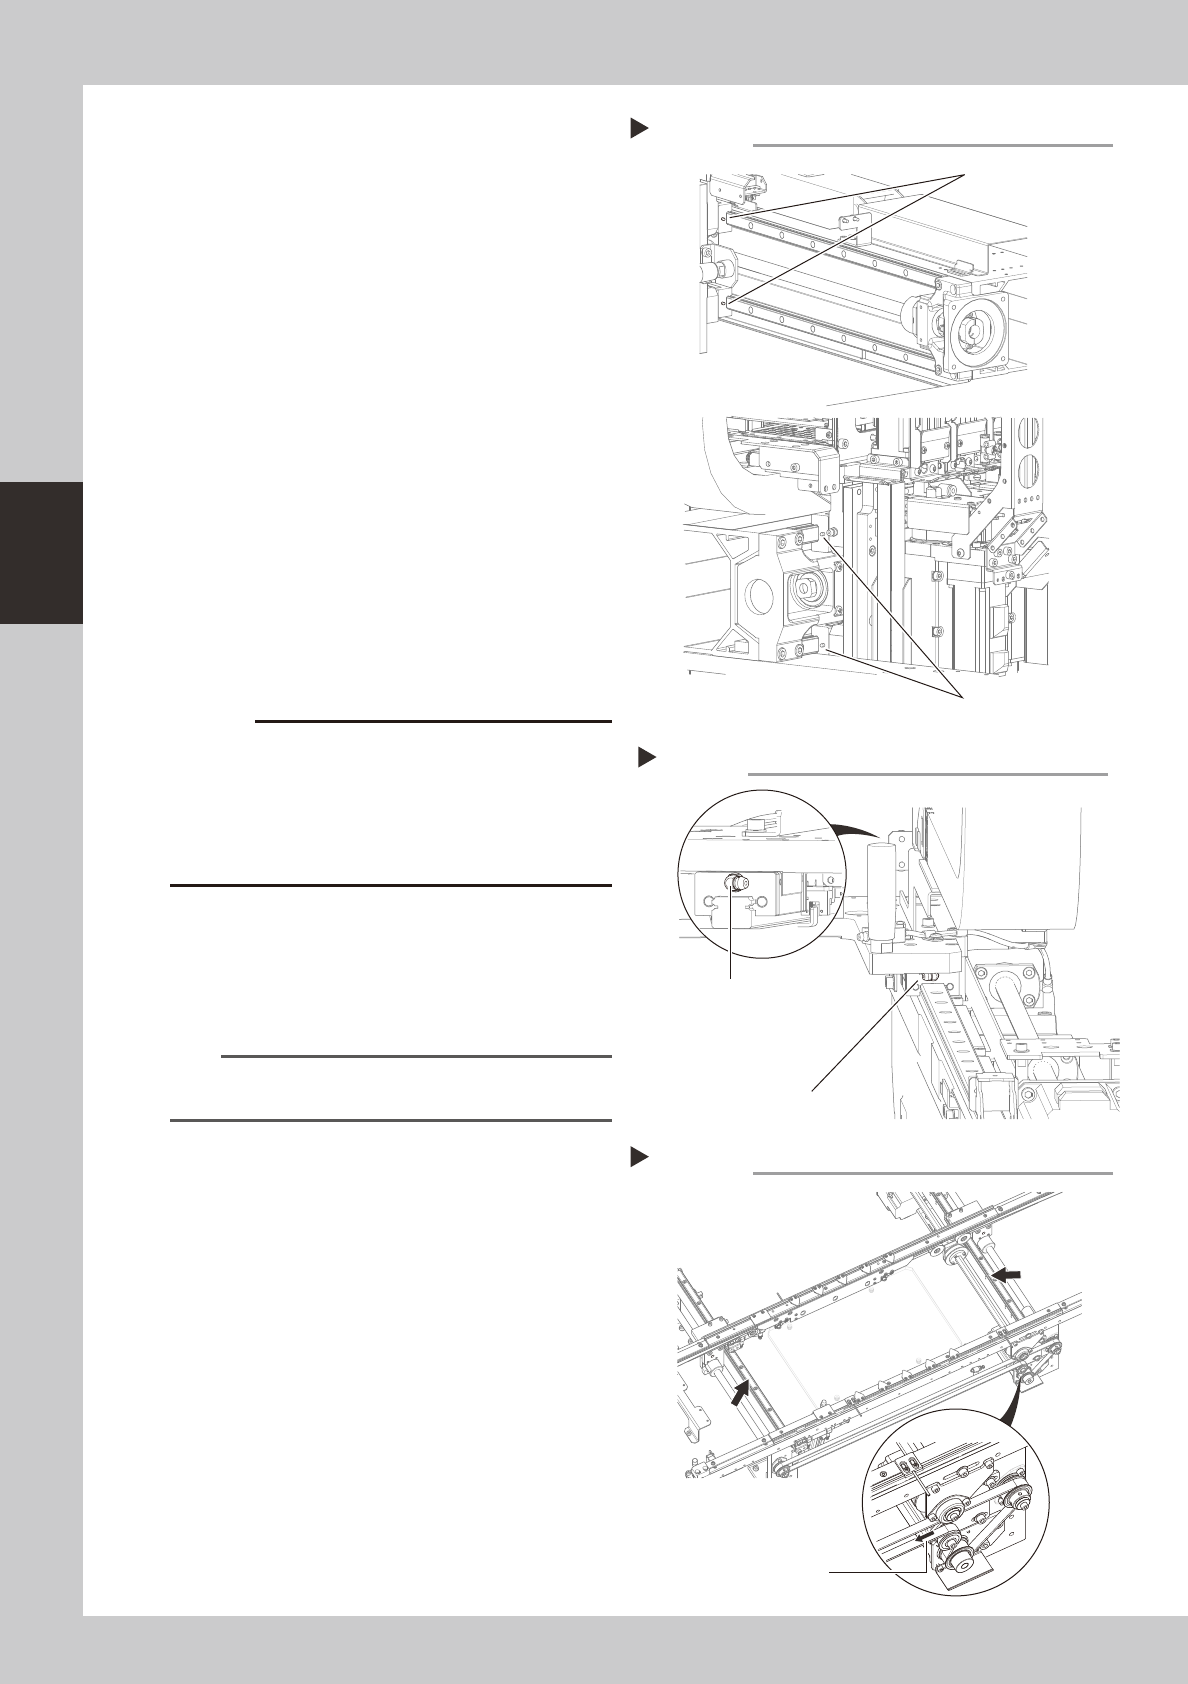
Apply new grease to the guide rails.
1. X axis
Use the grease gun to supply the
specified grease to the X-axis guide
grease nipples.
The grease nipples are located behind
the head assembly, two each on the right
and left at the positions (heights) of the
upper and lower guides (total of 4
places).
53312-N8-00
2. Y axes
Use the grease gun to supply the
specified grease to the Y-axis guide
grease nipples. The grease nipples are
located on the front and back sides of
the slider on each Y-axis guide (total of 4
places).
Attach the grease gun nozzle to the
grease gun so that the grease gun nozzle
can be aligned with the angle of the
grease nipples.
53313-N8-00
c
the grease gun nozzle with the angle of the grease
damaged or may come loose and fall off. Carefully
align the grease gun with the grease nipple.
3. W axis
Apply the specified grease to your finger,
and rub it evenly on the guide surfaces
and into the lead grooves.
53314-N8-00
n
NOTE
The lubrication points and nozzles are described in
detail in “Lubrication points” in Chapter 4.
4
Remove excess grease.
After moving the head (or conveyor rails)
back and forth a few times along their axes,
wipe away excess grease by hand or using
a cleaning paper.
Greasing the X-axis guide
Step 3-1
Grease nipple (right)
Grease nipple (left)
Greasing the Y-axis guide
Step 3-2
Grease nipple (front)
Grease nipple (back)
Greasing the W-axis guide
Step 3
Turning the belt in the
direction of arrow narrows
the conveyor width.
3-13
3
Periodic maintenance items
2.3 Conveyor
2.3.1 Inspecting and cleaning the conveyor belt
Inspect the conveyor belt for wear. As the belt wears away, slippages may occur and the boards may not be
conveyed stably. It is therefore necessary to periodically inspect the conveyor belt for wear.
Belt wear may also cause trouble such as incorrect detection of the conveyor sensor due to dust from belt wear
accumulating on the light receiving surface of the conveyor sensor, or dust from belt wear accumulating in the
belt guide grooves may cause the belt to stick, etc.
n
Required tools
• Slotted screwdriver
• Hex wrench (4mm, 5mm)
• Vacuum ASSY (option)
1
Change the conveyor width to a
convenient width for the
maintenance work.
1. Press the [Width] button to display the
"Conveyor Width" dialog box.
2. In the "Target Width" box, enter a width
large enough for the maintenance work
(slotted screwdriver can be used) and
press [OK].
The conveyor is changed to the width
you have specified.
54305-N8-00
e
2
Loosen the conveyor belt tension.
Press the emergency stop button. Use 4mm
and 5mm hex wrenches to loosen the belt
tension of each conveyor.
53315-N8-00
3
Remove the conveyor belt.
Remove the conveyor belt from the pulley
and the belt groove of the board guide.
4
Check the board conveying side of
the conveyor belt for wear.
Check if the board conveying side of the
conveyor belt you have removed in step 3 is
worn out.
5
Clean the belt grooves and pulleys
on the board guide.
Use the vacuum ASSY (option) to suck in belt
wear dust particles from the belt groove or
the sensor detection surface. Also, clean the
pulley and other parts for the conveyor belt
of each conveyor.
53316-N8-00
c
sometimes adhere to and darken the outer
Changing the conveyor width
Step 1
Loosening the tension on the belt
Step 2
Tensioner bolt
Tensioner pulley
Cleaning the belt grooves
Step 5
Belt groove