YC8_Mainte_E.pdf - 第65页
3-16 3 Periodic maintenance items 6 Raise and low er the push-up unit manually . After cancel emergency stop, raise and lower the push-up unit several times manually to spread the grease evenly. After the grease is well …
3-15
3
Periodic maintenance items
2.3.3
Inspecting, cleaning and greasing the PU (push-up) shaft (option)
The push-up shaft is designed to prevent flexing or warping of the board during clamping and is important
because it prevents depressing of the board during component mounting.
The push-up shaft also prevents deviations in the component mounting accuracy due to the board depressing
during component mounting, so it is important to regularly clean and inspect the push-up shaft to ensure it
operates correctly.
c
cleaning of the push-up shaft by the user will void the warranty.
n
Required tools
• Hex wrench (3mm)
• Specified grease: NSL
c
Always wear protective goggles and gloves when using grease.
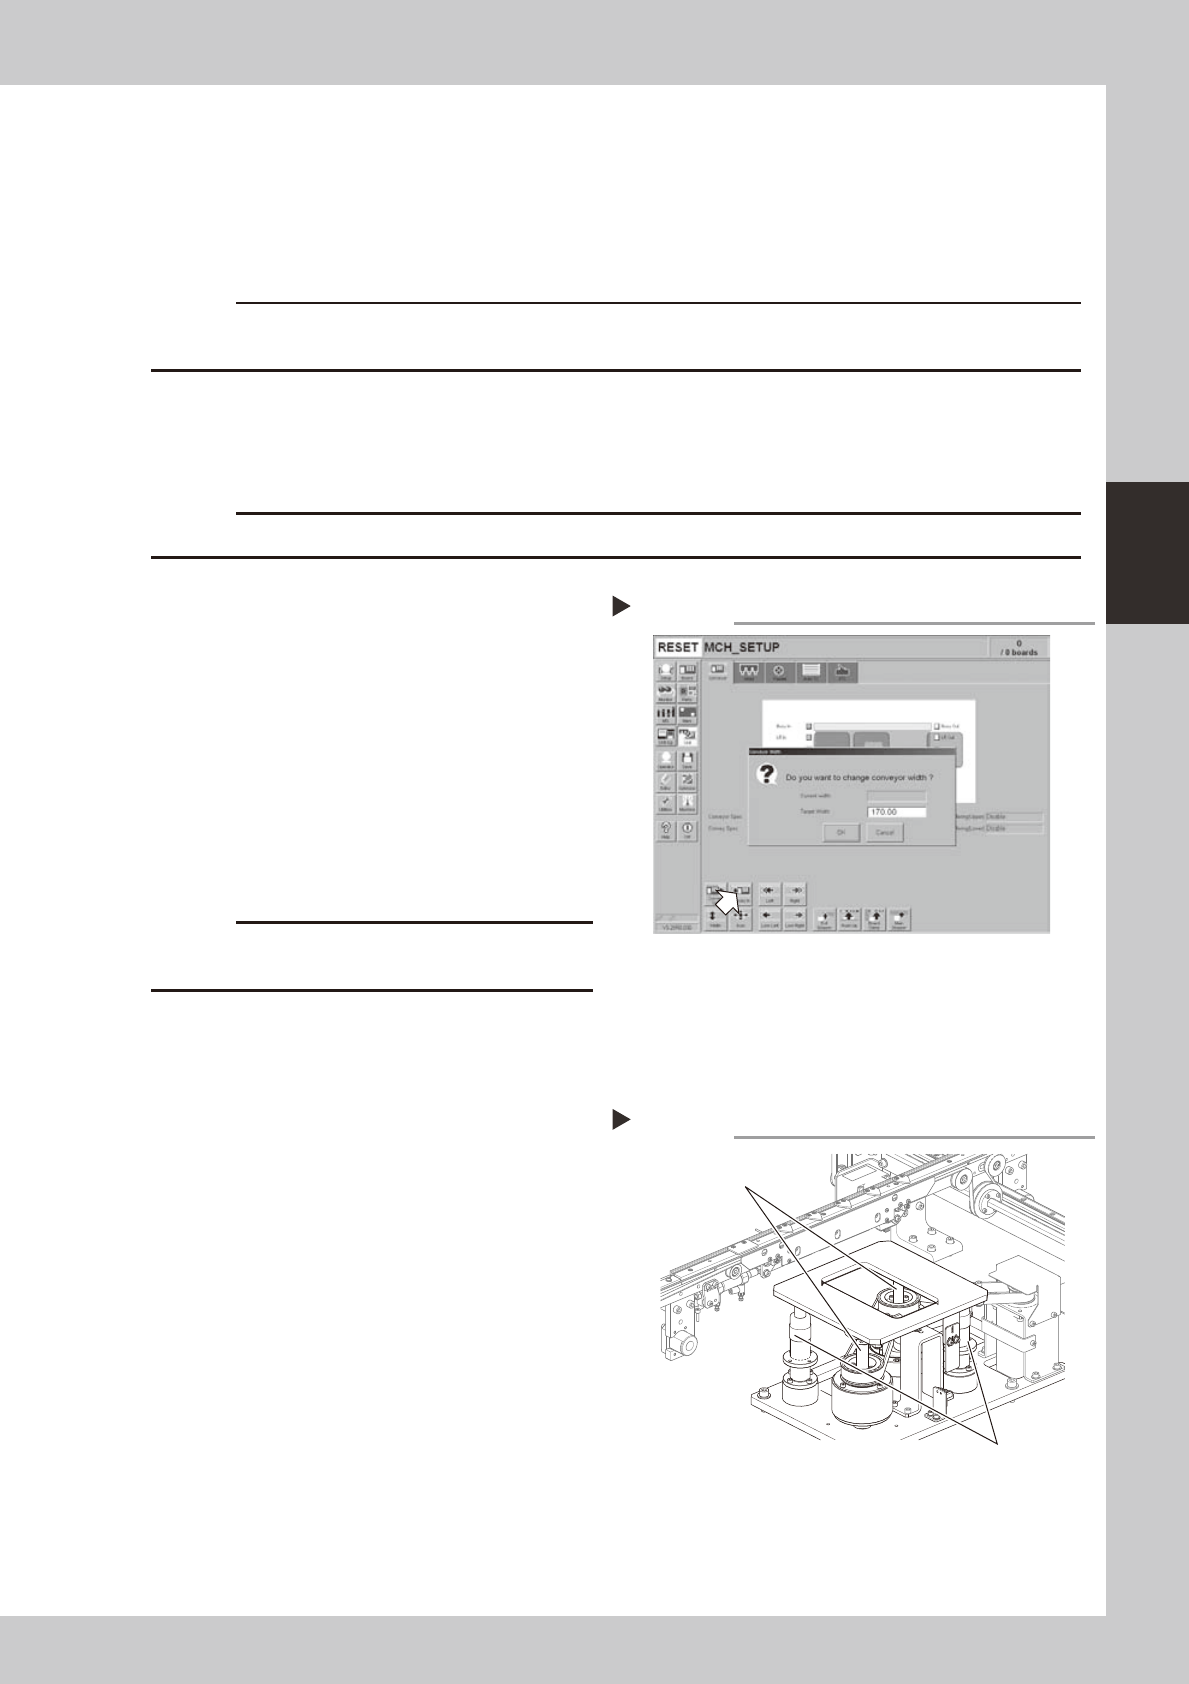
1
Set the conveyor width to
maximum.
Press the [Width] button to display the
"Conveyor Width" dialog. Enter the maximum
conveyor width from the specifications and
press [OK]. The conveyor is changed to the
width that was just entered.
54304-N8-00
e
2
Remove the push-up plate.
Press the emergency stop button and then
remove the push-up plate using a hex
wrench.
c
The push-up plate is heavy so use plenty of caution
during handling.
3
Raise the push-up unit.
Cancel emergency stop and raise the
push-up unit manually.
e
4
Remove the old grease by hand.
After pressing the emergency stop button,
thoroughly remove the old grease from the
two ball screws and the two ball guides by
hand.
5
Apply the new grease by hand.
Ball screw
Apply as much as 2 cm of new grease to
your finger, and rub it evenly into the ball
screw grooves.
Ball guide
Apply as much as 2 cm of new grease to
your finger, and coat it evenly on the ball
guides.
53318-N8-00
Setting the conveyor width
Step 1
Applying the grease
Step 5
Ball guides
Ball screws

3-16
3
Periodic maintenance items
6
Raise and lower the push-up unit
manually.
After cancel emergency stop, raise and
lower the push-up unit several times
manually to spread the grease evenly. After
the grease is well spread, raise the push-up
unit and leave it in that state.
e
7
Wipe away excess grease by hand.
After pressing the emergency stop button,
wipe away excess grease by hand.
Again raise and lower the push-up unit
several times manually and if there is no
problem then lower the push-up unit.
8
Reinstall the pushup plate to its
original position.
Reinstall in the reverse procedure of step 2.
c
The push-up plate is heavy so use plenty of caution
during handling.
3-17
3
Periodic maintenance items
3. Three-month inspection
3.1 Head
This section describes the maintenance procedures, using the V2 head machine as an example.
3.1.1 Cleaning and replacing the ejector filter
Although depending on the air supply conditions and operating time, ejectors should be inspected once every
3 months. Use an air blow tool to remove dust buildups when small. We recommend replacing the air filter if
heavy dust deposits are found.
n
Required tools
• Square cloth
• Precision slotted screwdriver (option)
• Tweezers
• Air blow tool (option)
• Replacement parts (See 2.1.1 “Consumable parts and replaceable parts (for repairs)” in Chapter 1.
c
n
NOTE
Before beginning the work, put a square cloth on the conveyor to prevent any parts from being lost or dropping into
other sections and causing trouble.
1
Move the head all the way to the
front end of the Y axis.
On the [Unit]-[Head] tab (or [conveyor] tab)
screen, press the [Axis] button to open the
"Move Axis" screen. Then move the head
assembly all the way to the front of the Y
axis (front of machine).
TIP
The ejector unit is located at the front of the head
assembly. It is easier to inspect the ejector filters when
the head assembly is positioned to the front side of the
Y axis. (Inspect the ejector filters from the front of the
machine.)
e
2
Press the emergency stop button.
The machine should be in emergency stop
to ensure safety during work.
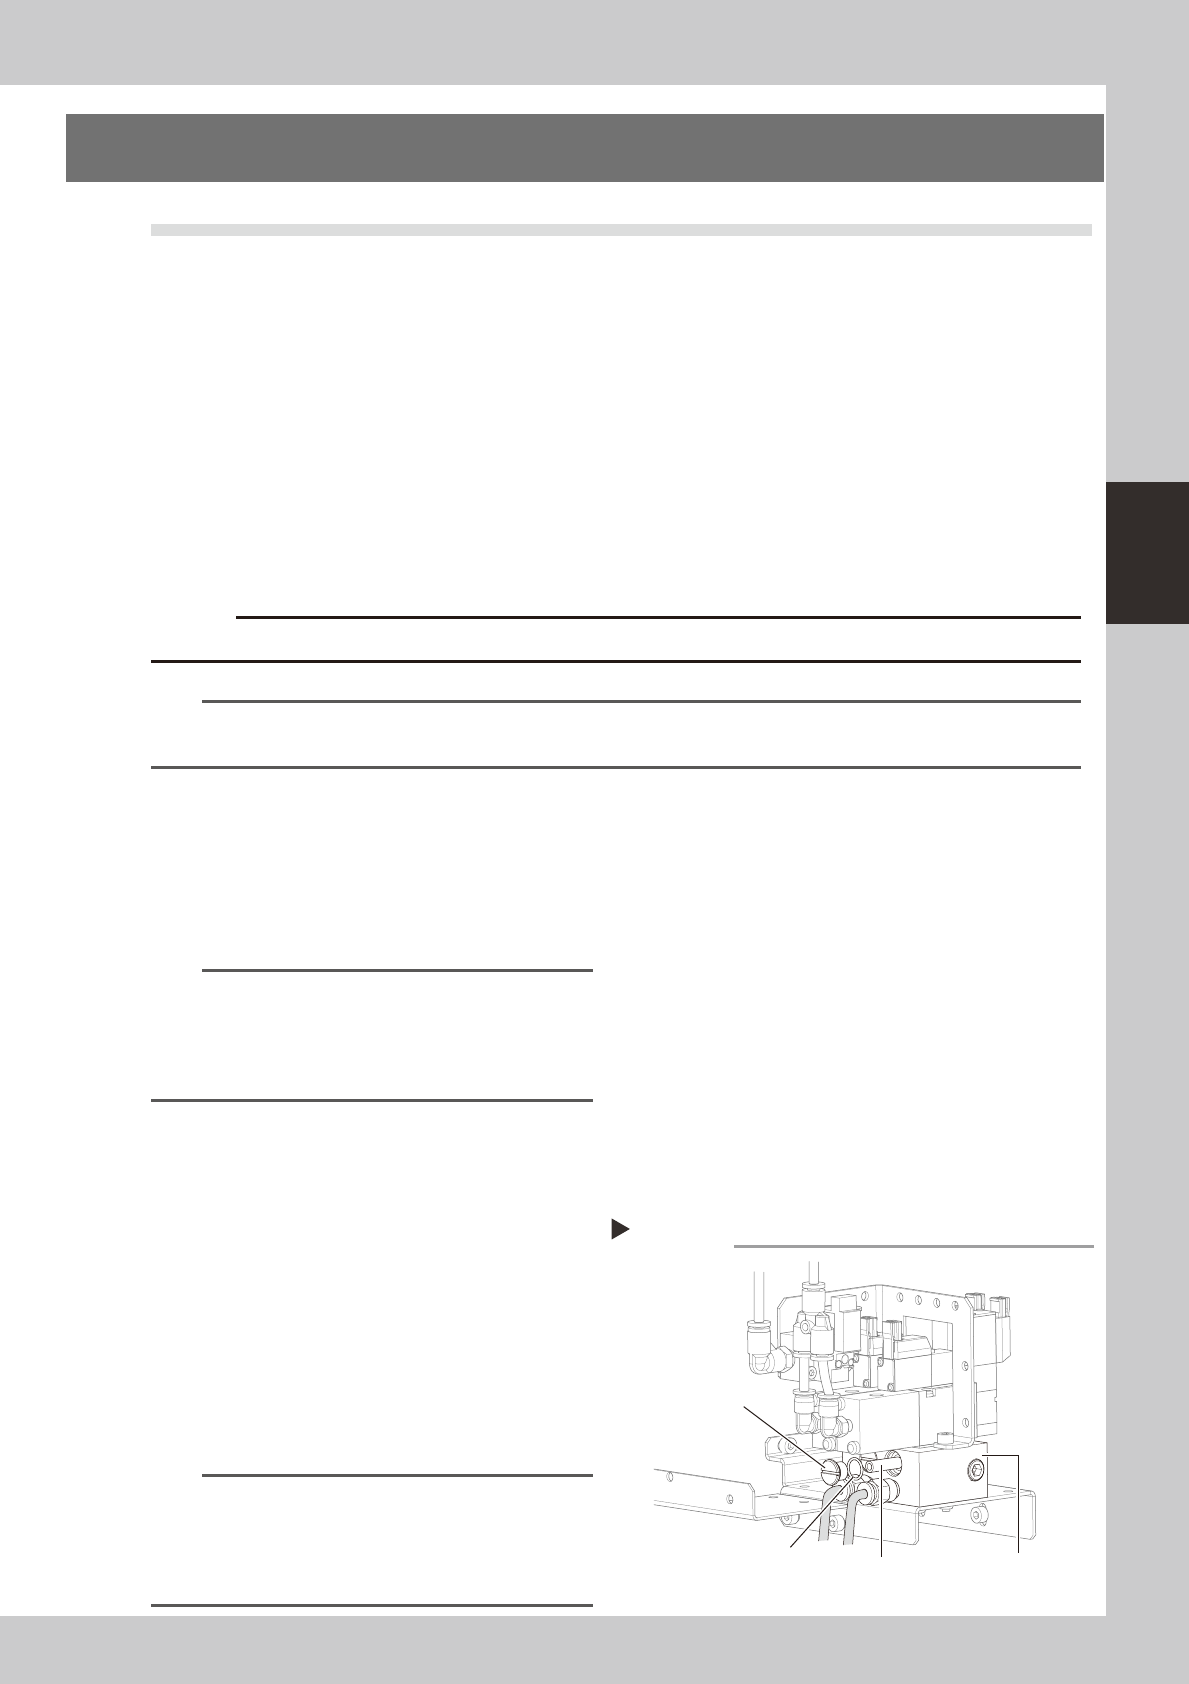
3
Remove the filter cap.
Loosen and remove the filter cap with a
slotted screwdriver.
53319-N8-00
4
Clean the filter.
Use tweezers to take the filter out of the
ejector. When there is only a little dust in the
filter, use an air blow tool to blow it away
and return the filter back to the original
position.
n
NOTE
If there are heavy dust deposits in the filter or the filter
has discolored, replace it with a new filter (K46-M8527-
C0X). As a general guide, filters should be replaced
once every 3 months, although this depends on the
actual operating time.
Removing the filter cap
Step 3
Ejector unit
Filter cap
O-ring
Filter