7OM-1625-004_w.pdf - 第94页
7OM-1603 Chapter 2 : 3. Product Change Menu 2-25 [5] [Move & Adjust] Button When this button is pressed, the recognition window appears and the manual alignment operation is enabled. [6] [OK], [CANCEL] Button Using t…
7OM-1603
2-24
Chapter 2 : 3. Product Change Menu
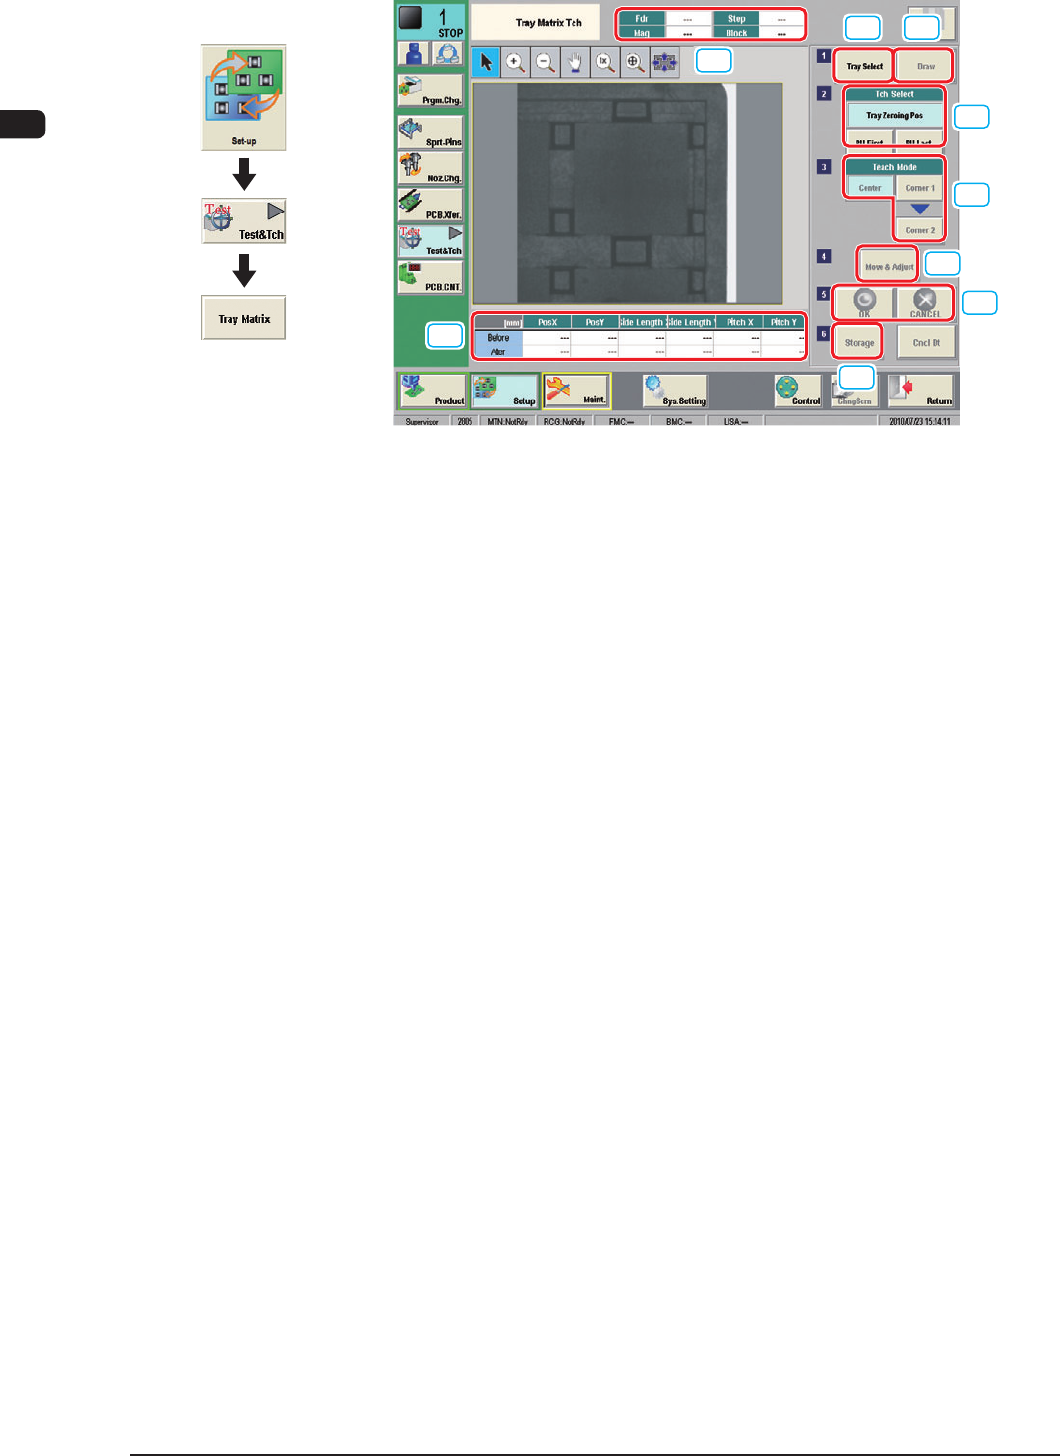
3.2.1 "Tray Matrix Tch" Window
[1]
[2]
[3]
[4]
[5]
[6]
[7]
[9]
[8]
[2]
[2]
[2]
"Tray Matrix Tch" window F7B25
[1] [Tray Select] Button
The tray to be taught is selected in this data box.
[2] Feeder No. Tray Set Display
The Feeder No., where the components are picked up, magazine, setup and
blocks are displayed in this pane.
[3] Tch Select
[Tray Zeroing Pos] Button
When this button is pressed, a teaching operation is performed to specify the
component data offsets X and Y.
[PU First], [PU Last] Button
Side Lengths X and Y and Pitches X and Y are determined according to the
taught rst and last takeout positions.
[4] Teach Mode
The following two types of teaching methods are provided and should be
selected according to the component size.
Teaching Operation with the [Center] Button
Normally, using this button, the component center is aligned with the screen
center and so the teaching operation is performed.
Teaching Operation with the [Corner1] and [Corner2] Buttons
When a component is large in size, these keys are used to align two points on
the component and a teaching operation is performed based on the alignment.
1007-002
Graphic
Development

7OM-1603
Chapter 2 : 3. Product Change Menu
2-25
[5] [Move & Adjust] Button
When this button is pressed, the recognition window appears and the manual
alignment operation is enabled.
[6] [OK], [CANCEL] Button
Using these buttons, the set parameters are reected on the machine
operation or cancelled.
[7] Feeder (B) Offset
Displayed are the current values that indicate the pickup position. After a
teaching operation is performed, the results appear in the text boxes entitled
"Adj".
Before
:
Values before Teaching Operation
After
: Results of Teaching Operation
[8] [Draw] Button
When this button is pressed, the tray selected in [1] is drawn out from the
elevator unit.
[9] [Storage] Button
When this button is pressed, the tray drawn out in [8] is stored.
1007-002
7OM-1603
2-26
Chapter 2 : 3. Product Change Menu
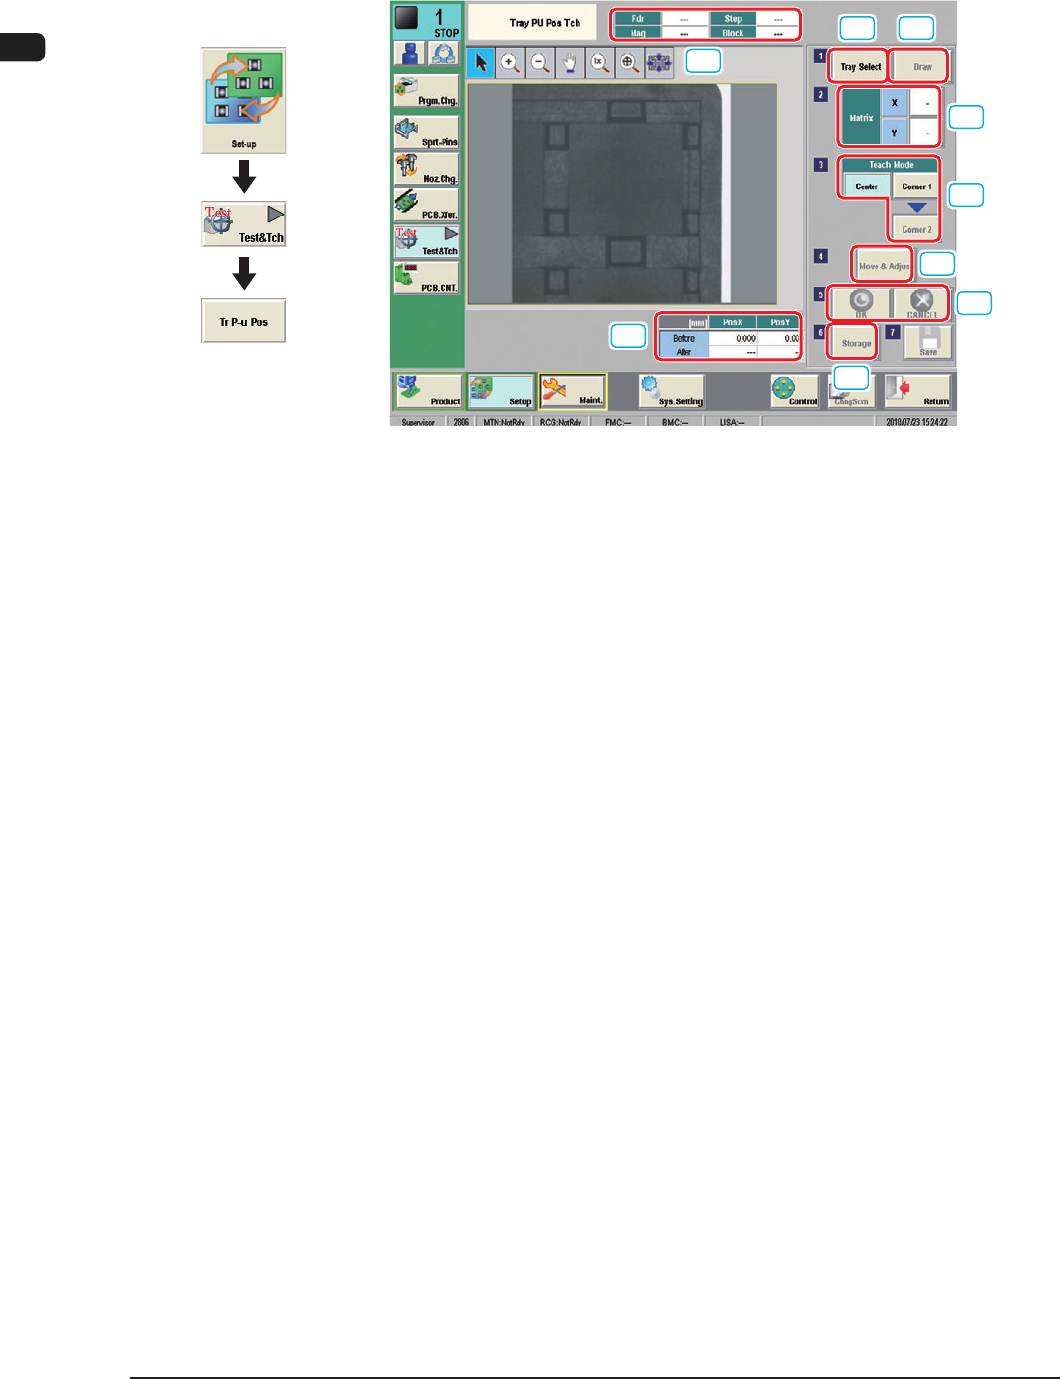
3.2.2 "Tray PU Pos Tch" Window
This window can be used to Perform a teaching operation to determine the feeder
(B) offset for the tray components.
[2]
[1]
[4]
[5]
[6]
[7]
[9]
[8]
[3]
"Tray PU Pos Tch" window F7B26
[1] Feeder No. Tray Set Display
The Feeder No., where the components are picked up, magazine, setup and
blocks are displayed in this pane.
[2] [Tray Select] Button
The tray to be taught is selected in this data box.
[3] [Draw] Button
When this button is pressed, the tray selected in [2] is drawn out from the
elevator unit.
[4] Matrix
The matrix to be taught is set in this group box.
[5] Teach Mode
The following two types of teaching methods are provided and should be
selected according to the component size.
Teaching Operation with the [Center] Button
Normally, using this button, the component center is aligned with the screen
center and so the teaching operation is performed.
Teaching Operation with the [Corner1] and [Corner2] Buttons
When a component is large in size, these keys are used to align two points on
the component and a teaching operation is performed based on the alignment.
1102-003
Graphic
Development