DeltaTherm_IR_REV_B-1.pdf - 第28页
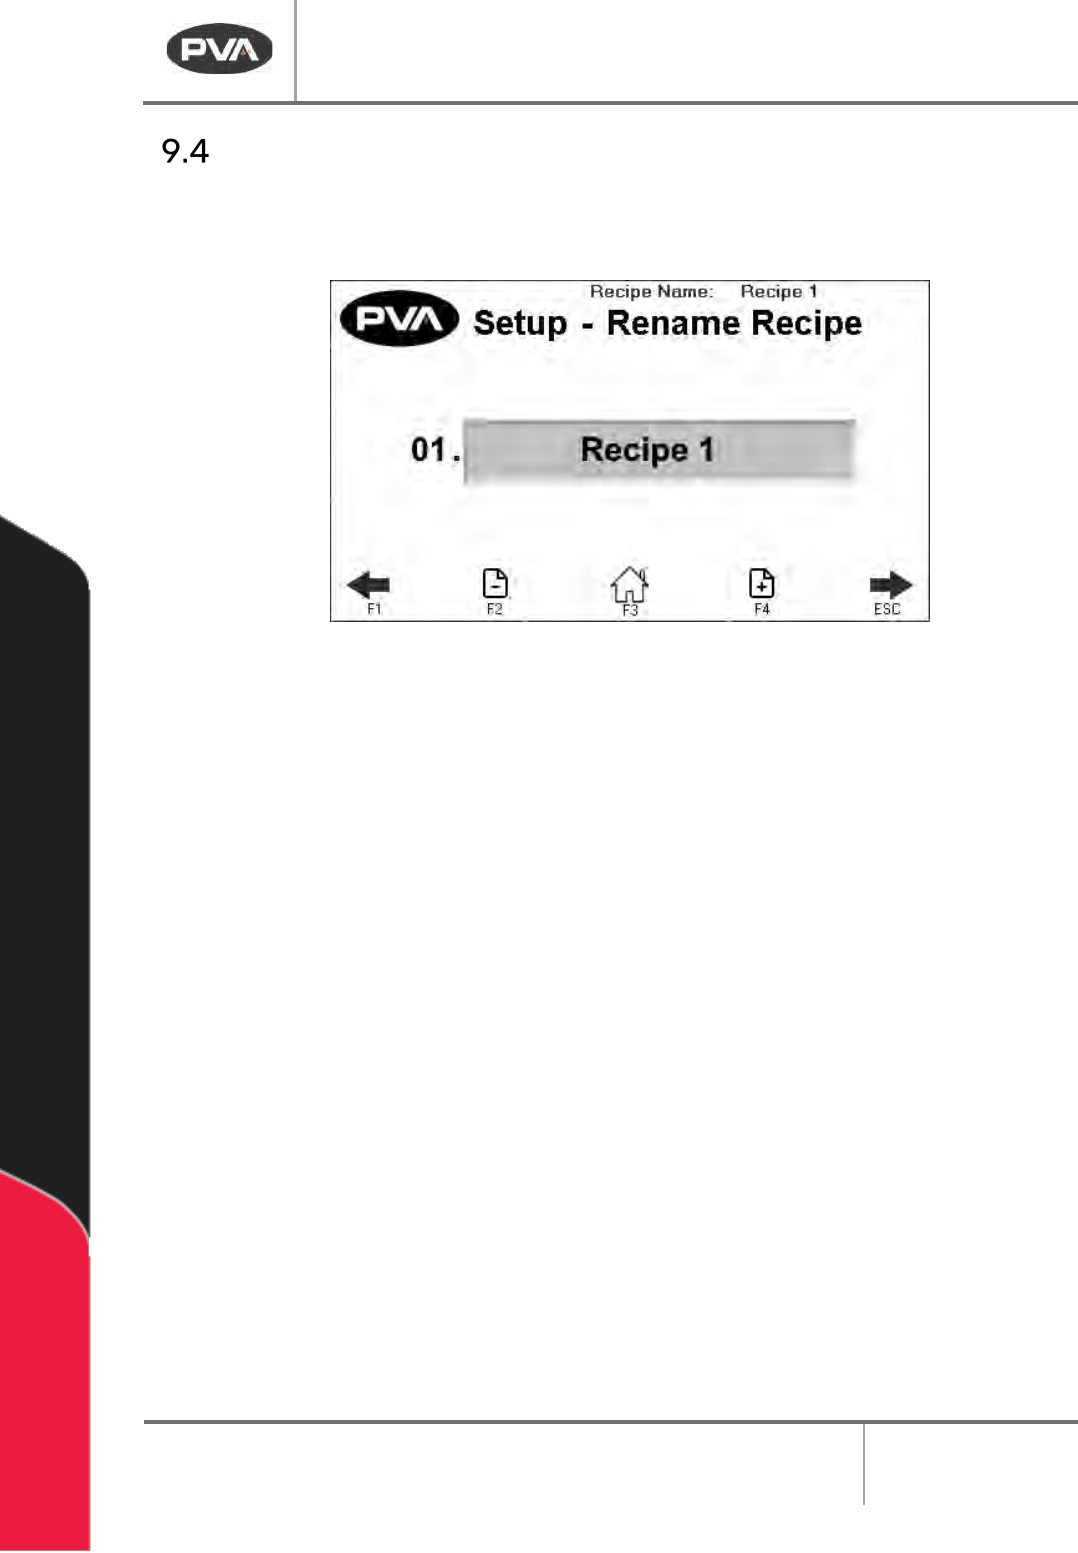
Delt aTherm IR Cure Modul e Revision B / February 2020 Page 28 of 41 Rename Recipe • Use the arrows on the screen or the “ F1 ” an d “ ESC ” button to scroll t o the Set up - Se tti ngs scre en . Figure 21 : Setup - Rena…
DeltaTherm IR Cure Module
Revision B / February 2020
Page 27 of 41
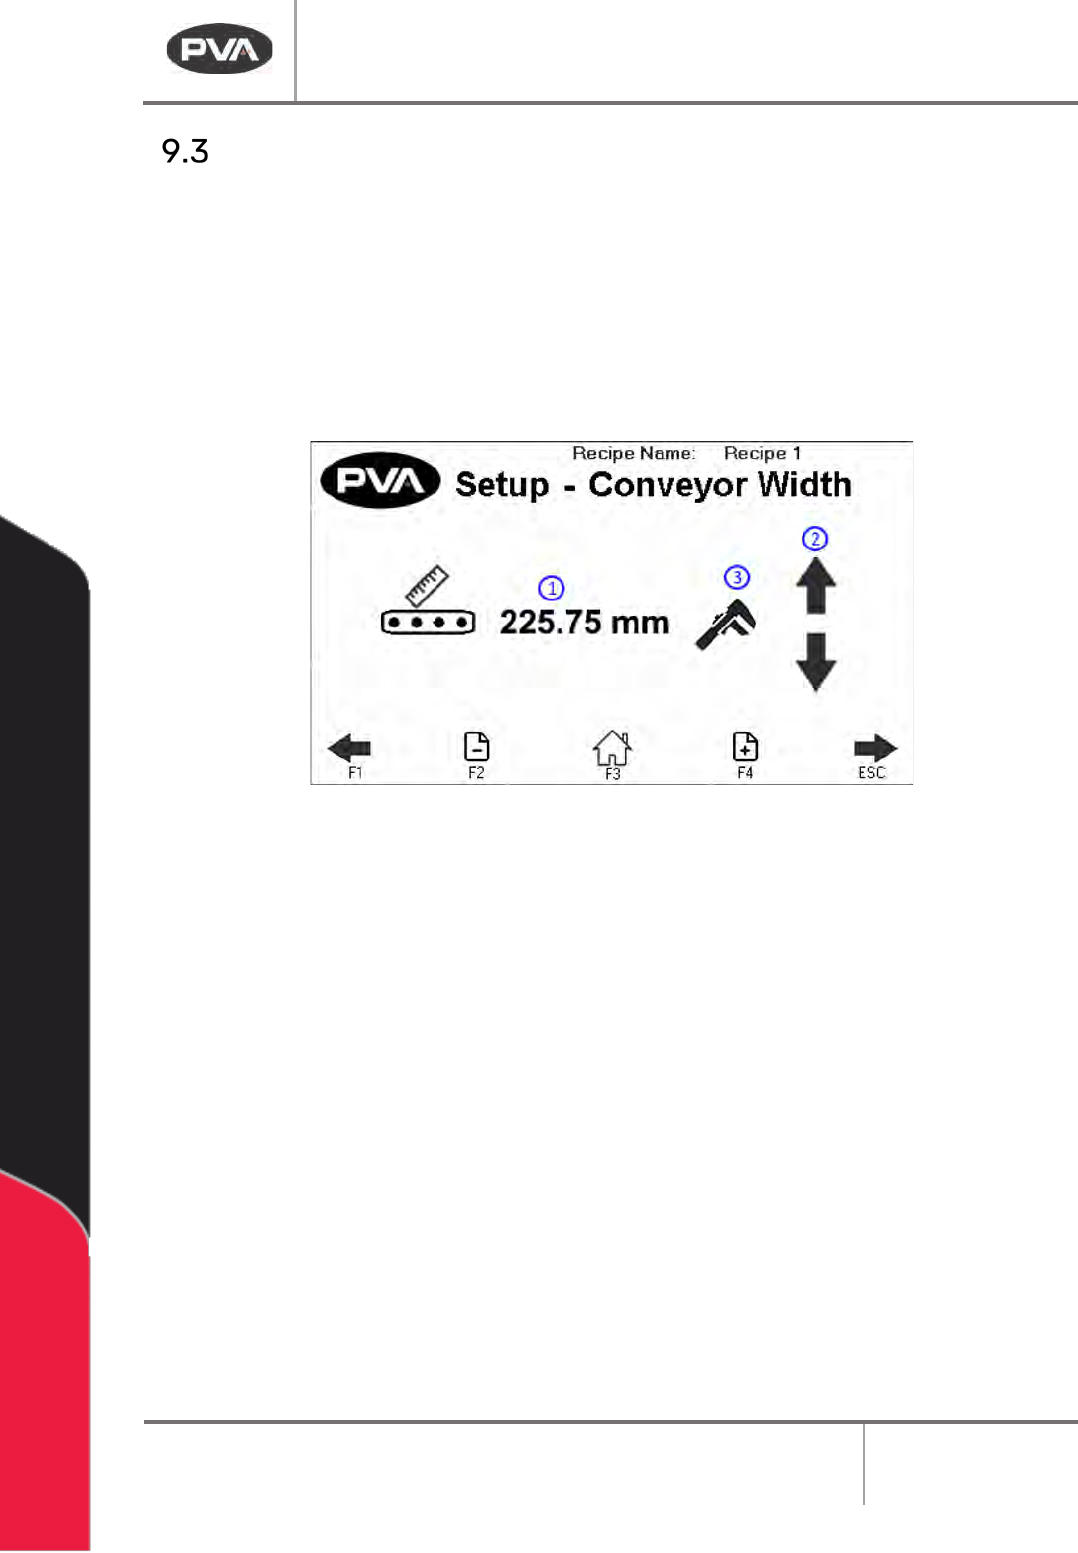
Conveyor Width
This is an optional setting. Not all modules will have this option.
• Use the arrows on the screen or the “F1” and “ESC” button to scroll to the Setup-
Conveyor Adjust screen.
• Select the indicator to toggle this feature on and off.
• Place the board on the conveyor.
Figure 20: Conveyor Adjust
1. The screen displays the Target Recipe Width. If the width value is known, press the
value to manually enter the width setpoint. A keypad will be shown.
• Enter the necessary value. The metric unit range is from 50–500 mm (1.97-
19.69 in).
• Select “Save” to keep and use the new value.
2. If the width value is unknown, press the arrows to use the Auto Adjust Conveyor
Width. This will jog the conveyor in a negative or positive direction.
3. Once the target recipe width is correct, press the wrench icon to set the target
recipe width to the Current Conveyor Width.
Note: The clear board sequence will not run prior to jog.
Note: The conveyor width setpoint will not update during manual jog.
DeltaTherm IR Cure Module
Revision B / February 2020
Page 28 of 41
Rename Recipe
• Use the arrows on the screen or the “F1” and “ESC” button to scroll to the Setup-
Settings screen.
Figure 21: Setup - Rename Profile
• Use the + - Page icons or the F2 and F4 keys to scroll through the recipe names.
• You can have a maximum of 30 profiles.
• Select the name you want to change in the text box.
• The keyboard will be shown, type the new name and select enter. The new name will
be saved. Recipe names are limited to 15 characters.
DeltaTherm IR Cure Module
Revision B / February 2020
Page 29 of 41
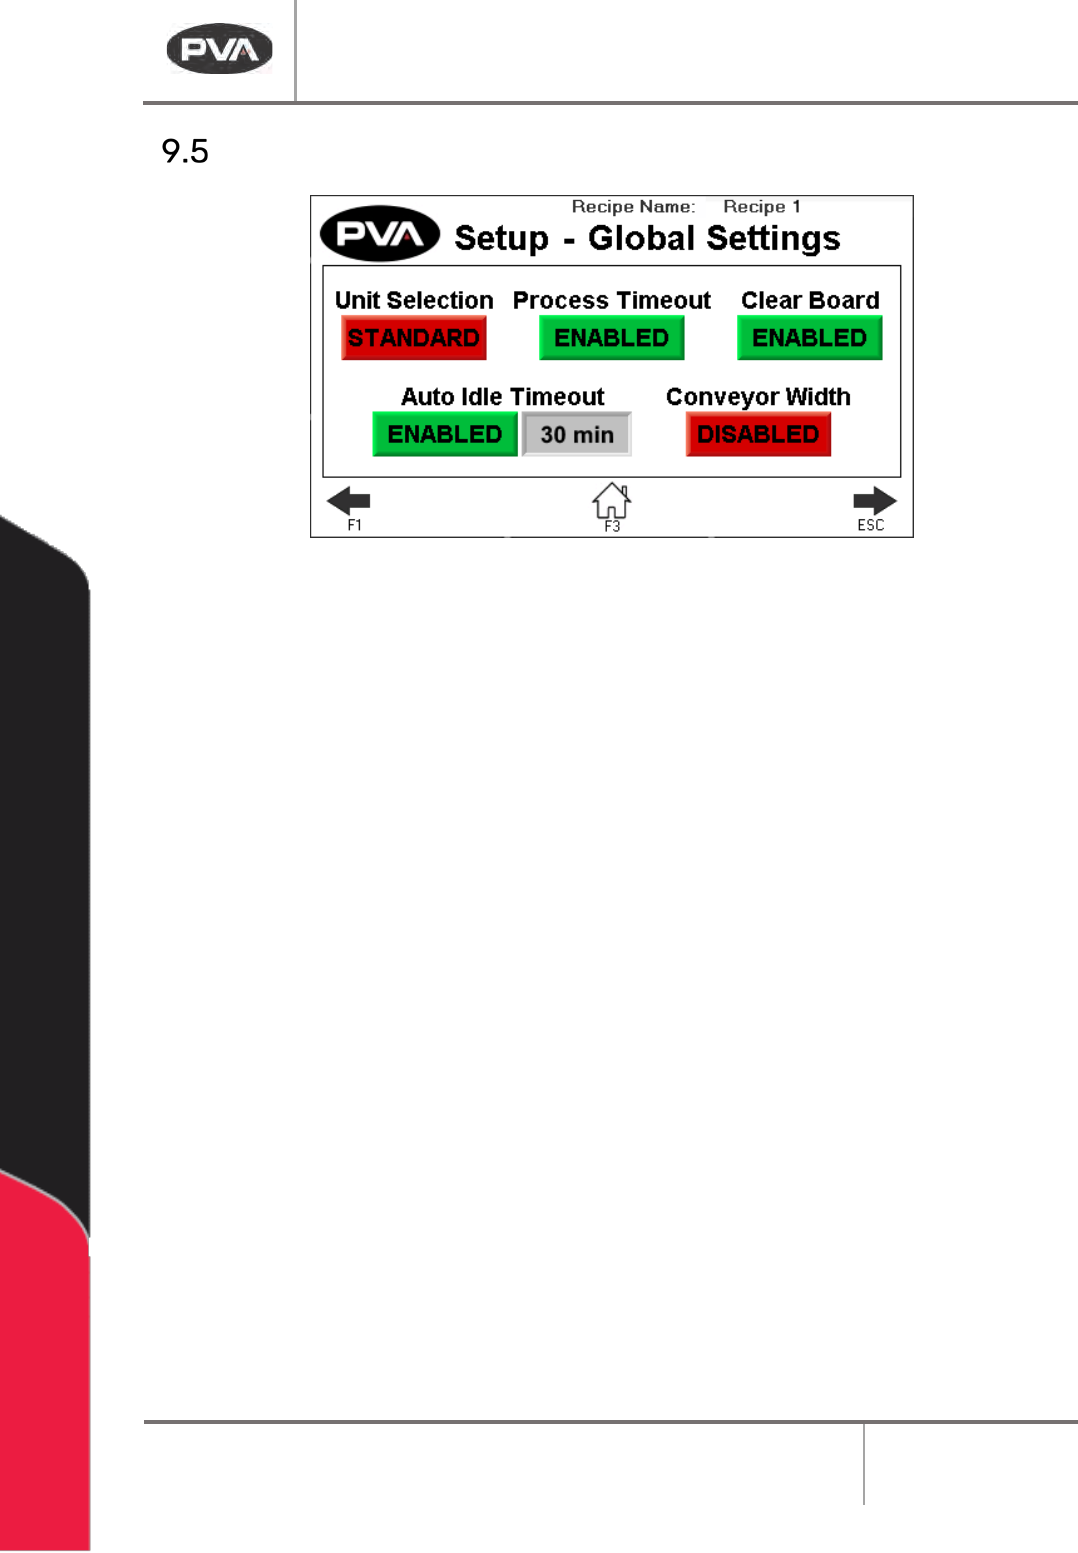
Global Settings
Figure 22: Global Settings
1. Press Unit Selection to toggle between Metric and Standard.
2. Press Process Timeout to enable or disable board process timeout in Auto Cycle.
3. Press Clear Board to enable or disable the clear board check when entering Auto
Cycle. If disabled, upon entering Auto Cycle, boards in the oven will not move
downstream until the oven is at temperature and ready to process boards.
4. Press Auto Idle Timeout to enable or disable the idle timeout in Auto Cycle. When
enabled, if no boards are being processed in the specified timeout, a silent timeout
fault will occur and the oven will exit Auto Cycle, turning the heater panels off.
5. Press Conveyor Width to enable/disable the conveyor width move to current recipe
position after homing and when entering Auto Cycle.