YSI_Prog_E.pdf - 第139页
3-16 3 Step screen 2.1.5 Light detail settings By pressing the [Light Detail] button on the luminance, color , and shape screens, the follo wing light detail settings screens are displa yed. T his section describes all i…
3-15
3
Step screen
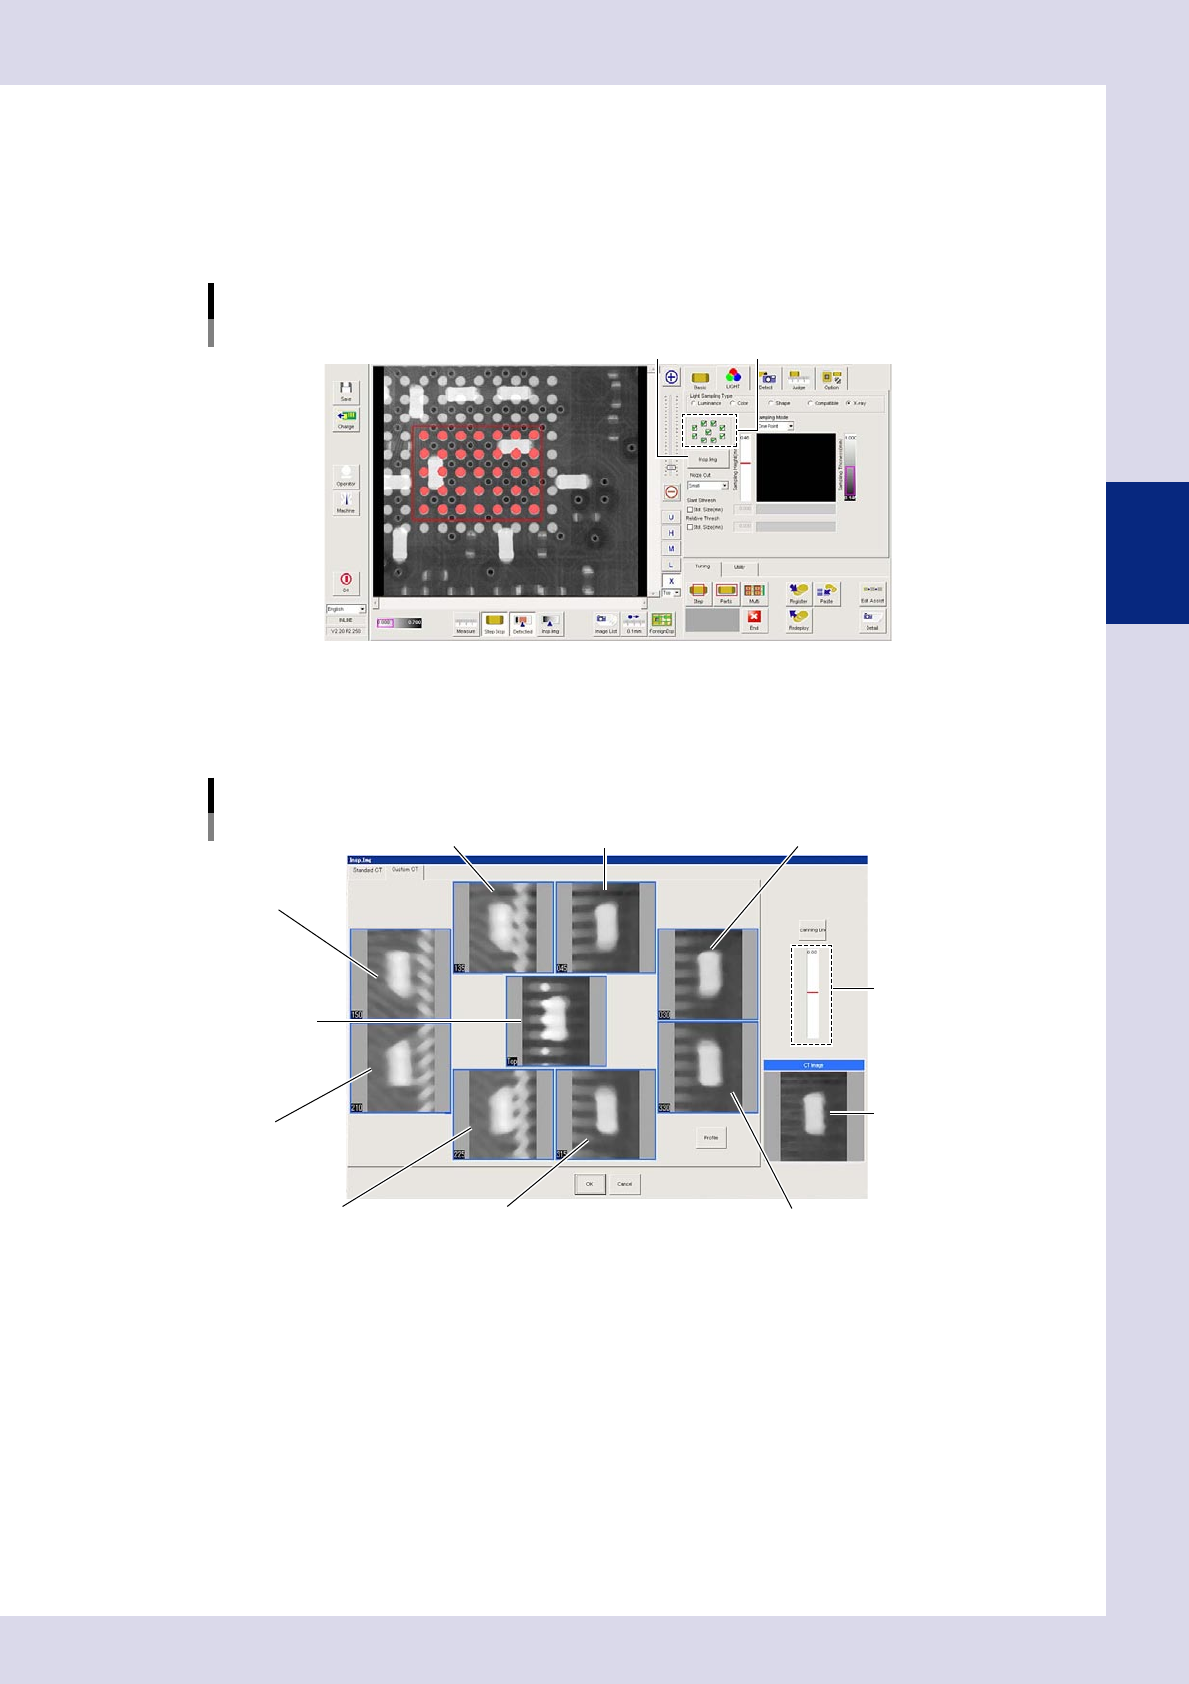
2.1.4 X-ray (YSi-X)
This is an X-ray inspection setting parameter used with the YSi-X. This parameter sets the capture direction used
for X-ray laminography image capture.
1
Select the direction to be used for inspection, and press the [Insp. Img] button.
An "Insp. Img" screen is displayed.
Light Sampling Type: X-ray screen
Select the direction used for inspection.[Insp. Img] button
24314-P6-00
2
Open the "Custom CT" tab.
A composite image is formed with the images captured from the direction selected at Step 1. This
image is displayed in the lower right, and is used for inspection.
Inspection image (Custom CT) tab
Image from 135° direction Image from 45° direction Image from 30° direction
Image from 225° direction
Image from 210°
direction
Image from 150°
direction
Image from 315° direction Image from 330° direction
Composite inspection
image
Image from directly
above
Fault plane height
setting bar
24315-P6-00
3
Set the inspection height.
1. Move the fault plane height setting bar up and down to change the inspection height.
2. Check the inspection object with the composite image.
4
Press the [OK] button to save the settings.
3-16
3
Step screen
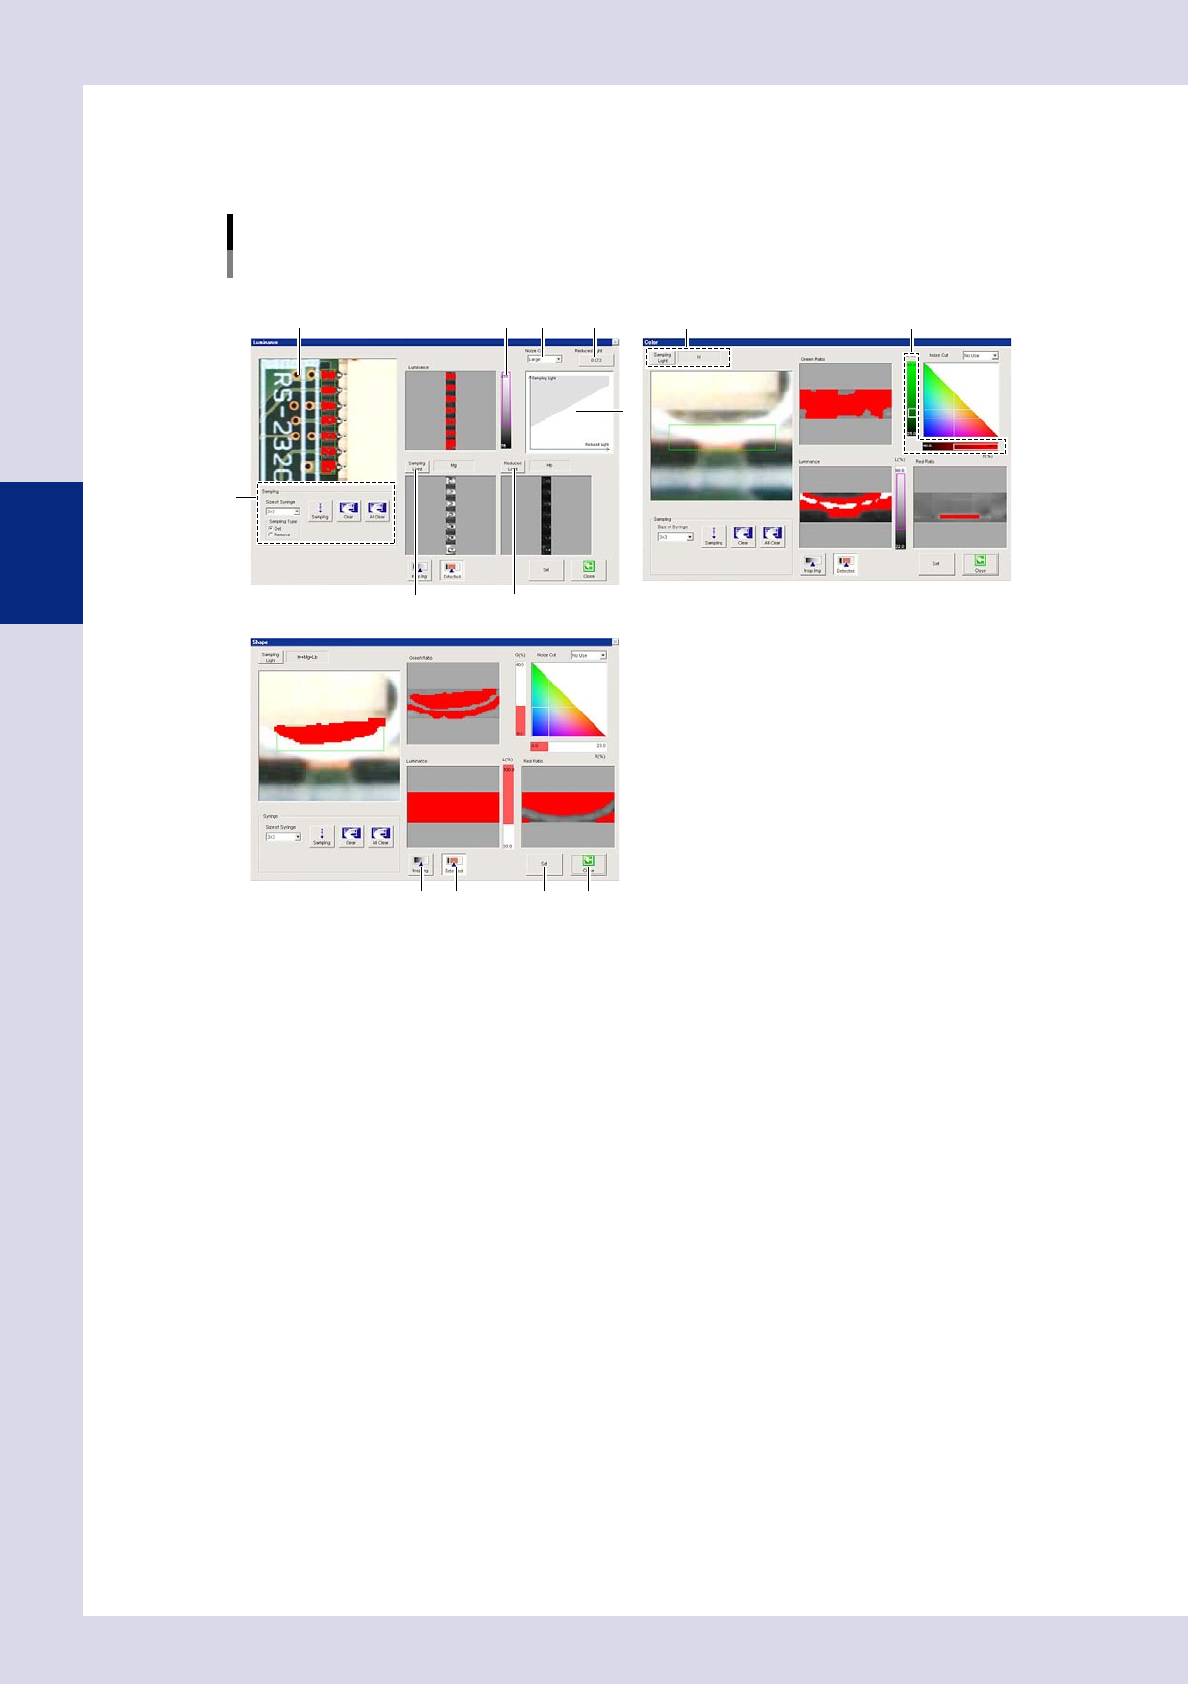
2.1.5 Light detail settings
By pressing the [Light Detail] button on the luminance, color, and shape screens, the following light detail
settings screens are displayed. This section describes all items set at these screens.
Lighting parameters
[Light Detail] button - light detail settings screens
Light Sampling Type: Luminance Light Sampling Type: Color
View image
Light Sampling Type: Shape
25
76
3
1
4
8
9
10 11 12 13
24316-P6-00
1. Sampling
Size of Syringe
Select the size of the syringe used for sampling.
Sampling Type
Sets whether to sample a detected point, or excluded point.
[Sampling] button
Press this button and click the screen to display values (luminance, color, shape) for the clicked location in a graph.
[Clear] button
Clears the last sampled data.
[All Clear] button
Clears all sampled data.
2. Noise Cut
Selects the size for cutting the influence of noise.
3. Reduced Light
Sets the reduced light magnification selected when processing image calculations. By pressing this button, a dialog box
appears, allowing an arbitrary value to be entered for the reduced light magnification.
4. Threshold value range
The position for the luminance level displayed in gray is shown in red when the [Detected] button is pressed. If reduced
light is set, the reduced light magnification is adjusted by dragging the gray area.
5. Threshold slide bar
Adjust the threshold by dragging with the mouse.

3-17
3
Step screen
6. [Sampling Light] button (luminance, color, shape)
Sets the sampling light. By pressing the [Sampling Light] button, a sampling light type dialog box appears. Select an
image from the image list in which the area to be inspected appears white to set. Up to two images can be selected.
Luminance : The image is selected from ten types, including H RGB, M RGB, L RGB, and Uir (infrared).
Color : The image is selected from three types: H, M, L.
Shape : The image is selected from four types: Hr+Mg+Lb, Hb+Mg+Lr, Hb+Mr+Lg, Hr+Mg+Lb Ver2
Hr+Mg+Lb Ver2 should normally be selected.
7. [Reduced Light] button (luminance)
Sets the reduced light. (Reduced light does not have to be selected.) If setting reduced light, a sampling light type dialog
box appears when the button is pressed. Select an image from the image list in which the area to be reduced appears
white.
Luminance : The image is selected from ten types, including H RGB, M RGB, L RGB, and Uir (infrared).
8. Threshold slide bar
Adjust the threshold by dragging with the mouse.
9. [Insp. Img] button
The inside of the step in the upper left image is displayed with the inspected image.
10
. [Detected] button
Displays the detected area in red.
11
. [Set] button
Sets the content set here.
12
. [Close] button
Closes the "Luminance" screen without saving settings.