YSI_Prog_E.pdf - 第144页
3-21 3 Step screen 2.2.2 Editing registered characters When registering user char acters, characters that ha ve already been registered can be edited and then registered in a template. T he procedure is as follows. 1 Sel…
3-20
3
Step screen
7
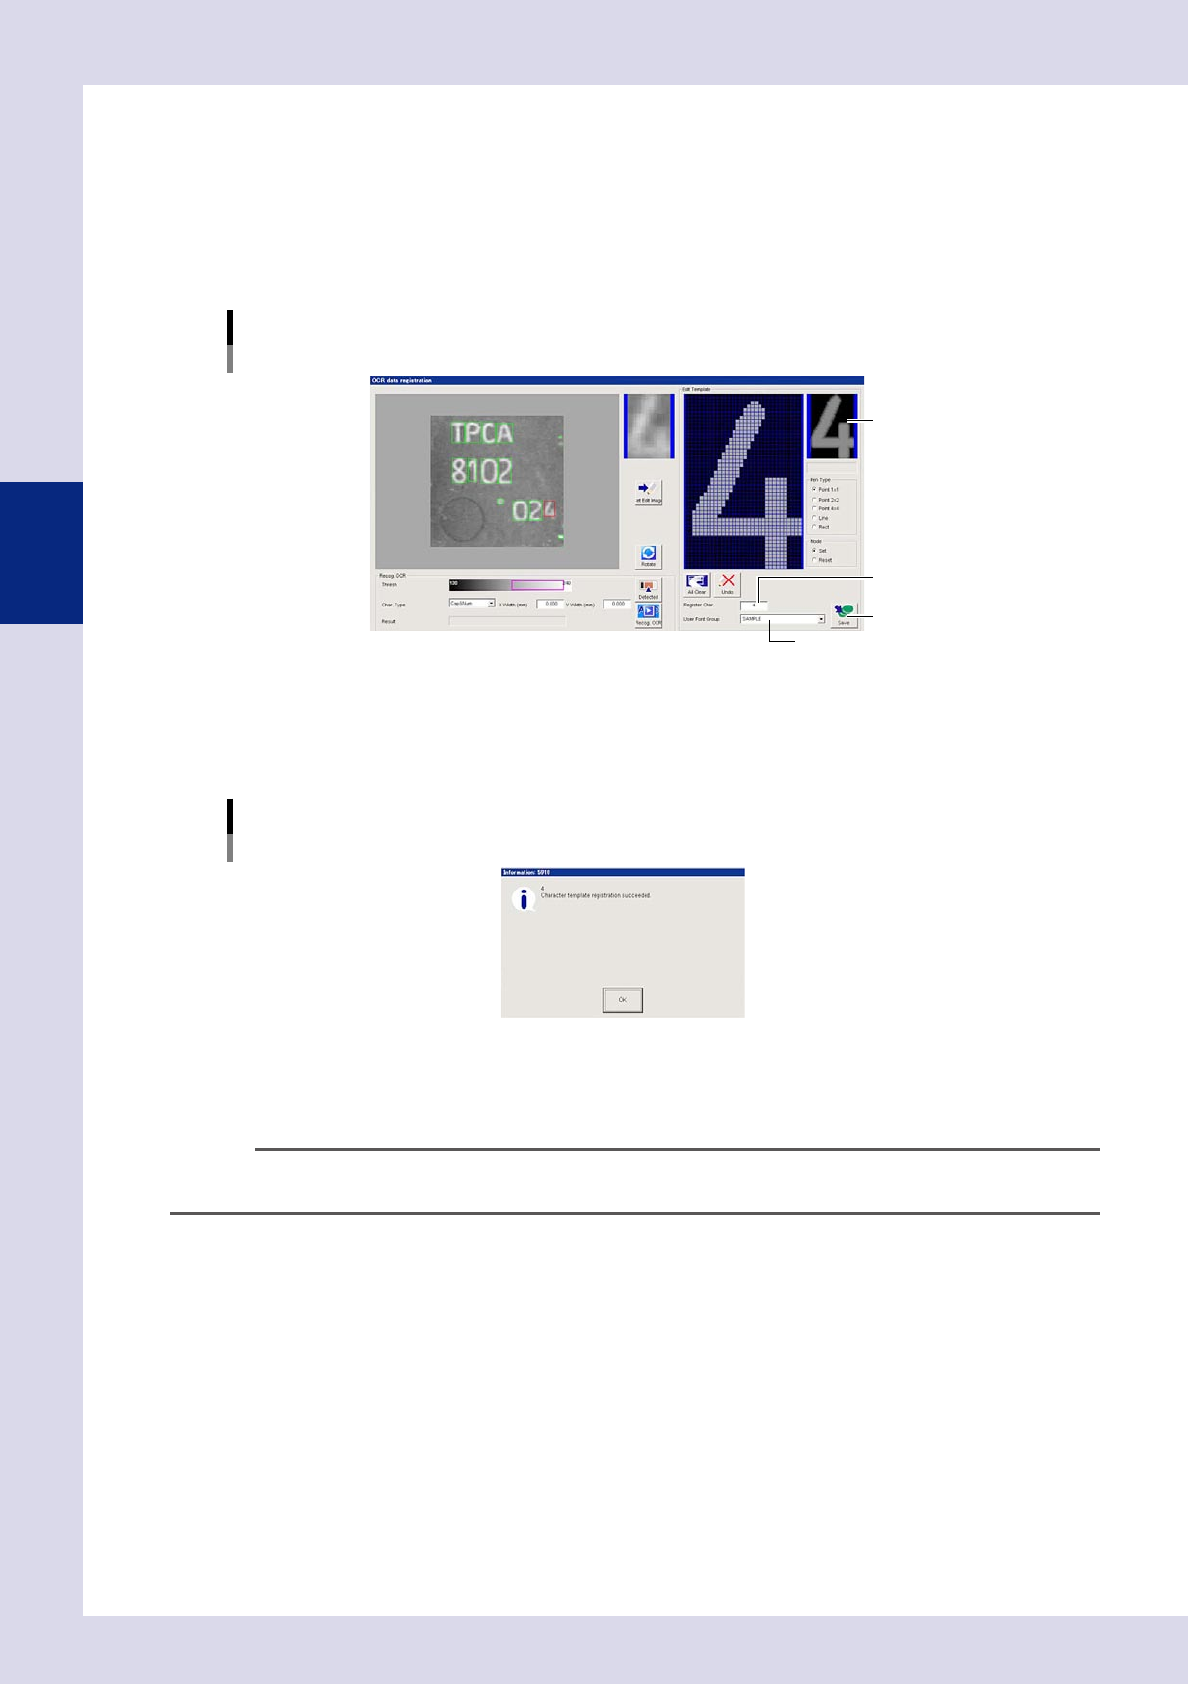
Register the corrected image.
1. Enter the character to be registeredin "Register Char." The characters that can be registered are as
follows.
Alphabet characters: A to Z
Numeric characters: 1 to 9
2. Specify the "User Font Group". If adding to a group that has also been registered, select from the
drop-down list. If registering a new group, enter the group name directly.
"OCR data registration" screen
Character registration
Enter the character to be registered.
Specify the group to be registered.
Display the image to be registered.
[Save] button
24322-P6-00
3. Check the image to be registered, and press the [Save] button. If registering a new group, a
confirmation dialog box appears. Follow the instructions provided. The following message appears
when registration is complete. Press the [OK] button to close the dialog box and return to the
original screen.
"OCR data registration" screen
Registration complete message
24323-P6-00
8
Press the button area [Save] button.
The image is saved to a user template.
n
NOTE
If registering a library for a part containing step data (character recognition) using a user template, the user template
is also registered in the library.
3-21
3
Step screen
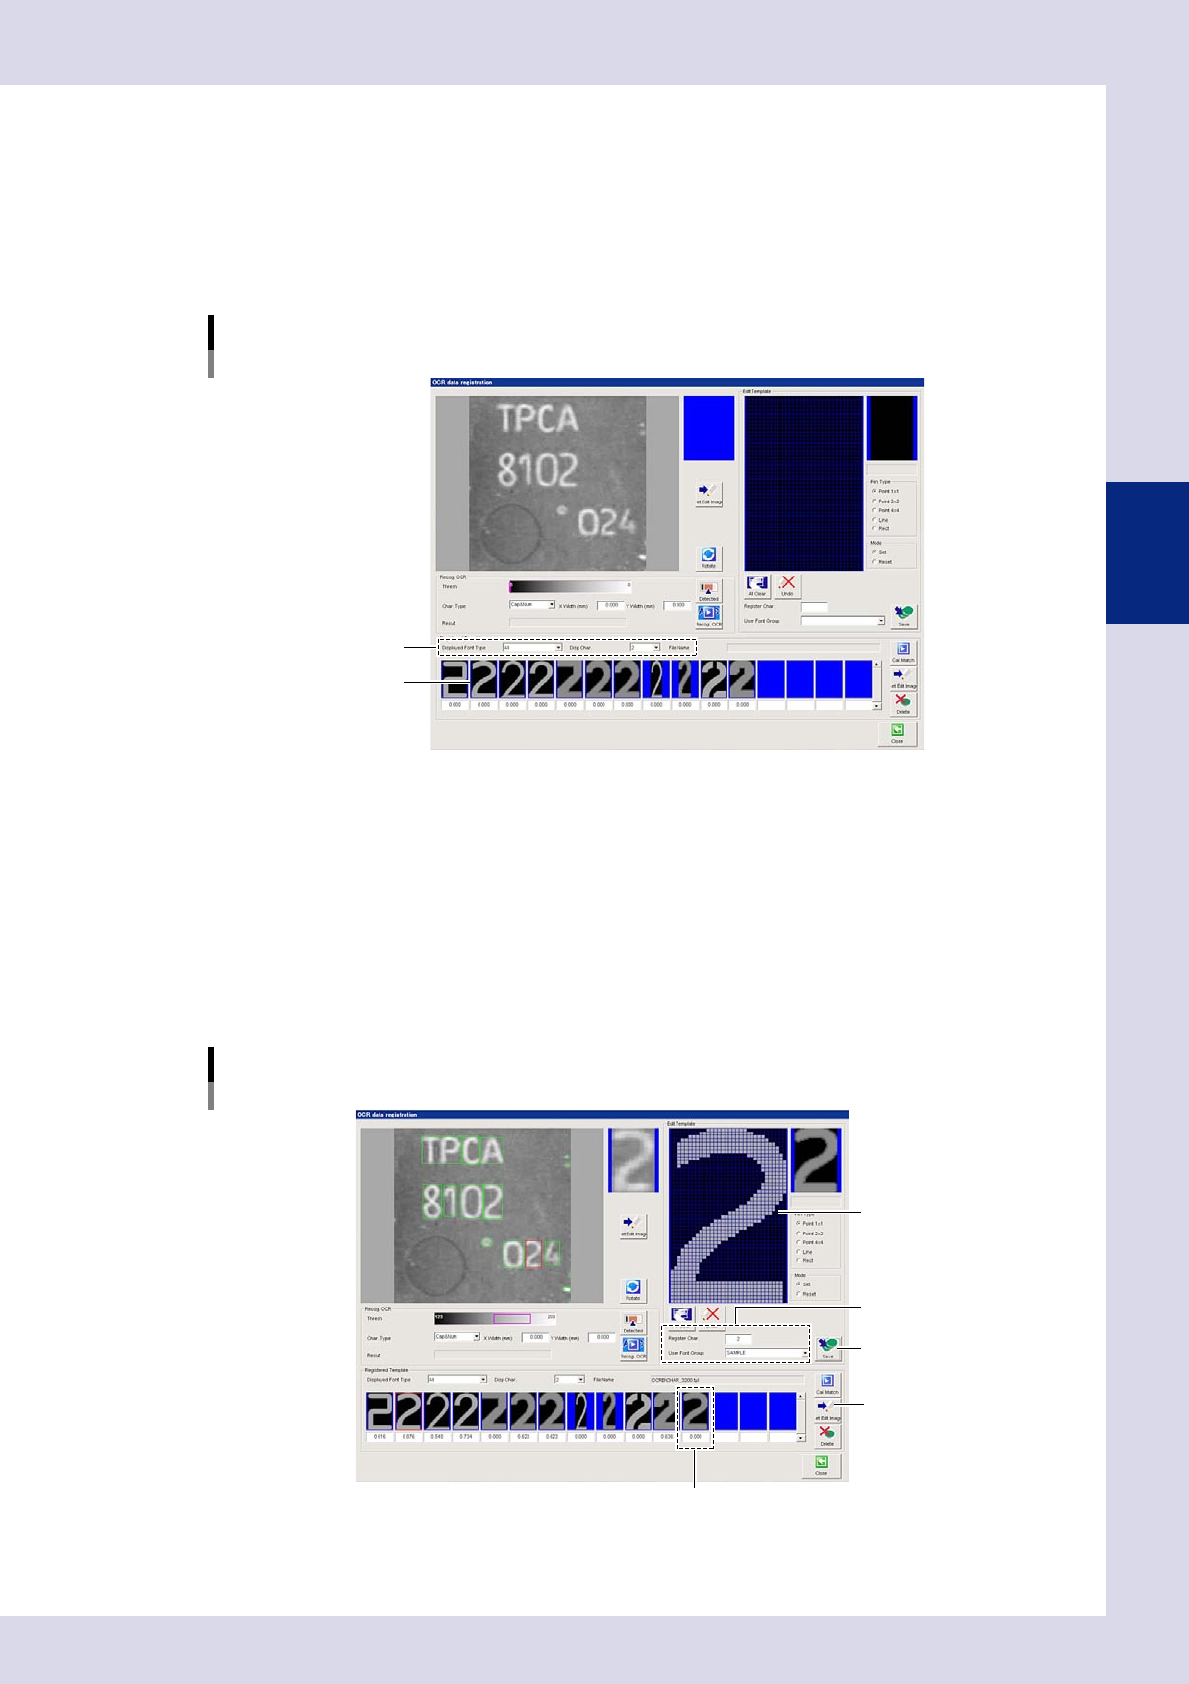
2.2.2 Editing registered characters
When registering user characters, characters that have already been registered can be edited and then
registered in a template. The procedure is as follows.
1
Select the character to be edited.
1. Select "All" for the "Displayed Font Type", and select the character to be edited at "Disp Char."
2. Select the character to be edited from the font list.
"OCR data registration" screen
Select the character to be edited.
Select the displayed font type
and display character.
Select the font.
24325-P6-00
2
Press the [Set Edit Image] button.
The selected character is displayed in the "Edit Template" screen.
3
Edit the image.
Select the pen type and mode to edit the image.
4
Register the character.
When editing is complete, set the character to be registered and the user font group, and then press
the [Save] button. When registration is complete, the character is displayed in the registered template
character list.
"OCR data registration" screen
Registered image editing
[Save] button
Display the registered character.
Correct the image.
Set the image to be
registered and group.
[Set Edit Image] button
24326-P6-00
3-22
3
Step screen
n
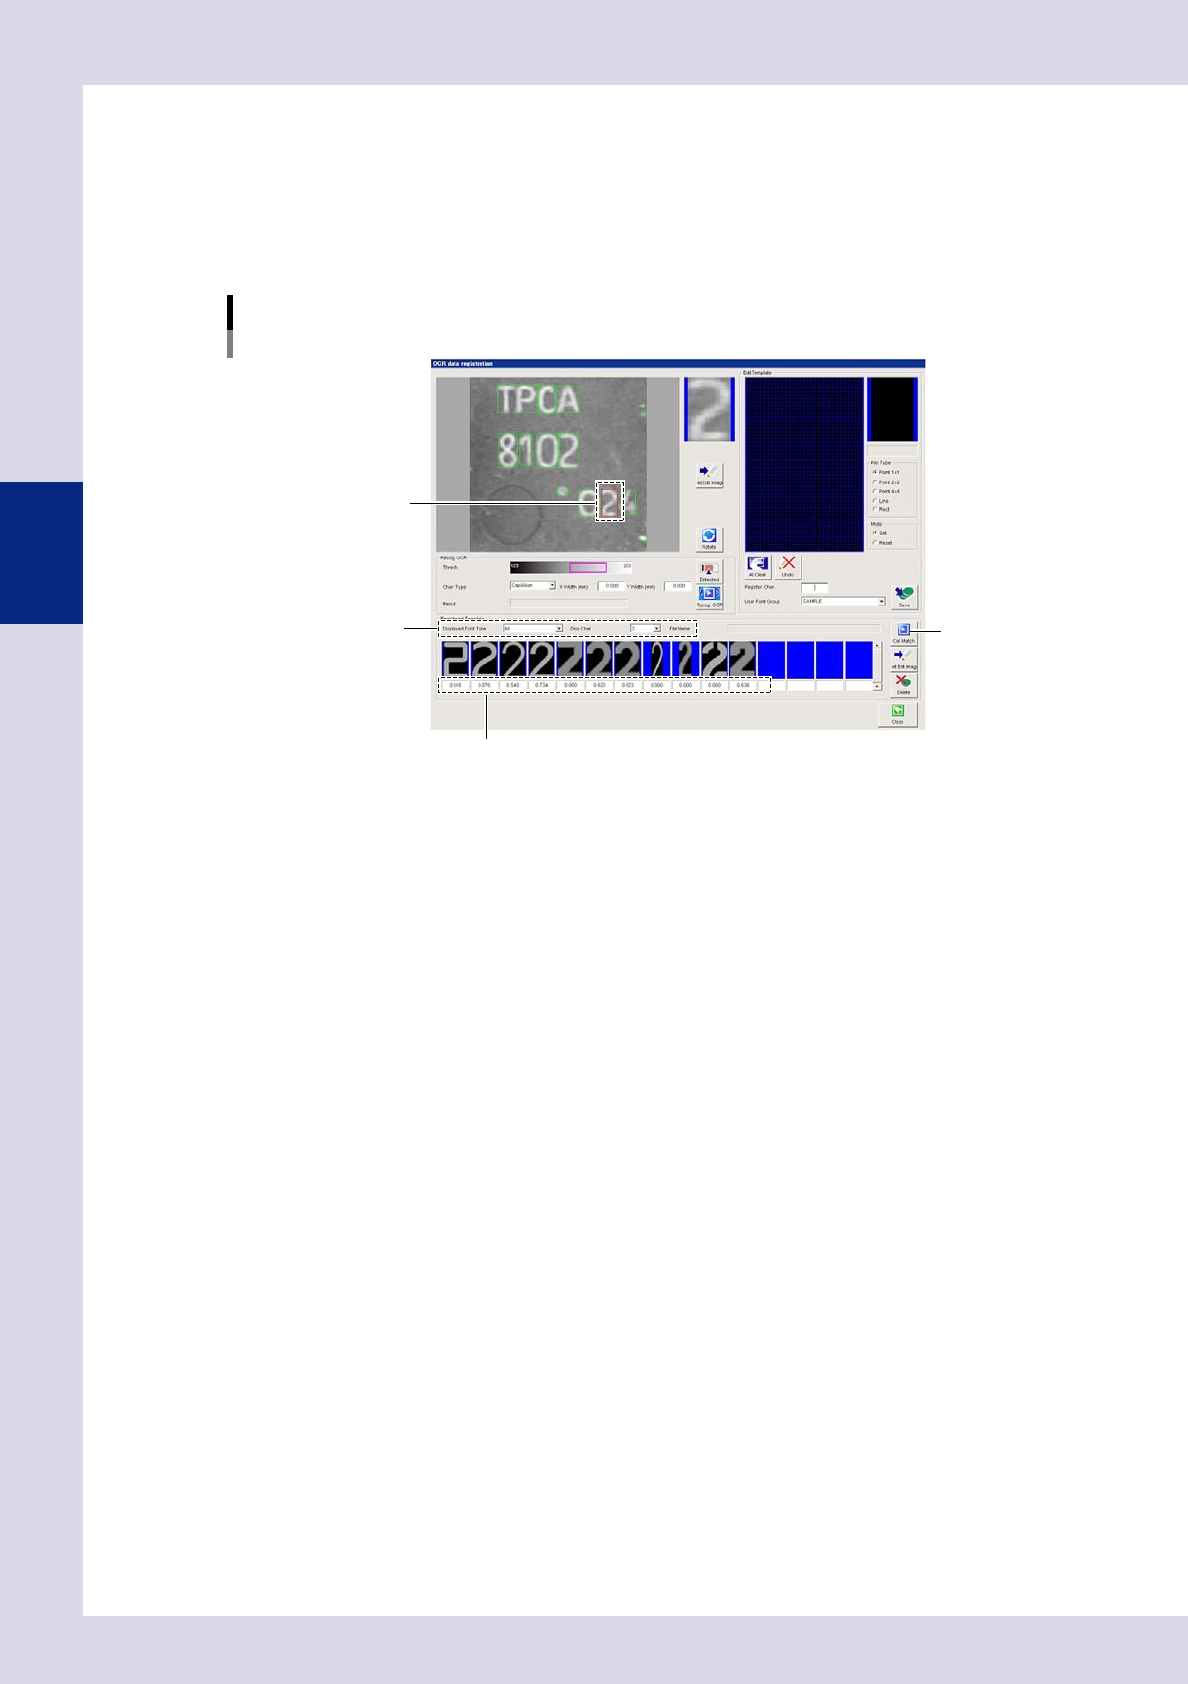
Registered character matching
This section describes the procedure for checking how well the selected character matches the registered character.
1. Adjust the threshold value and perform character recognition.
2. Select the character to check for a match.
3. By pressing the [Cal. Match] button, the match between the character to be checked and the registered character is
displayed.
"OCR data registration" screen
Match check
[Cal. Match] button
Displays the match.
Select the displayed font
type and display character.
Select the character.
24324-P6-00