User Manual - SIPLACE Glue Feedeer.pdf - 第30页
3 Initial Operation 3.5 Predosing the Glue Feeder 30 User Manual SIPLACE Glue Feeder 05/2020 3.5 Predosing the Glue Feeder The aim of this task is to distribute the glue in the feed pipe, jet block and dispenser nozzle o…
3 Initial Operation
3.4 Connecting the Glue Feeder to the Compressed Air Supply
User Manual SIPLACE Glue Feeder 05/2020 29
3.4 Connecting the Glue Feeder to the Compressed Air
Supply
NOTICE
Connection to compressed air supply already present?
If the machine does not yet have a connection to the compressed air supply, you will need
to fit this first. You will find a retrofit description in the appropriate retrofit kit for your
machine.
The external compressed air supply is linked to the Glue Feeder using a quick-change coupling.
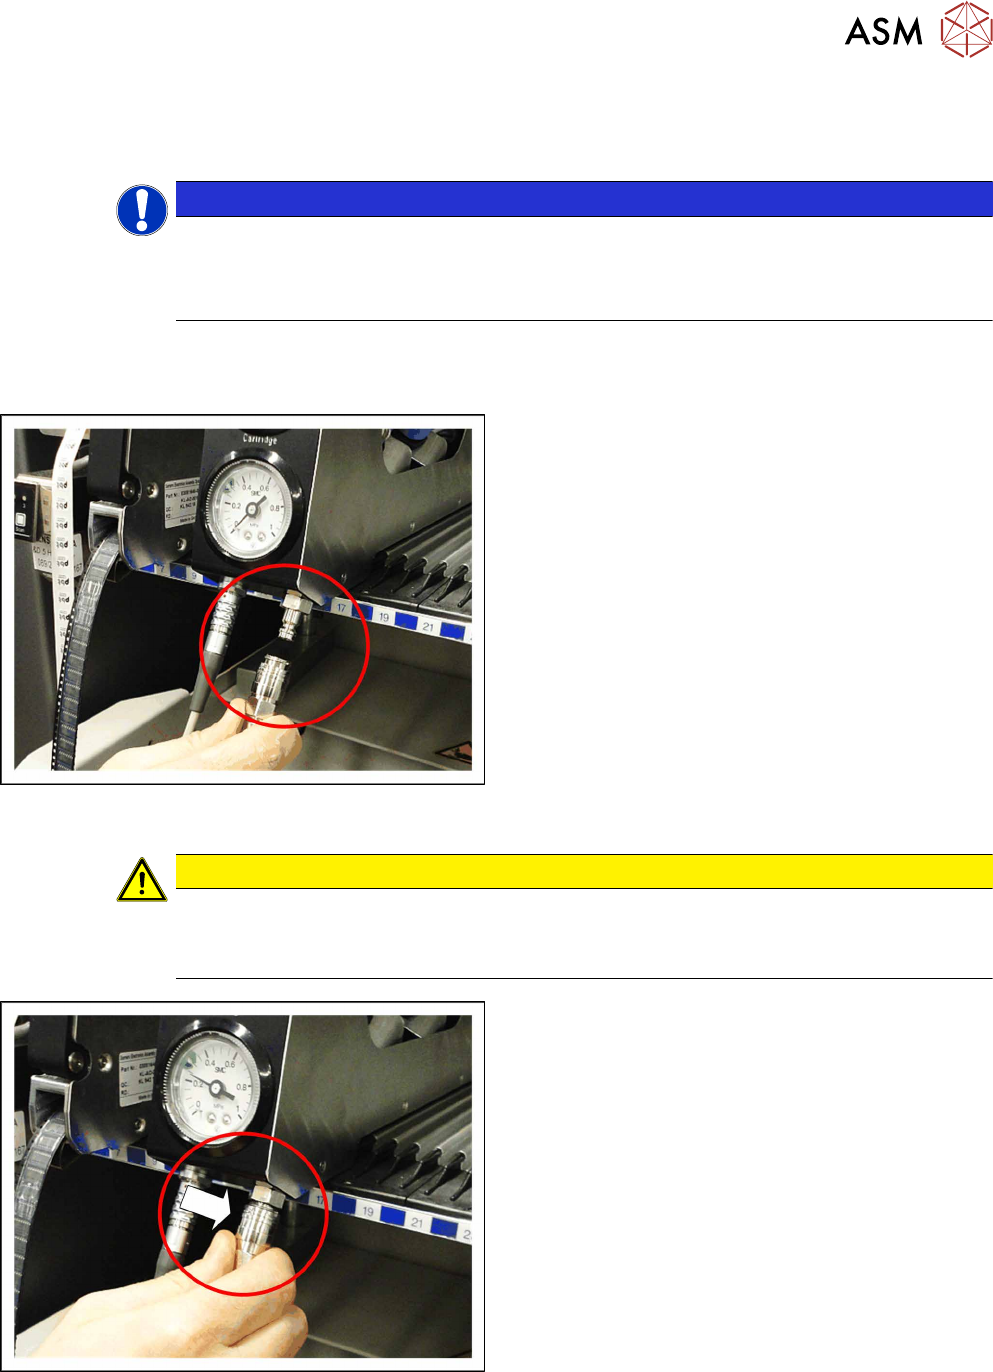
Connecting the compressed air supply
► Connect the quick-change coupling for the com-
pressed air supply to the connection shown in the
diagram.
Disconnecting the compressed air supply
CAUTION
Risk of injury from compressed air
Risk of injury when disconnecting the compressed air lines.
► Never disconnect the compressed air supply while it is still pressurized.
► To disconnect the Glue Feeder from the com-
pressed air supply, grip the safety ring on the
quick-change coupling, as shown in the diagram,
and pull the coupling down and off.
3 Initial Operation
3.5 Predosing the Glue Feeder
30 User Manual SIPLACE Glue Feeder 05/2020
3.5 Predosing the Glue Feeder
The aim of this task is to distribute the glue in the feed pipe, jet block and dispenser nozzle on
setup or after cleaning and to also make sure that there is no air left in these parts.
NOTICE
Pressure set?
Before you begin with the predosing, check that the pressure at the cartridge and at the jet
valve has been correctly set (see section 2.2.5
"Overview of Glues" [}16] and section4.3.1
"Setting the Pressure Reducer" [}63]).
Also observe the Technical Information TI2015-05E11 "Maintenance and production pre-
paration tips for the Glue Feeder".
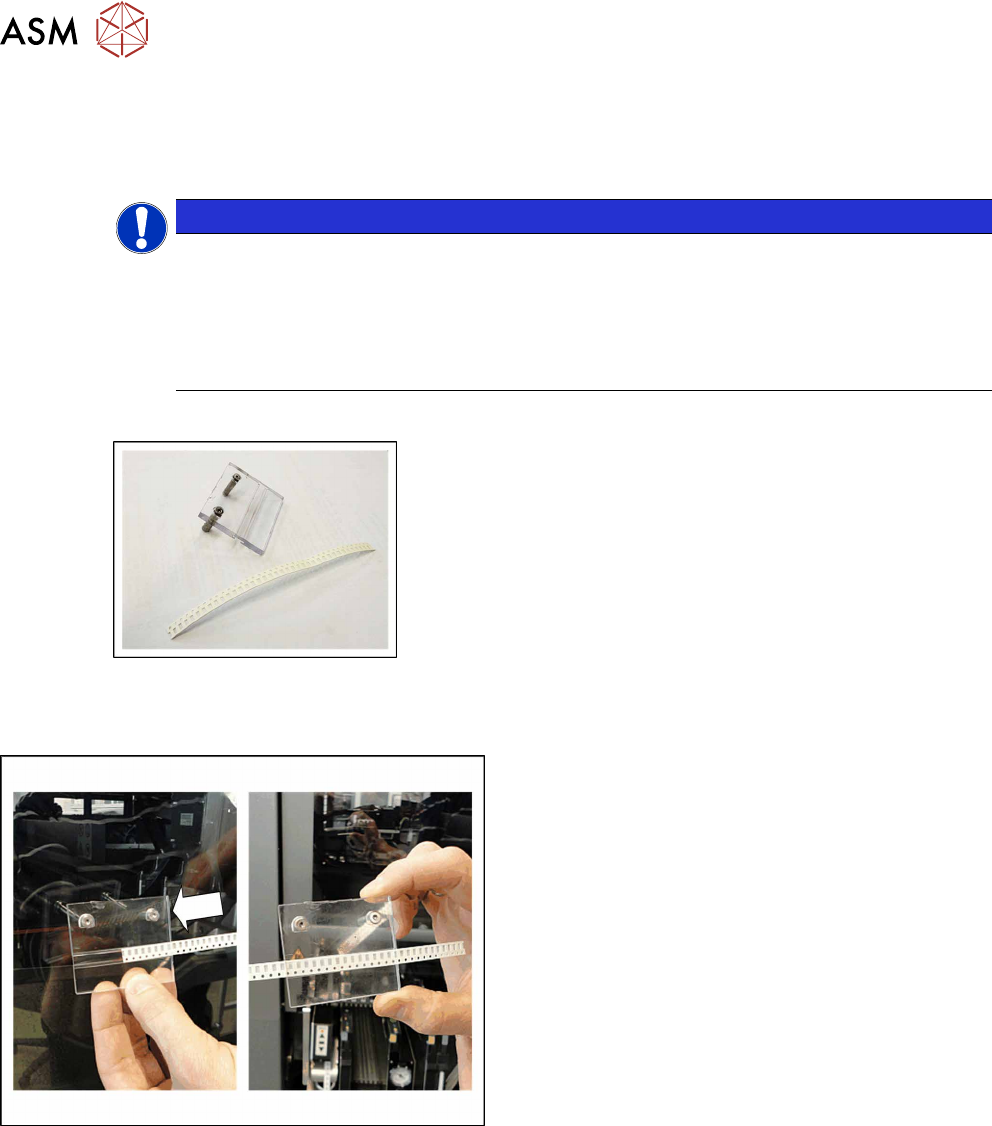
Equipment required
●
Safety cover
(The new version of the safety cover is made of black metal)
●
8mm paper tape
► Push the paper tape into the safety cover as
shown in the diagram.
► Open the machine hood.
► Push the gantry back.
3 Initial Operation
3.5 Predosing the Glue Feeder
User Manual SIPLACE Glue Feeder 05/2020 31
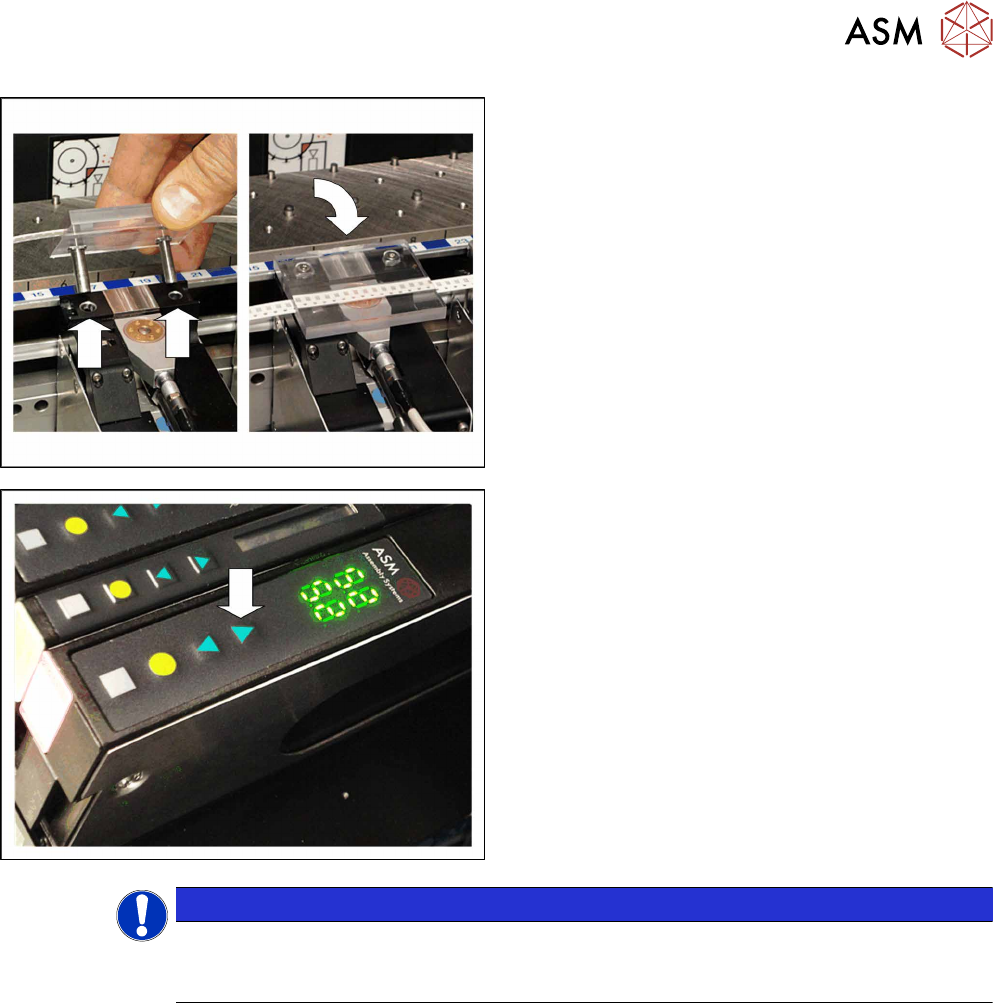
► Position the safety cover over the dispenser
nozzle of the Glue Feeder, as shown in the dia-
gram.
This automatically activates the nozzle heating.
► After reaching the set nominal temperature, the
Glue Feeder will start a waiting period of
25seconds, to ensure that the glue in the jet
block has been fully warmed through. During the
waiting period, the display will flash the current
temperature.
Predosing is only possible after this waiting
period.
► Press the front arrow button to release a glue dot
(shot of glue).
Short press = 1 drop
Long press = 20 drops
Normally 3x20 drops are sufficient.
► Remove the safety cover and check the glue dot.
NOTICE
Actual temperature does not change?
If the displayed actual temperature does not change, check whether the safety cover has
been correctly fitted.
The glue dot should be round and with no satellite formation. If it is not, move the paper tape in the
safety cover and repeat the procedure.
If the result is in the required range, you can use the component shape teach mode to pick up a
component, apply glue to it and check it with SIPLACE Vision. If all the settings are correct, test the
placement program on a test board.
To check whether the volume of glue applied is enough or to make sure that it is not too large, you
can carefully lift the glued components off the test board with a pair of tweezers. If the glue coating
on the board is as you expected, you can start production operations.
If you want to use the glue at the same time as solder paste, the test board should also have solder
paste applied to it. This is the only way to check whether the height of the glue dot is enough to
coat the board.