PR8111、PR8112_user_manual_eng_20191015H.pdf - 第18页
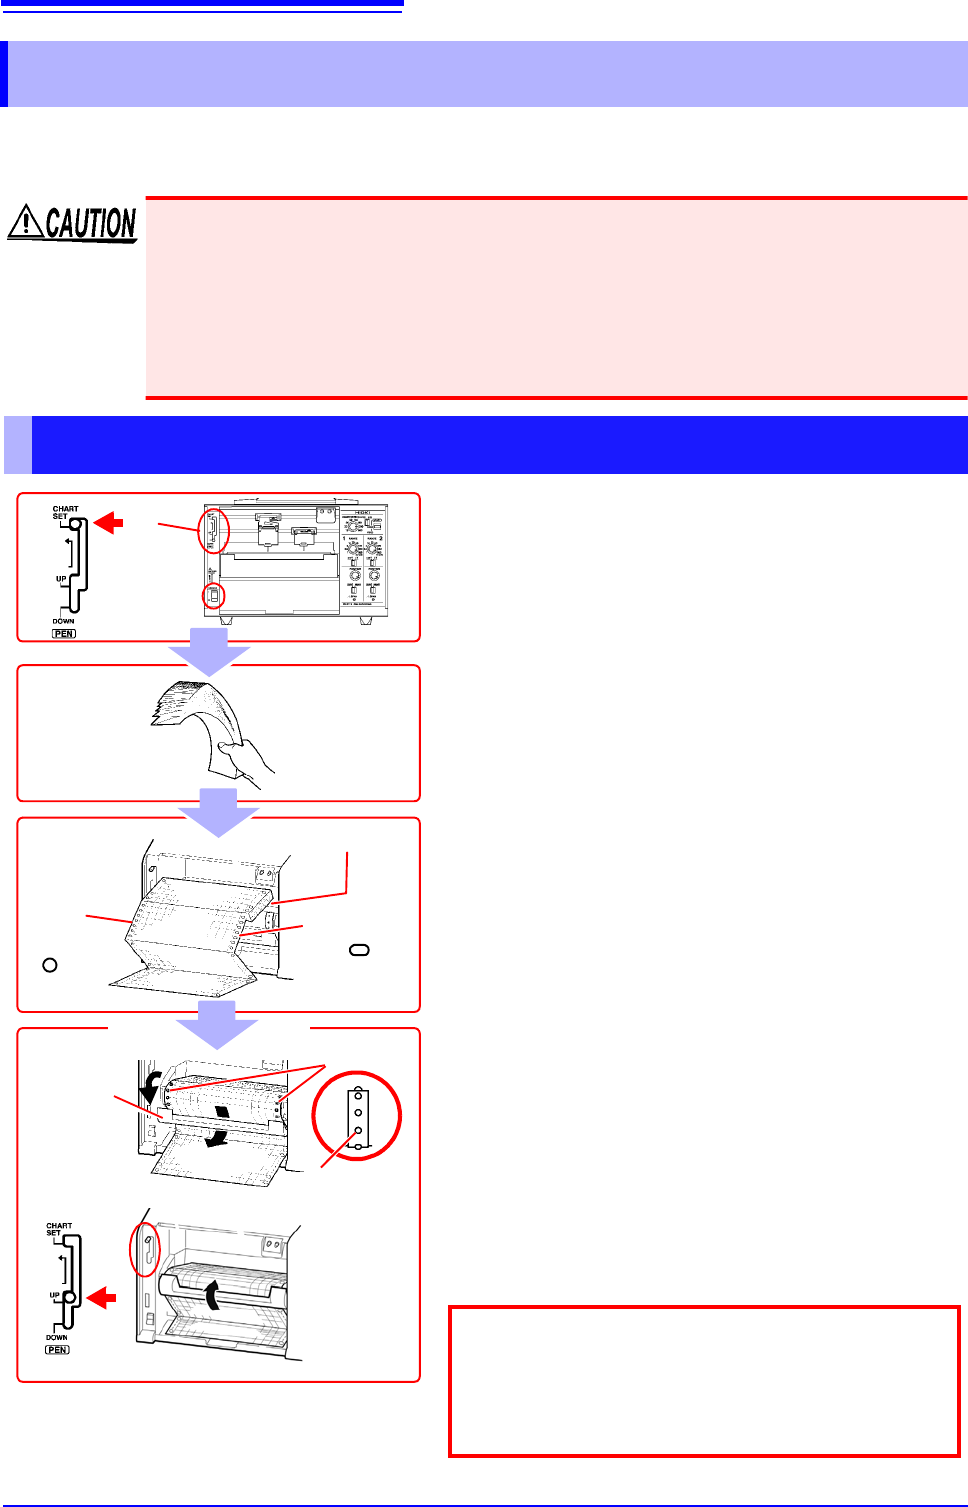
2.2 Loading Recording Paper 15 1 Loadin g Roll Recor ding Paper 2 Pen lev er 1 Round hol es Chart ho lder Oval hol es 3 1 T urn on the POWER switch. 2 Set the pen lever to the CHART SET (top) position and lock the lever …
2.2 Loading Recording Paper
14
You can use either fanfold or roll type recording paper in the instrument.
See: "Options" (p. 2)
2.2 Loading Recording Paper
• Please use only the specified recording paper. Using non-specified paper may not only
result in faulty printing, but printing may become impossible.
• If not loaded properly, recording paper may jam.
• Do not use wet recording paper. Doing so may damage the instrument.
• Do not reuse recording paper. Doing so may prevent the paper from feeding properly.
• Store recording paper at room temperature, taking care to avoid high temperatures and
humidity. Avoid moisture (rain or condensation).
Loading Fanfold Recording Paper
1 Turn on the POWER switch.
2 Set the pen lever to the CHART SET (top)
position and lock the lever in place by moving
it to the left.
The platen will be raised, and the pens will automat-
ically move to the far right.
3 Hold and shake the recording paper by the
edge to separate the sheets.
4 Load the recording paper into the chart holder
with the round holes on the left and the oval
holes on the right.
(Load so that the side of the paper with the red
marks along the edge is on the bottom.)
5 Open the chart cover, pass the top of the
recording paper through the opening, and pull
the top edge through.
6 Align the paper so that the sprockets engage
the round holes on its left edge.
7 In the same way, align the paper so that the
sprockets engage the oval holes on its right edge.
8 Close the chart cover.
9 Set the pen lever to the UP (middle) position.
The platen will be lowered.
Round
holes
Chart holder
Chart cover
Oval holes
3
4
6,7
Sprockets
2
Pen lever
5
8
Lower the START/STOP/FEED switch to the FEED
position to feed the paper and verify that it has been
properly loaded. You can press and hold the switch in
the FEED position for at least 2 seconds to increase
the feed speed.
9
1
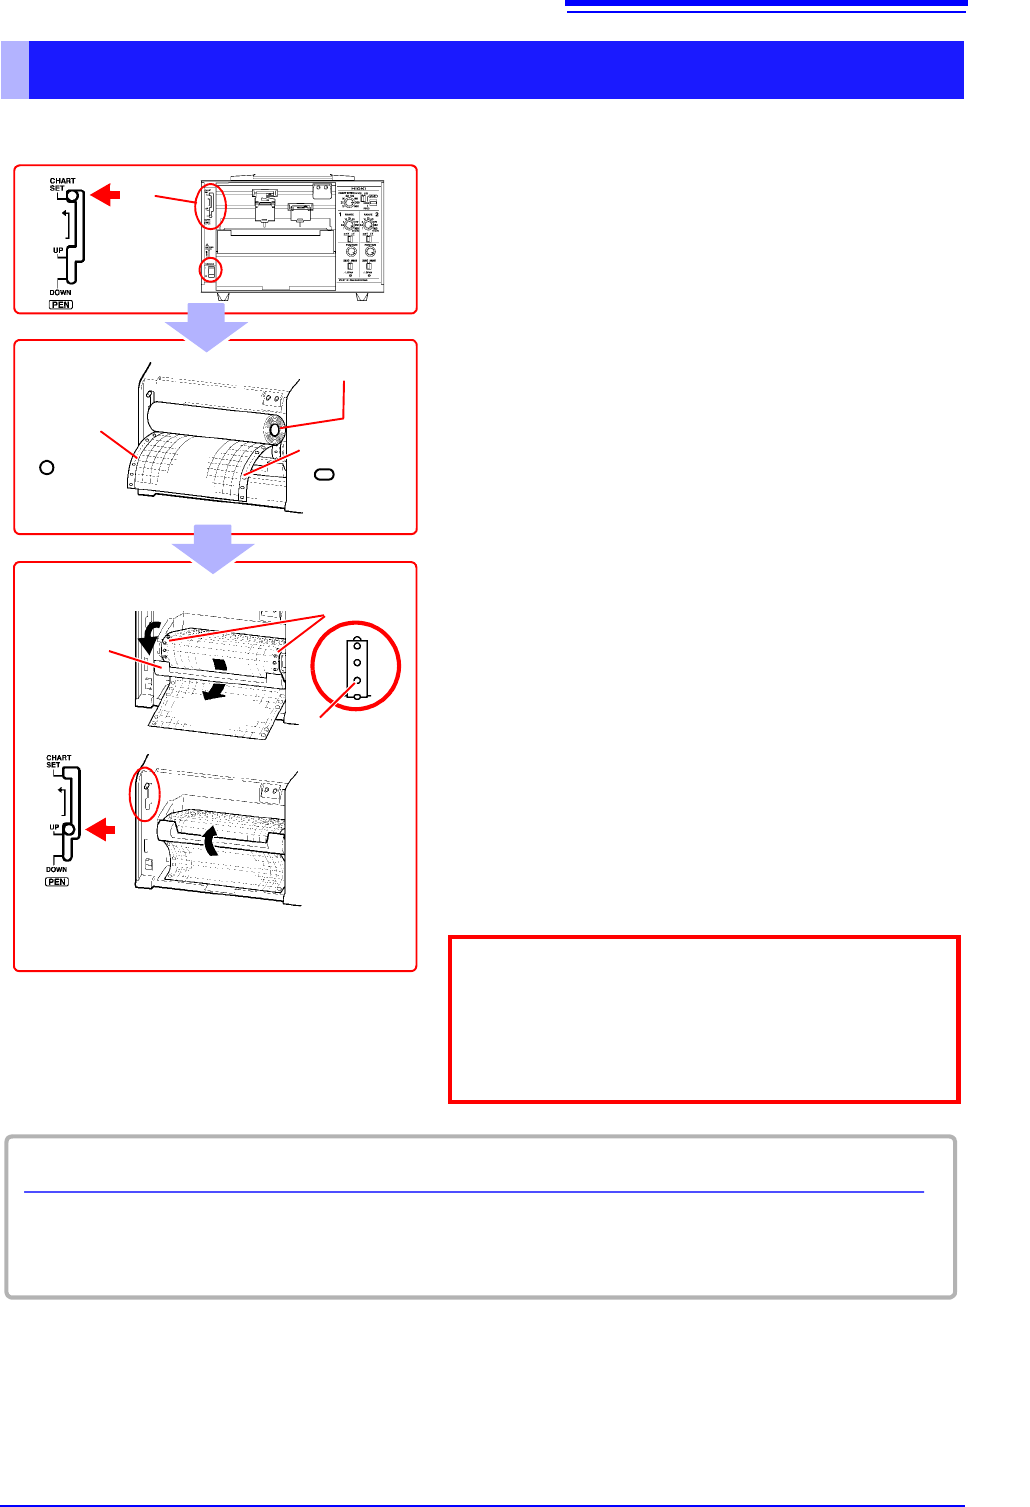
2.2 Loading Recording Paper
15
1
Loading Roll Recording Paper
2
Pen lever
1
Round
holes
Chart holder
Oval holes
3
1 Turn on the POWER switch.
2 Set the pen lever to the CHART SET (top)
position and lock the lever in place by moving
it to the left.
The platen will be raised, and the pens will auto-
matically move to the far right.
3 Load the recording paper into the chart holder
with the round holes on the left and the oval
holes on the right.
4 Open the chart cover, pass the top of the
recording paper through the opening, and pull
the top edge through.
5 Align the paper so that the sprockets engage
the round holes on its left edge.
6 In the same way, align the paper so that the
sprockets engage the oval holes on its right
edge.
7 Close the chart cover.
8 Set the pen lever to the UP (middle) position.
The platen will be lowered.
Chart cover
5,6
Sprockets
4
7
Lower the START/STOP/FEED switch to the FEED
position to feed the paper and verify that it has been
properly loaded. You can press and hold the switch in
the FEED position for at least 2 seconds to increase
the feed speed.
8
Remaining recording paper
The amount of recording paper remaining (in cm) is indicated on the left edge of the paper.
Red marks will appear on the right side of the paper when there is only about 100 cm of paper left.
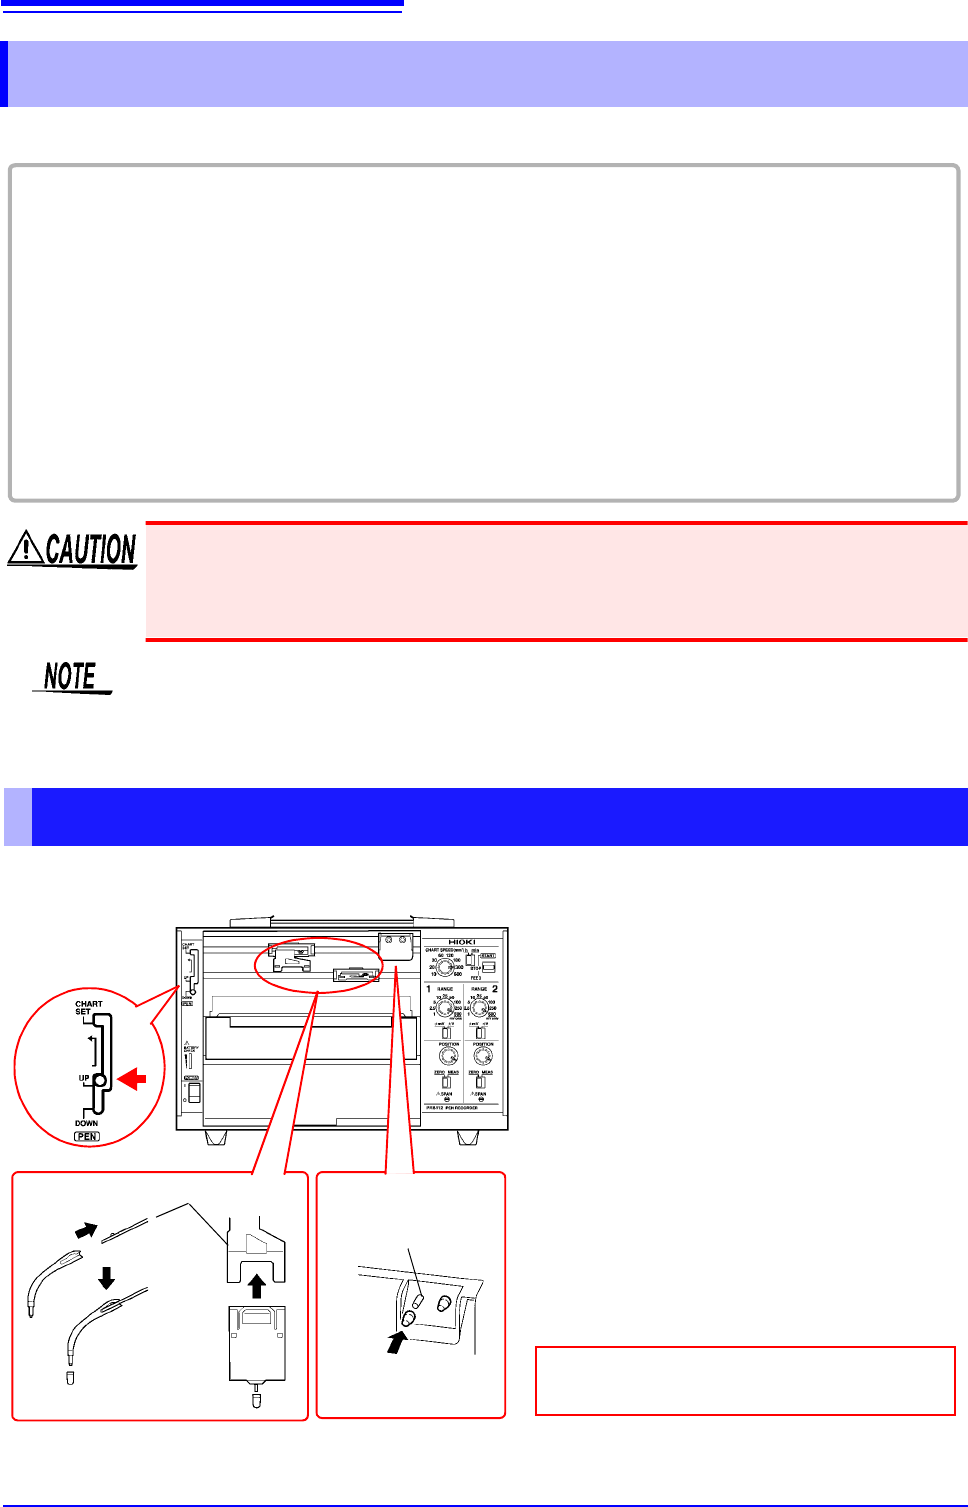
2.3 Installing the Pens
16
Use only genuine HIOKI P-1200 series felt pens in the instrument.
2.3 Installing the Pens
Colors: P-1201 (red), P-1202 (green), P1203 (blue)
The letters A through C are appended to the above part numbers depending on the pen type (speed).
(A: standard; B: high-speed; C: low-speed)
See: "Options" (p. 2)
The P-1201A and P-1202A (PR8112 only) pens that ship with the instrument are the standard “A” type.
Use these pens for general recording work.
• If you need to record at a low paper feed speed of 120 mm/h or less…
Use “C” low-speed type pens (P-1201C, etc.) for less running.
• If you need to record at a high speed or want the waveform to dry more quickly…
Use “B” high-speed type pens (P-1201B, etc.).
• Be sure to stop pen operation before attempting to install or replace pens. Do not apply
excessive force to the pens during recording. Doing so may damage the instrument.
• After use, recap each pen. Leaving the pens uncovered may cause the pen tip to dry out,
making it impossible to record waveforms.
• Once a pen has run out of ink, developed a thick tip, or grown too short, it cannot be used
anymore. Replace it with a new pen.
• Store unused pens at room temperature, avoiding high temperature and humidity.
• Dispose of used pens in accordance with local regulations.
Installing Pens and Using the Pen Caps
1 Set the pen lever to the UP (middle)
position.
The pens will be raised from the recording
paper.
2 Firmly insert the pen as far as it will go
into the pen holder.
Verify that the pen has been inserted as
far as it will go.
3 Remove the pen cap and place it on
the pen cap storage pin.
Pull the cap toward you away from the
pen to remove it.
Pen lever
Pen holder
Pen cap storage
pins
1
2
Return the pen caps to the pen tips after
use to keep the pens from drying out.
For the PR881 (2-pen model), the forward (upper) pen holder is CH1, and the rearward (lower) pen holder is
CH2.
3
Viewed from side