PR8111、PR8112_user_manual_eng_20191015H.pdf - 第25页
2.8 Attaching the Drip-proof Vinyl Cover 22 The drip-proo f cover can keep the instru ment and recording p aper from getting wet when using the device in light rain or locati ons such as tunnels where dri pping water is …
2.7 Attaching and Detaching the Front Cover
21
1
You can keep wind, dust, and other foreign matter out of the instrument by attaching the front cover,
which also prevents recording paper from becoming entangled. The cover also protects the mea-
surement hardware when the instrument is being shipped or transported.
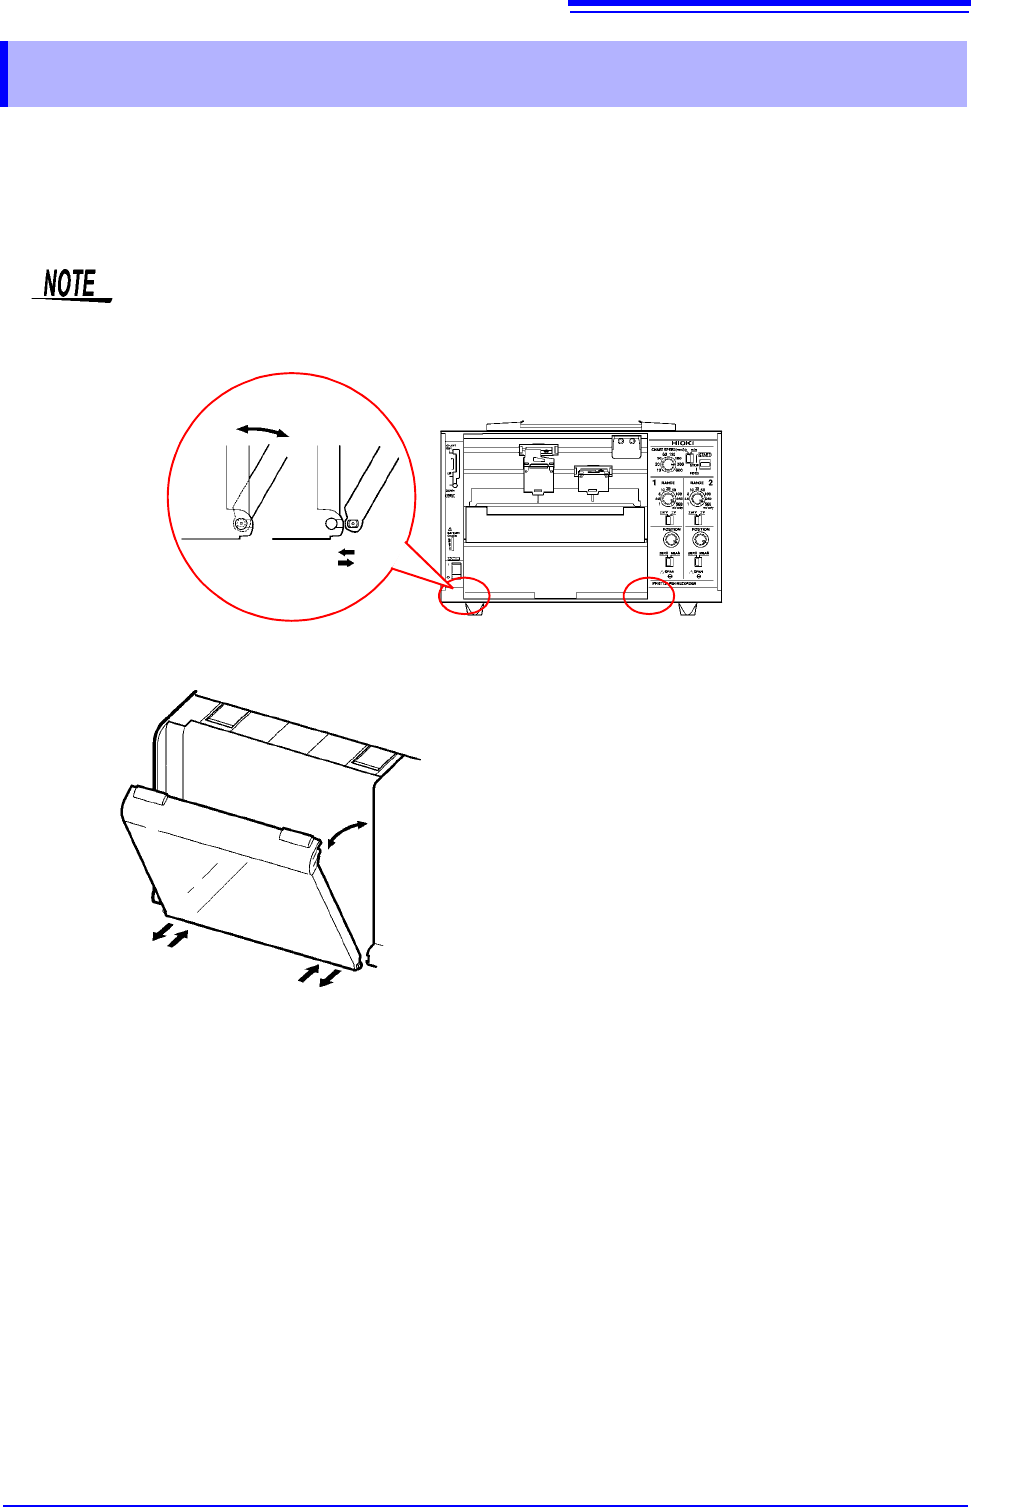
2.7 Attaching and Detaching the Front Cover
When using roll paper, either detach the front cover or use the instrument with the cover
open. Recording data with the front cover closed may cause paper to jam in the chart tray.
Attaching the front cover
Insert the pegs on the cover into the
grooves on the instrument while inclining
the cover at an angle of about 60 from the
horizontal.
Detaching the front cover
Remove the pegs on the cover from the
grooves on the instrument while inclining
the cover at an angle of about 60 from the
horizontal.
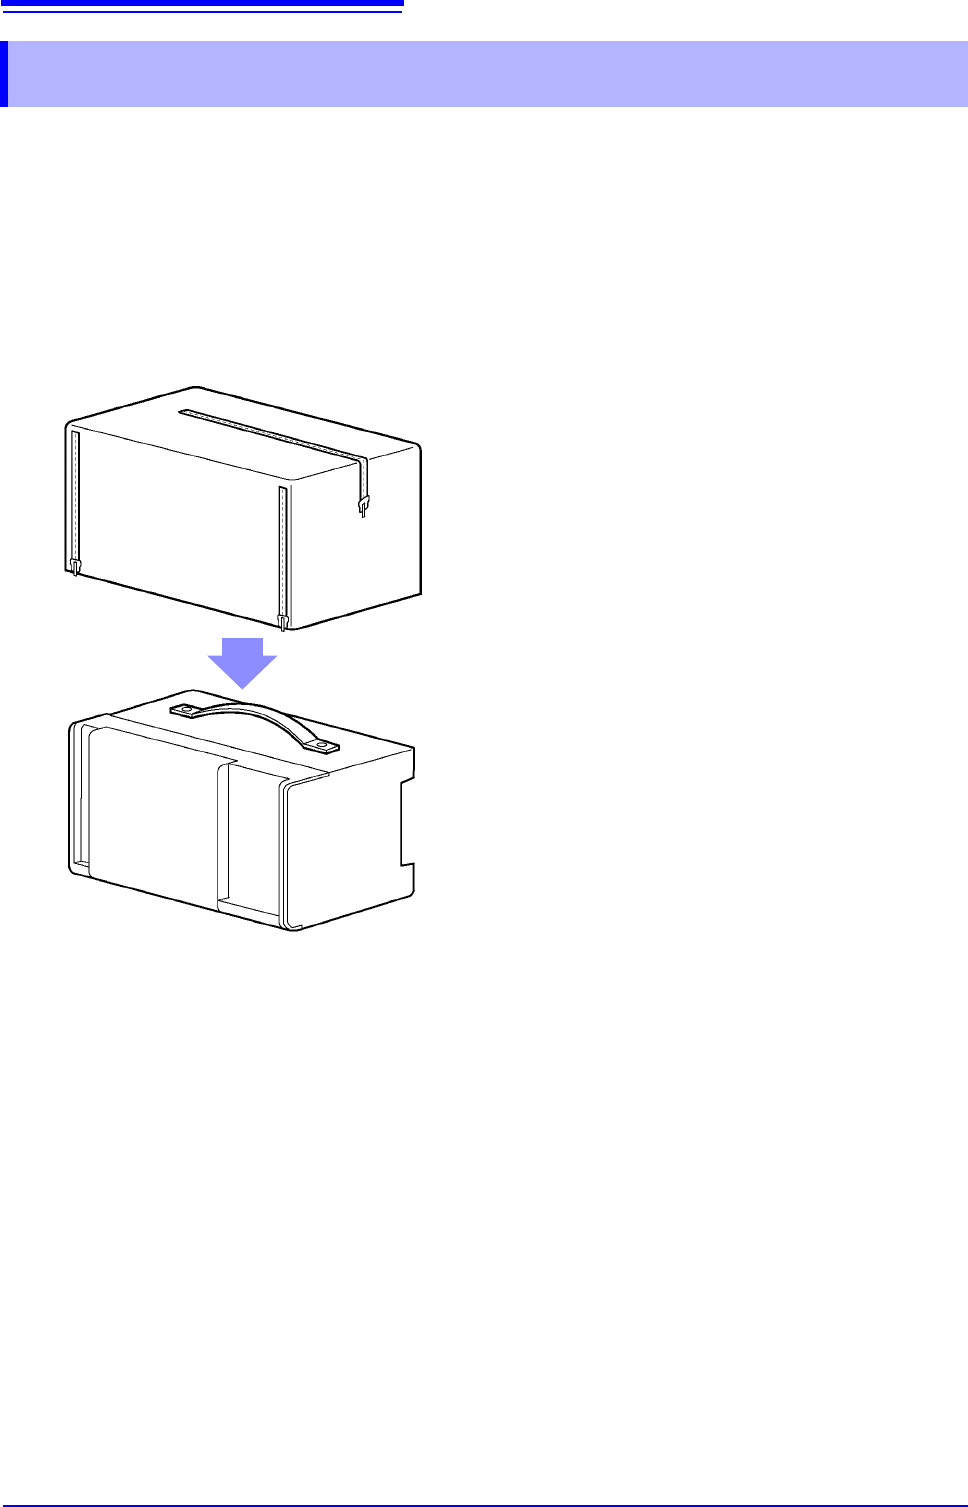
2.8 Attaching the Drip-proof Vinyl Cover
22
The drip-proof cover can keep the instrument and recording paper from getting wet when using the
device in light rain or locations such as tunnels where dripping water is a concern. It can also help
keep dust, sand, and other foreign matter out of the instrument.
The instrument can be carried with the drip-proof cover on it. Convenient zippers let you easily
check and replace recording paper.
2.8 Attaching the Drip-proof Vinyl Cover
Place the cover over the instrument,
positioning it so that the side that can be
opened and closed covers the front of the
device.
3.1 Configuration and Measurement Process
23
1
Configuring the Instrument
and Taking
Measurements Chapter 3
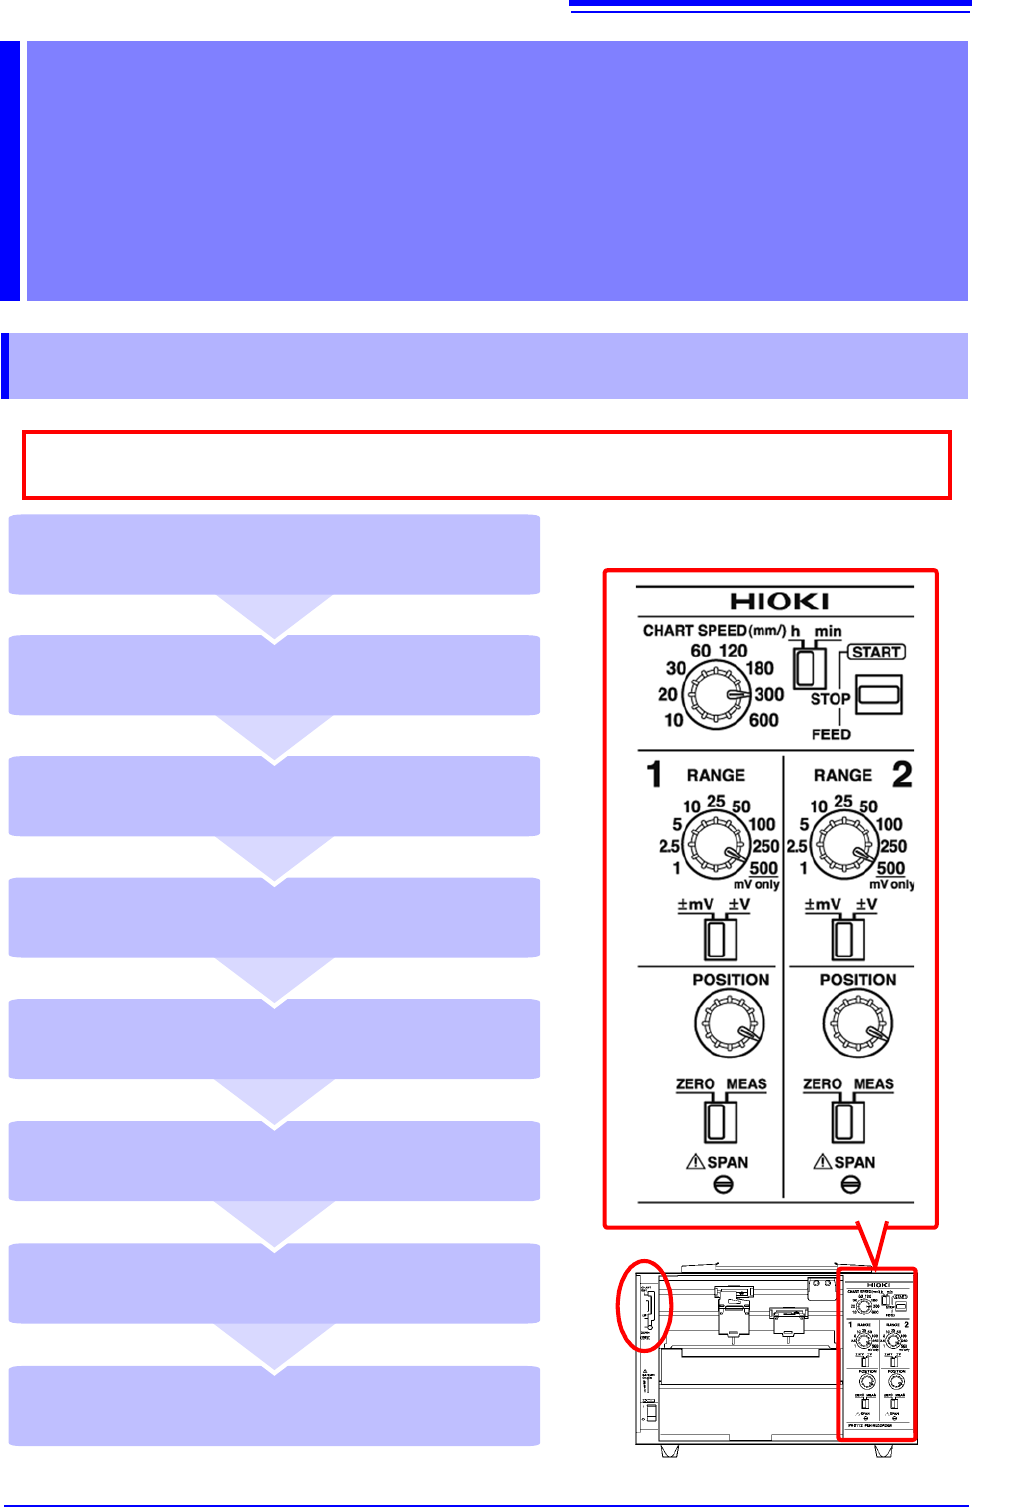
3.1 Configuration and Measurement Process
Place the pen lever in the UP position
(middle) and cap the pens (p. 25)
Remove the recording paper (p. 25)
Stop measurement (STOP) (p. 25)
Start measurement (START) (p. 25)
Place the pen lever in the DOWN position
(bottom) to lower the pens (p. 24)
Set the paper feed speed
(CHART SPEED) (p. 24)
Move the pen position (POSITION)
(p. 24)
Select a measurement range (RANGE)
(p. 24)
As much as possible, avoid printing in hot and humid environments. Otherwise, printer life
may be severely shortened.