PR8111、PR8112_user_manual_eng_20191015H.pdf - 第21页
2.4 Connecting the Power Source (Alkaline Batteries or AC Adapter) 18 Connect the Model 9 418-15 AC Adapter and power cord that came with t he instrument and then connect the power cord to a wall outl et. When the adapte…

2.4 Connecting the Power Source (Alkaline Batteries or AC Adapter)
17
1
You can power the instrument with either mains power or batteries, depending on where you’re
using it. If you use mains power while batteries are installed in the instrument, the AC adapter takes
precedence.
When you are unable to operate the instrument using mains power, you can power it with six LR20
alkaline batteries instead. The batteries will also serve as a backup power source in the event of a
power outage when using mains power.
2.4 Connecting the Power Source (Alkaline
Batteries or AC Adapter)
Installing Alkaline Batteries
Checking the remaining battery life
You can check how much battery life remains with the Power LED.
Green Indicates ample remaining battery life.
(Also lights up when powering the instrument with the AC adapter.)
Orange Indicates limited remaining battery life. It is recommend to have new batteries ready to use.
Red Indicates low remaining battery life.
It is recommended to replace the batteries in the instrument with new batteries.
Estimated operating times
• PR8111 (1-pen model): Approx. 50 hours
• PR8112 (2-pen model): Approx. 25 hours
When using the PR8112 (2-pen model) with just one pen, you can set the CH2 POWER switch on the
rear of the instrument to OFF to realize similar operating times as for the PR8111 (1-pen model).(p. 26)
Before installing batteries into the instrument, be sure to read "Using the Batteries" (p. 7).
Required: One Phillips head screwdriver, six LR20 alkaline batteries
1 Turn off the POWER switch.
If the instrument is connected to the AC adapt-
er and cables, disconnect them.
2 Use the screwdriver to remove the screws
holding the battery cover in place on the
back of the instrument and remove the
battery cover.
3 Install six new LR20 alkaline batteries.
4 Reattach the battery cover and tighten it
securely in place with the screws
removed in step (2) above.
The battery cover is held in place by M3-size screws.
To ensure safe operation, affix the battery cover with
screws. Avoid mixing new and old batteries or differ-
ent types of batteries. Note the positive and negative
poles and exercise care not to install the batteries
backwards. Doing so may result in degraded perfor-
mance or cause the batteries to leak.
2.4 Connecting the Power Source (Alkaline Batteries or AC Adapter)
18
Connect the Model 9418-15 AC Adapter and power cord that came with the instrument and then
connect the power cord to a wall outlet. When the adapter is used along with alkaline dry-cell batter-
ies, the AC adapter takes precedence. If the supply of power from the AC adapter is interrupted, the
instrument will switch over to battery power. When power returns, it will automatically revert to
power from the AC adapter.
You can also use the instrument with DC power source input, for example from an external battery.
The instrument can be powered with a 10 to 27 VDC signal from the AC adapter jack. Hioki can pro-
vide cables for this purpose on a special-order basis. For more information, please contact your
dealer or Hioki representative.
The cable connecting the battery and instrument should not exceed 3 m in length.
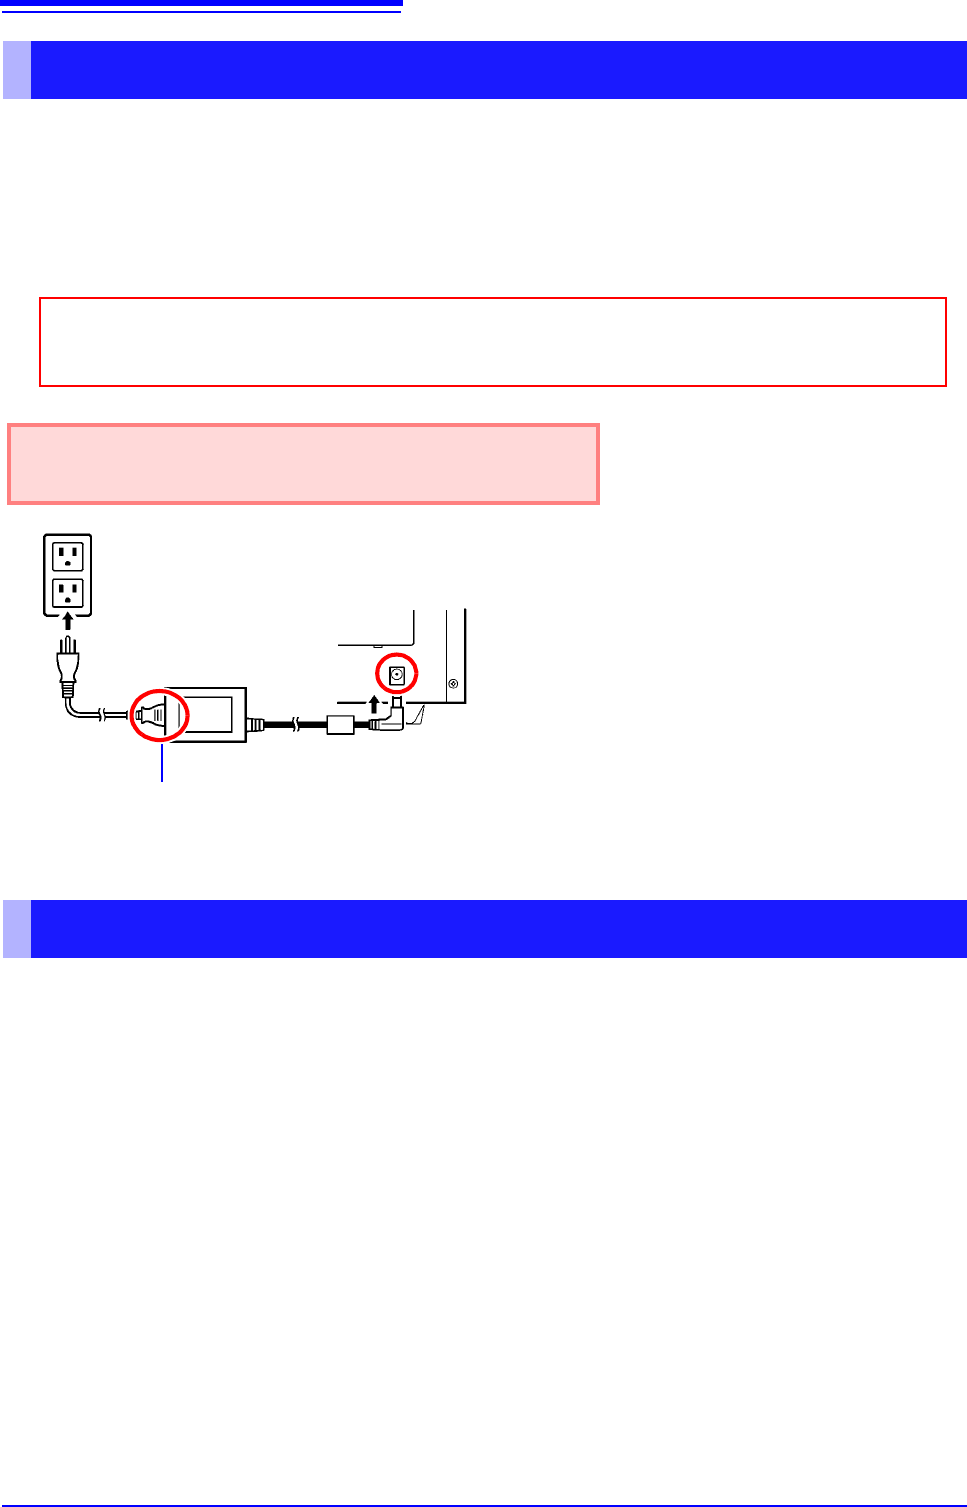
Connecting the AC adapter
Before connecting the AC adapter, be sure to read "Using the AC Adapter" (p. 7) and
"Handling the Cords and Cables" (p. 6).
Rated supply voltage is 100 to 240 VAC, and rated sup-
ply frequency is 50 or 60 Hz.
1
2
3
Power cord
AC adapter
1 Connect the power cord to the inlet socket
on the AC adapter.
2 Connect the output plug of the AC adapter
to the instrument.
3 Plug the power cord into the mains outlet.
Rear panel
Using a DC Power Source
2.5 Turning the Instrument On and Off
19
1
Once you have connected the instrument to its power supply or loaded batteries, you can turn the
instrument on.
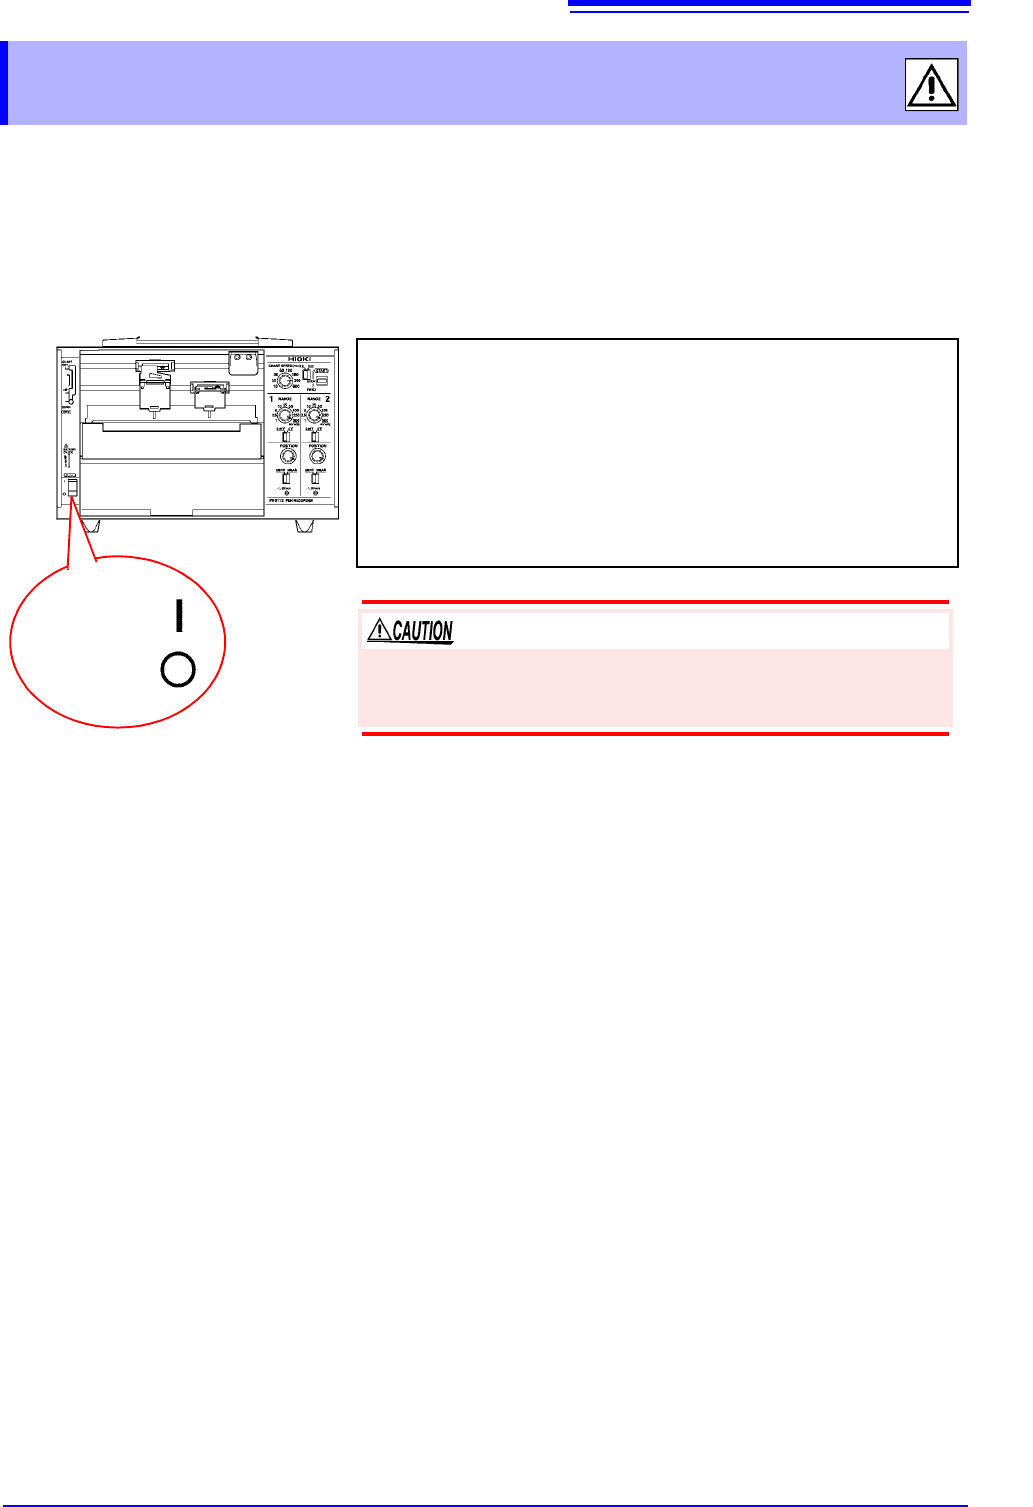
2.5 Turning the Instrument On and Off
Power ON
Power OFF
Turning on the instrument
Turn the POWER switch to the ON position.
Once the instrument has been turned on, the power supply LED will
light up.
Green Lights up when power is being supplied by the AC adapt-
er. When using batteries, indicates ample remaining bat-
tery life.
Orange Indicates limited remaining battery life. It is recommend to
have new batteries ready to use.
Red Indicates low remaining battery life. It is recommended to
replace the batteries in the instrument with new batteries.
Turning off the instrument
Turn the POWER switch to the OFF position.
If the orange or red LED lights up while using the AC adapter, the
instrument may be damaged. Stop all use and have the unit
repaired.