PR8111、PR8112_user_manual_eng_20191015H.pdf - 第26页
3.1 Configuration a nd Measurement Process 23 1 Configuring the Instrument and T aking Measurement s Cha pter 3 3.1 Configuratio n and Measuremen t Process Place the pen lever in th e UP pos ition (middle) and cap the pe…
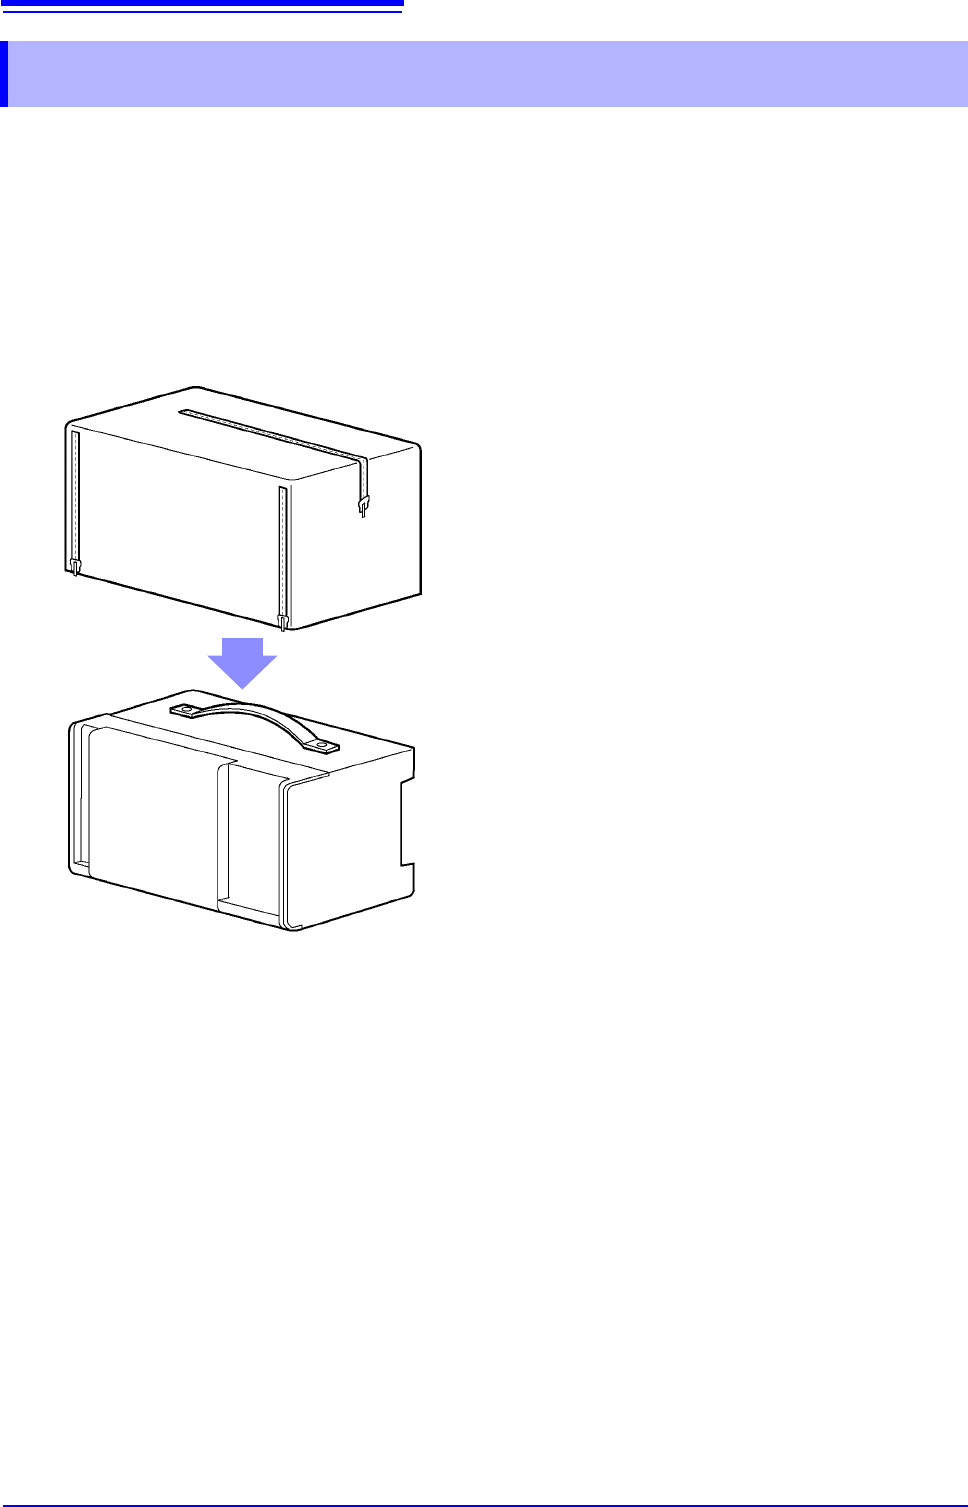
2.8 Attaching the Drip-proof Vinyl Cover
22
The drip-proof cover can keep the instrument and recording paper from getting wet when using the
device in light rain or locations such as tunnels where dripping water is a concern. It can also help
keep dust, sand, and other foreign matter out of the instrument.
The instrument can be carried with the drip-proof cover on it. Convenient zippers let you easily
check and replace recording paper.
2.8 Attaching the Drip-proof Vinyl Cover
Place the cover over the instrument,
positioning it so that the side that can be
opened and closed covers the front of the
device.
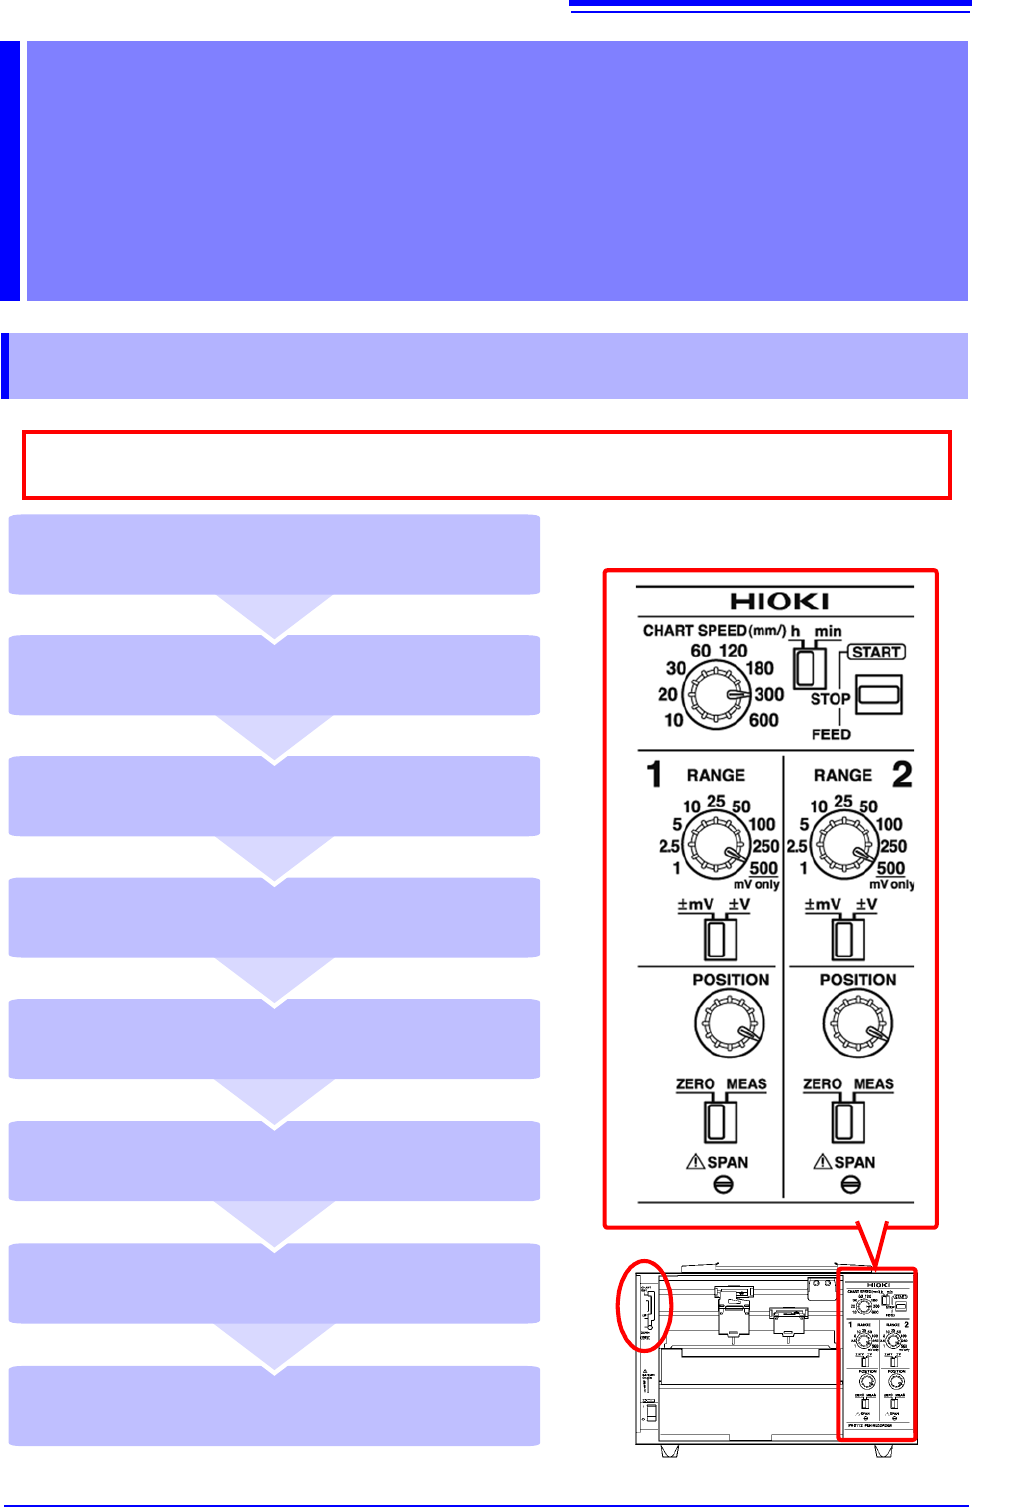
3.1 Configuration and Measurement Process
23
1
Configuring the Instrument
and Taking
Measurements Chapter 3
3.1 Configuration and Measurement Process
Place the pen lever in the UP position
(middle) and cap the pens (p. 25)
Remove the recording paper (p. 25)
Stop measurement (STOP) (p. 25)
Start measurement (START) (p. 25)
Place the pen lever in the DOWN position
(bottom) to lower the pens (p. 24)
Set the paper feed speed
(CHART SPEED) (p. 24)
Move the pen position (POSITION)
(p. 24)
Select a measurement range (RANGE)
(p. 24)
As much as possible, avoid printing in hot and humid environments. Otherwise, printer life
may be severely shortened.
3.2 Basic Measurement
24
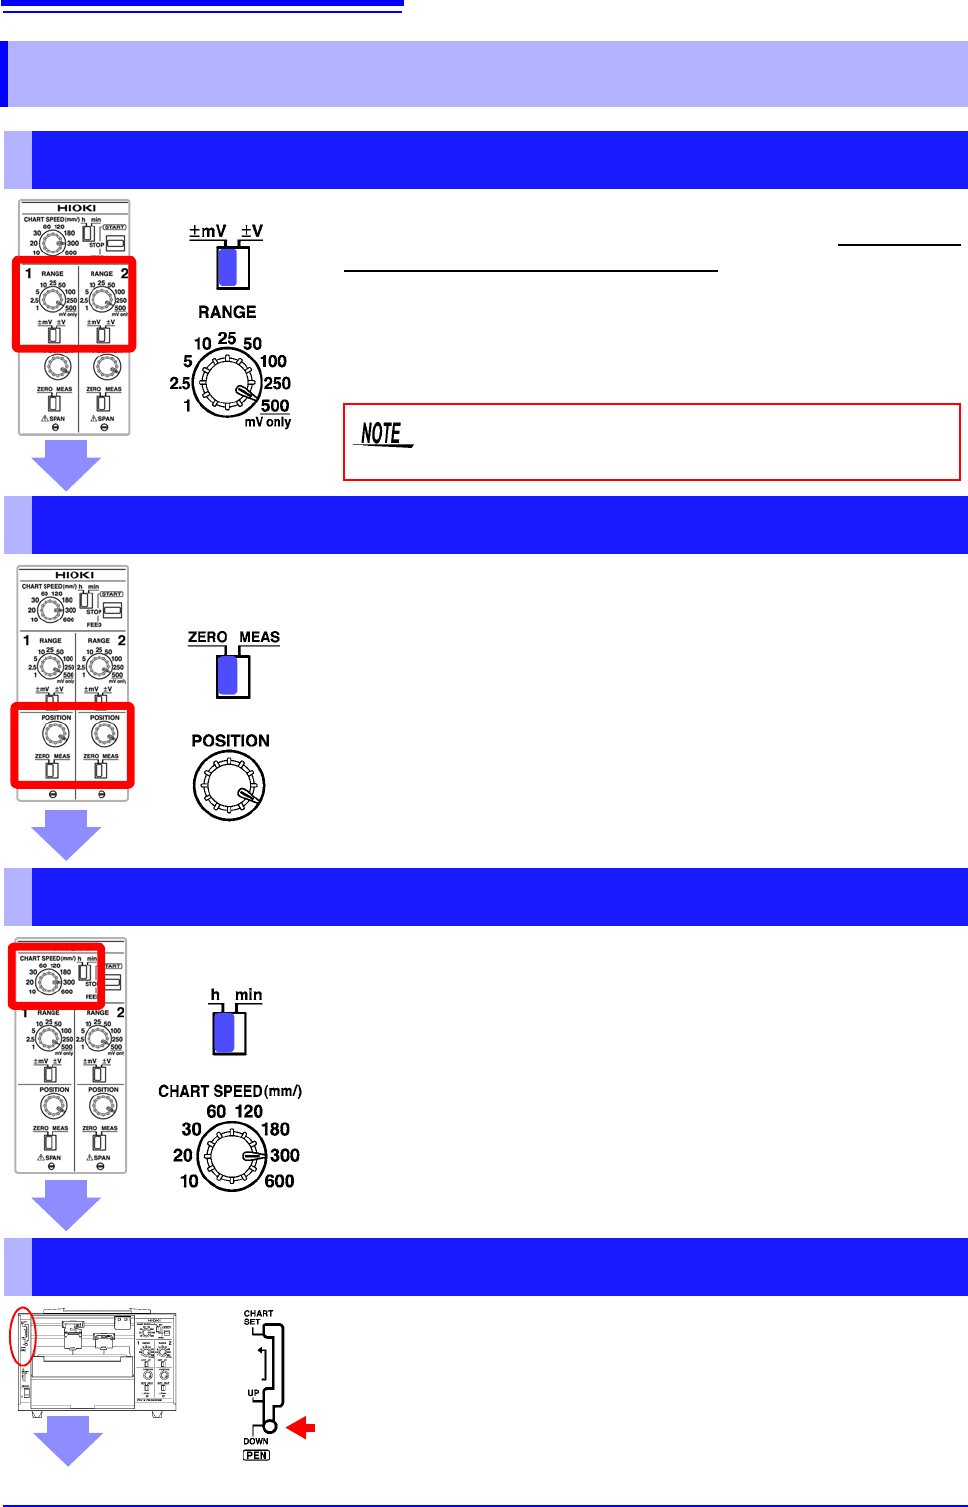
3.2 Basic Measurement
Select a Measurement Range (RANGE)
1 Select the units with the mV/V switch.
2 Rotate the RANGE knob to select the desired range.
You can select the best range for the voltage you intend to mea-
sure. The range can be set from ±1 mV to ±250 V. The 500 set-
ting is used exclusively for mV ranges.
Do not set the RANGE knob to 500 while the mV/V
switch is set to V.
Move the Pen Position (POSITION)
1 Move the ZERO/MEAS switch to the ZERO position.
2 Rotate the POSITION knob to set the pens’ zero points.
You can adjust the pen zero point and move the pen position.
You can set the zero point (0 V position) by moving the ZERO/
MEAS switch in the ZERO position.
Example: When using the ±1 mV range, centering the zero point
allows you to measure from -1 mV to +1 mV, while placing it at
the leftmost edge allows you to measure from 0 V to +2 mV.
Set the Paper Feed Speed (CHART SPEED)
You can set the paper feed speed according to the desired recording
time. This setting can be changed while recording is in progress.
1 Select the speed unit with the h/min switch.
• mm/h: Amount of paper feed per hour [mm]
• mm/min: Amount of paper feed per minute [mm]
2 Rotate the CHART SPEED knob to select the desired
speed.
(Example: 300 mm/h)
Lower the Pens (pen lever)
Place the pen lever in the DOWN (bottom) position
to lower the pens.