PR8111、PR8112_user_manual_eng_20191015H.pdf - 第27页
3.2 Ba sic Measurem ent 24 3.2 Basi c Meas urement Selec t a Measureme nt Range (RANGE) 1 S elec t the units with the mV/V switch. 2 R otate t he RANG E knob to select the desired range. Y ou can select the best range fo…
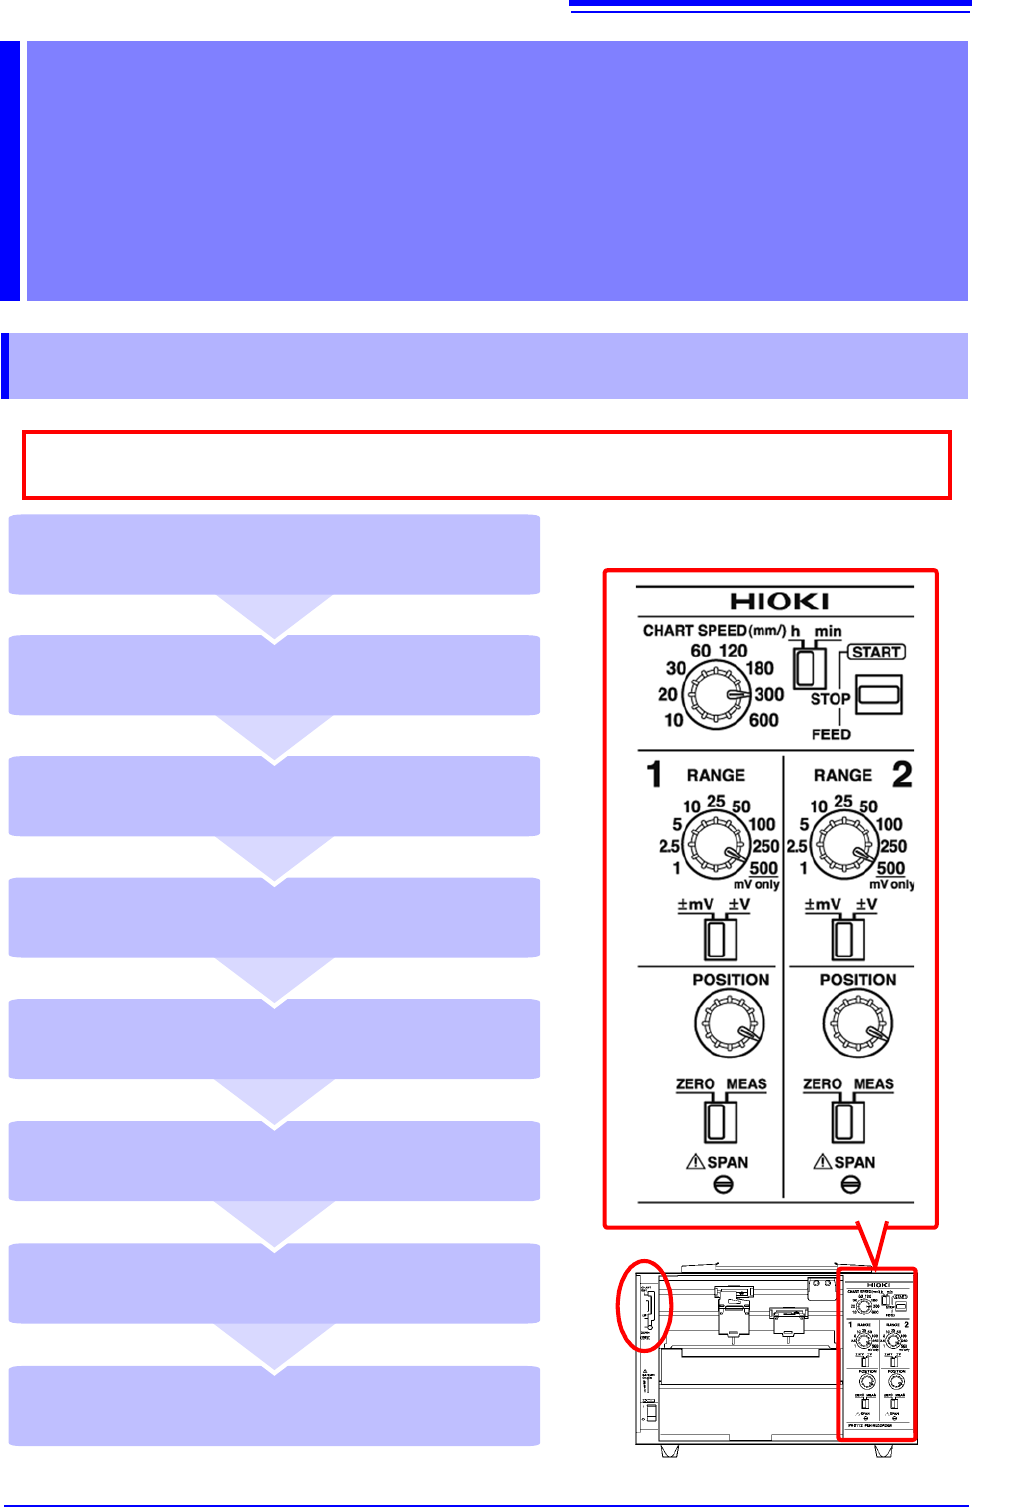
3.1 Configuration and Measurement Process
23
1
Configuring the Instrument
and Taking
Measurements Chapter 3
3.1 Configuration and Measurement Process
Place the pen lever in the UP position
(middle) and cap the pens (p. 25)
Remove the recording paper (p. 25)
Stop measurement (STOP) (p. 25)
Start measurement (START) (p. 25)
Place the pen lever in the DOWN position
(bottom) to lower the pens (p. 24)
Set the paper feed speed
(CHART SPEED) (p. 24)
Move the pen position (POSITION)
(p. 24)
Select a measurement range (RANGE)
(p. 24)
As much as possible, avoid printing in hot and humid environments. Otherwise, printer life
may be severely shortened.
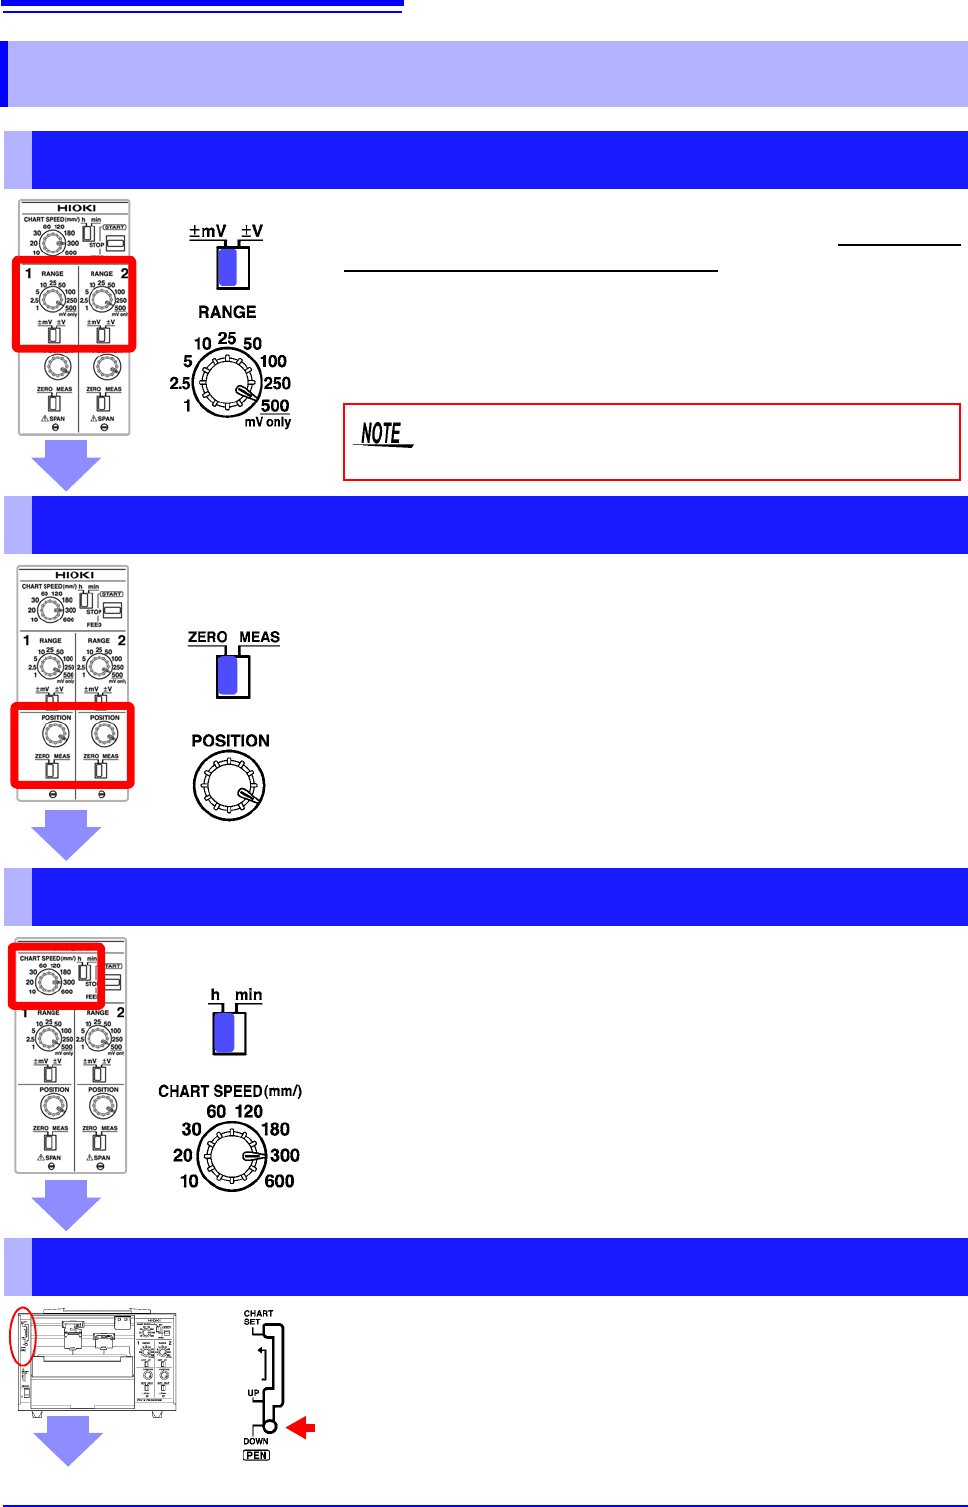
3.2 Basic Measurement
24
3.2 Basic Measurement
Select a Measurement Range (RANGE)
1 Select the units with the mV/V switch.
2 Rotate the RANGE knob to select the desired range.
You can select the best range for the voltage you intend to mea-
sure. The range can be set from ±1 mV to ±250 V. The 500 set-
ting is used exclusively for mV ranges.
Do not set the RANGE knob to 500 while the mV/V
switch is set to V.
Move the Pen Position (POSITION)
1 Move the ZERO/MEAS switch to the ZERO position.
2 Rotate the POSITION knob to set the pens’ zero points.
You can adjust the pen zero point and move the pen position.
You can set the zero point (0 V position) by moving the ZERO/
MEAS switch in the ZERO position.
Example: When using the ±1 mV range, centering the zero point
allows you to measure from -1 mV to +1 mV, while placing it at
the leftmost edge allows you to measure from 0 V to +2 mV.
Set the Paper Feed Speed (CHART SPEED)
You can set the paper feed speed according to the desired recording
time. This setting can be changed while recording is in progress.
1 Select the speed unit with the h/min switch.
• mm/h: Amount of paper feed per hour [mm]
• mm/min: Amount of paper feed per minute [mm]
2 Rotate the CHART SPEED knob to select the desired
speed.
(Example: 300 mm/h)
Lower the Pens (pen lever)
Place the pen lever in the DOWN (bottom) position
to lower the pens.
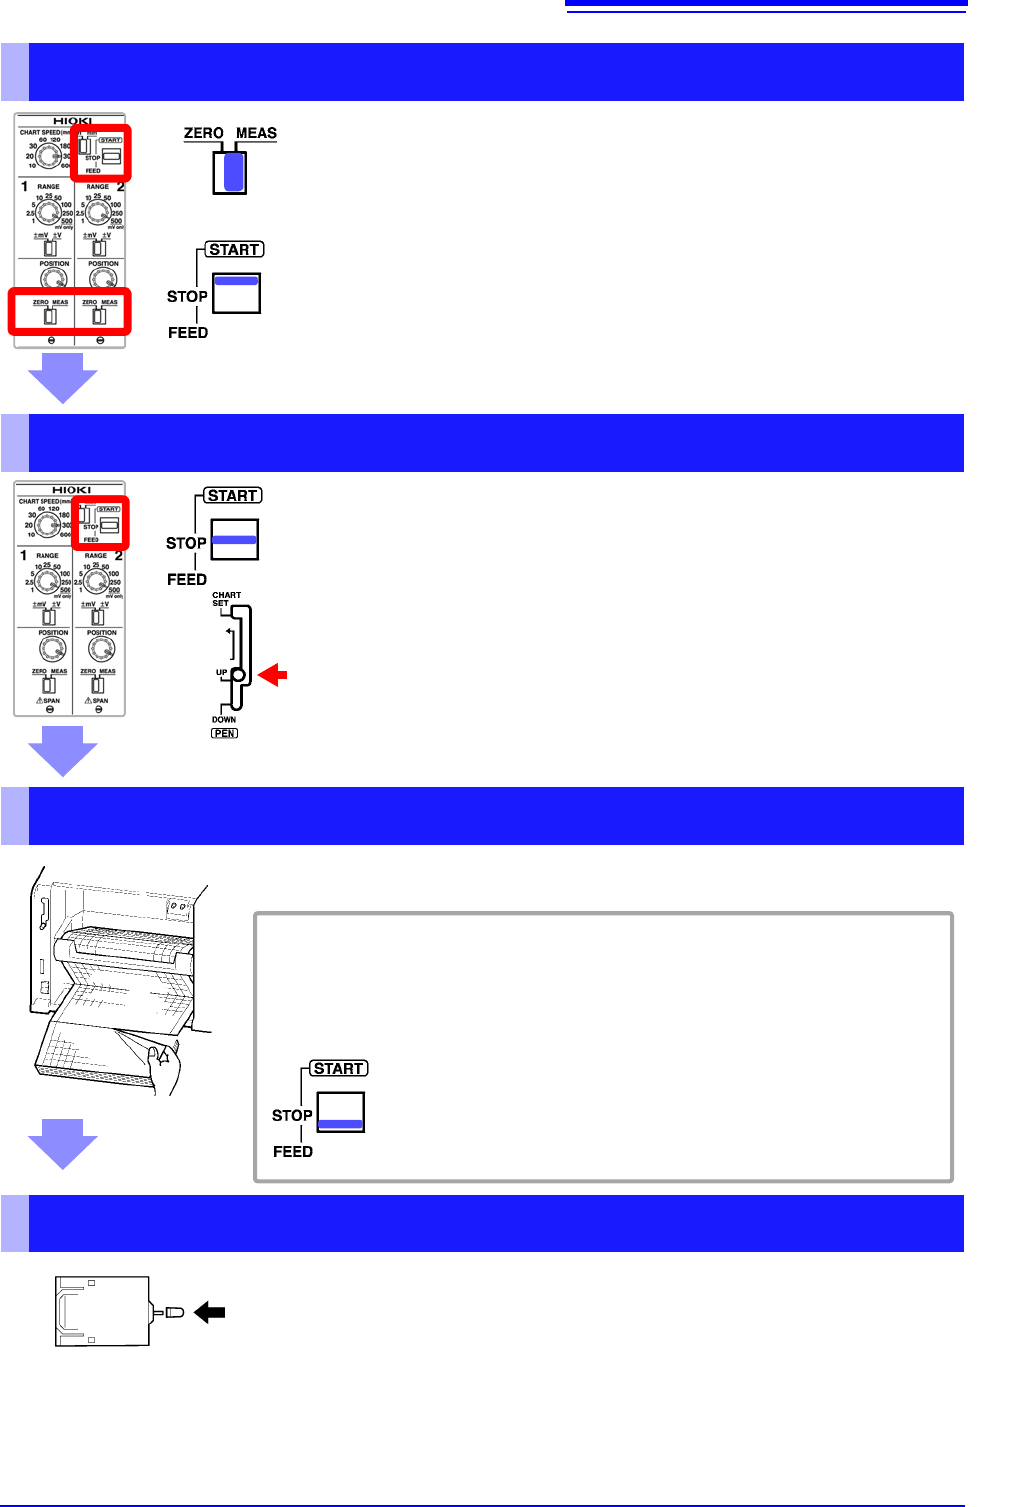
3.2 Basic Measurement
25
1
Start Measurement
1 Move the ZERO/MEAS switch to the MEAS position.
The pens will move in response to input signals.
2 Move the START/STOP/FEED switch to the START position.
Paper will be fed through the instrument, and recording will start.
Stop Measurement
1 Move the START/STOP/FEED switch to the STOP position to
stop feeding paper through the instrument.
Paper will stop moving through the instrument.
2 Place the pen lever in the UP (middle) position to raise the
pens.
Remove the Recording Paper
If you’re using fanfold paper, tear off the paper along the perforated line.
To feed paper through the instrument
You can use the START/STOP/FEED switch to feed paper through the in-
strument.
Moving the switch to the FEED position causes paper to be fed
through the instrument. There are four feed speeds. When you
press and hold the switch in the FEED position for at least 2
seconds, the feed speed will increase.
Cap the Pens
Lift each pen toward you and cap it.