00196591-04 UM S-Feeder Test Station EN.pdf - 第15页
Installation MTC 2 3.4.2 Connecting the Serial Port for Data Exchange Connecting th e S-Feeder Checking D evice User Manual SIPLACE S-Feeder Test Sta tion 15 3.4.2 3 . 4 . 2 C o n n e c t in g t h e S e r ia l P o r t f …
Installation MTC 2
Initializing the USB Port for the Camera 3.4.1 Connecting to the Power Supply
14 User Manual SIPLACE S-Feeder Test Station
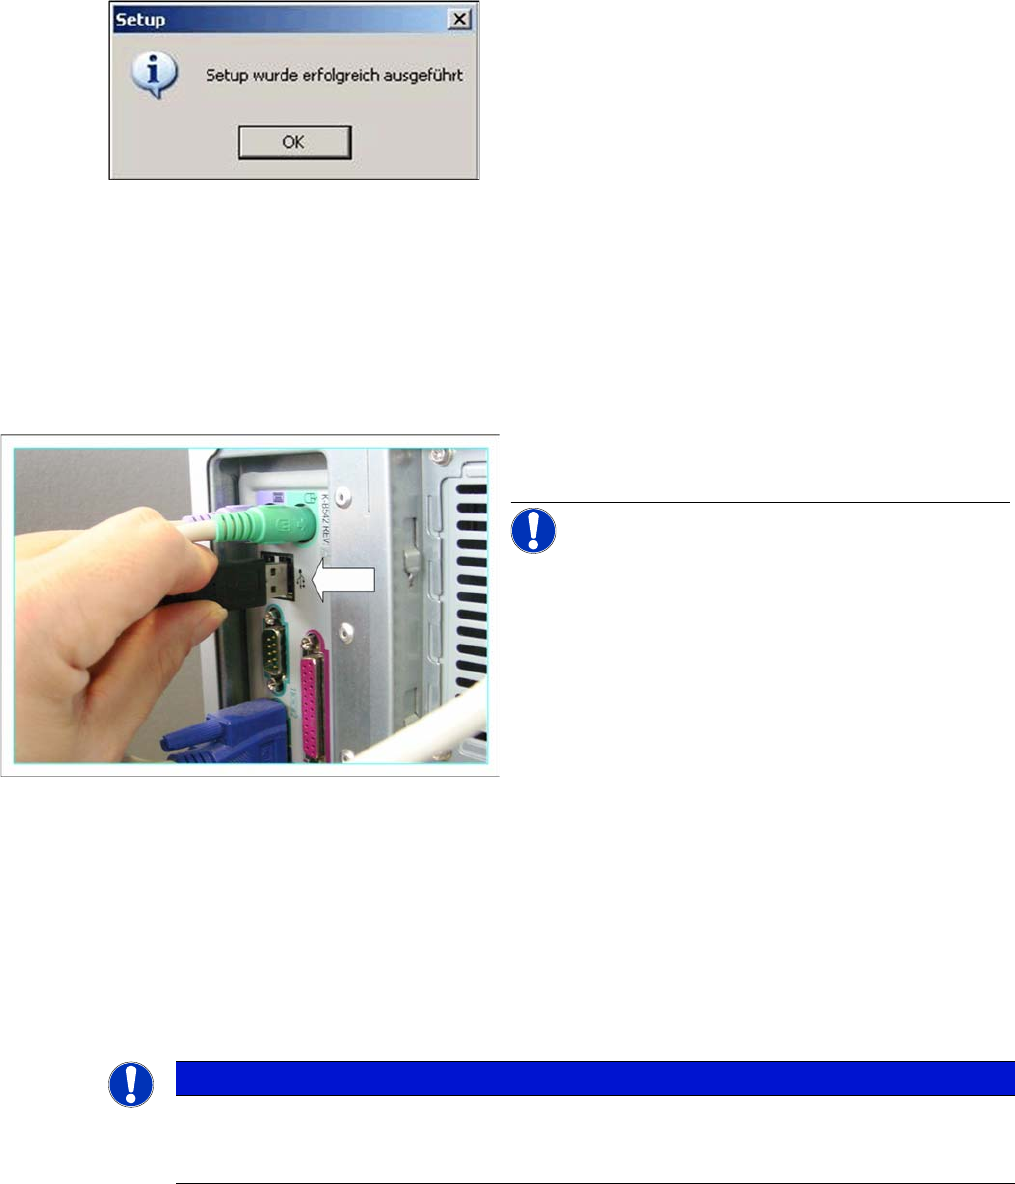
► To finish the setup, click on the OK button.
A barcode scanner can be installed for scanning the serial number of the feeders.
The reports of the S-Feeder Test Station can then be saved under the serial number of the feeder.
You can only use barcode scanners that offer a keyboard emulation, e. g. Wired USB BC Scanner
[00386212-xx].
3.3
3.3 Initializing the USB Port for the Camera
Initializing the USB Port for the Camera
3.4
3.4 Connecting the S-Feeder Checking Device
Connecting the S-Feeder Checking Device
First install the
S-Feeder test software
supplied with the device.
To set up the checking device, follow the steps below:
▪ Connecting to the Power Supply
▪ Connect the serial cable
▪ Connect the camera
For a description of the individual setup steps, refer to the following sections.
3.4.1
3.4.1 Connecting to the Power Supply
Connecting to the Power Supply
The checking device does not have its own power supply. The power is supplied via an external power
pack. The checking device is then supplied with +30 volt.
► Connect the USB camera cable of the testing device
to a USB 2.0 port on your PC.
NOTICE! Where possible, use a connection on
the back of the PC, as this generally allows a faster and
more reliable image transmission.
NOTICE
Packaging
Keep the box and packaging materials. You will need these later on for transporting the check-
ing device.
Installation MTC 2
3.4.2 Connecting the Serial Port for Data Exchange Connecting the S-Feeder Checking Device
User Manual SIPLACE S-Feeder Test Station 15
3.4.2
3.4.2 Connecting the Serial Port for Data Exchange
Connecting the Serial Port for Data Exchange
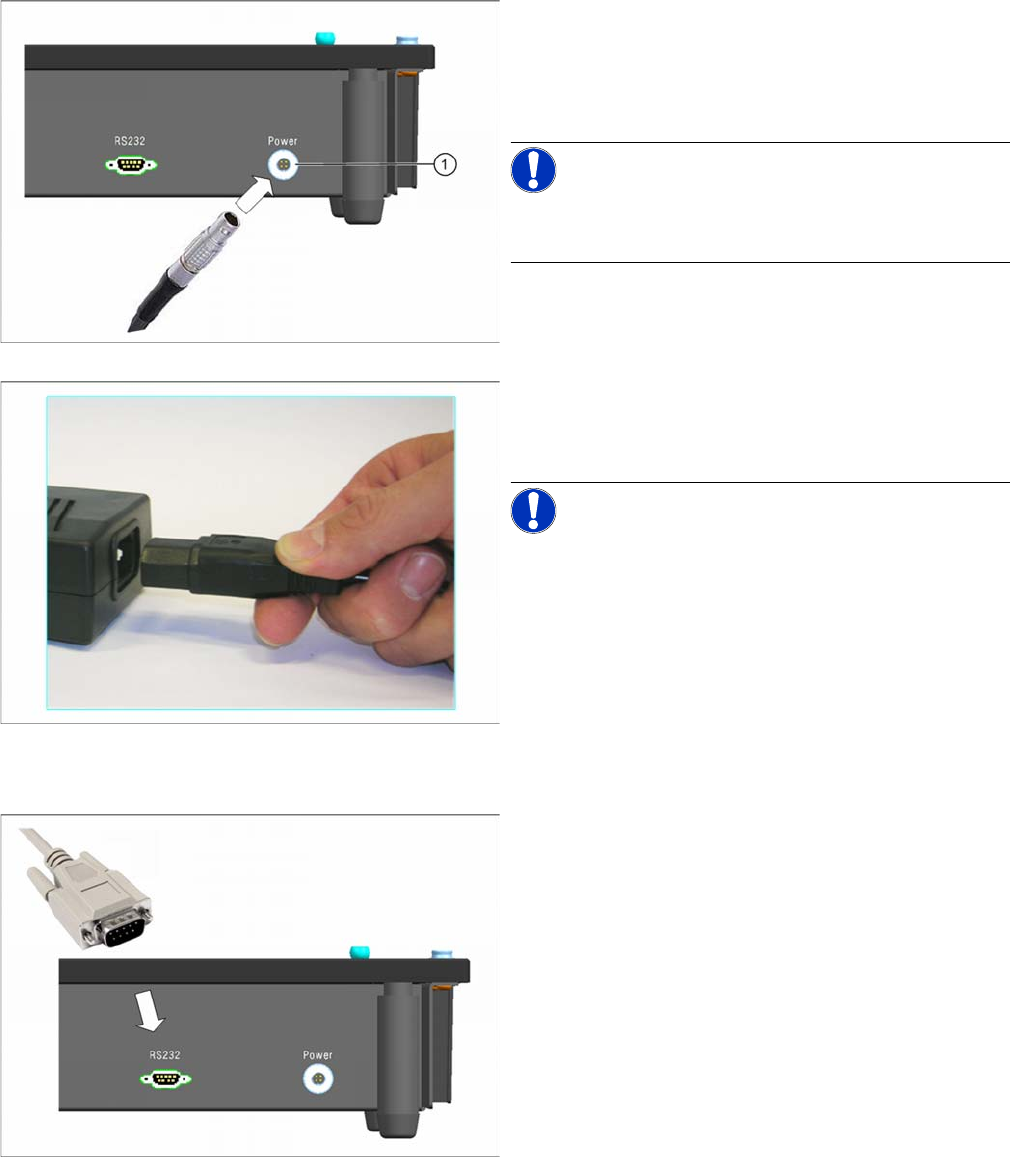
► Connect the Lemo plug of the power pack into the
right-and connection (Power) on the back of the
checking device.
Make sure that the red dot on the front of the plug is
at the top.
NOTICE! If you want to disconnect the plug:
Press the circlip (1) on the connection.
Hold the circlip pressed and pull out the plug.
► Plug the inlet connector into the power pack.
► Connect the power supply plug to an appropriately
grounded socket.
NOTICE! When connecting to the 110V supply,
you do not need to perform any conversions or switch
over the setting on the power pack.
► Connect one end of the serial cable (connector) to the
left connection (RS232) on the back of the checking
device.

Installation MTC 2
Initial Software Start 3.4.3 Connecting the Device Ground
16 User Manual SIPLACE S-Feeder Test Station
3.4.3
3.4.3 Connecting the Device Ground
Connecting the Device Ground
The device ground is used to discharge static energy.
3.4.4
3.4.4 Switching the Checking Device ON/OFF
Switching the Checking Device ON/OFF
3.5
3.5 Initial Software Start
Initial Software Start
► To start the
S-Feeder test software
, click on the following icon on the desktop of your PC:
The main
S-Feeder test software
window will be shown.
► Now connect the other end of the serial cable to the
serial port (COM1) on your PC.
NOTICE! If you want to use a different serial port
to COM1, you will then need to set this in the S-Feeder
test software, Tools menu, at Select COM port.
► Fasten the connector to the serial port, with the lock-
ing screws (1).
► Screw or plug a ground cable (1) into the checking
device.
► Connect the free end of the device ground cable to a
point at which the static energy can be discharged
(e.g. to the workbench).
Switching the checking device on
► Switch the power pack and the
S-Feeder Checking
Device
on at their respective ON/OFF switches (1).
The control lamp on the
S-Feeder Checking Device
will
shine. The device is now ready for operation.
Switching the checking device off
► Switch the
S-Feeder Checking Device
of at the ON/
OFF switch (2).
The control lamp on the
S-Feeder Checking Device
will
extinguish.
► Switch the power pack off.