Galaxy EX Squeegee Module.pdf - 第10页
SQUEEG EE MODULE REPLACEMENT PRO CEDURES 10. 10 Tech nical Refere nc e Manu al Ch apte r Issue 4 , Jun 18 19. Loosen the f our captive screws sec uring the P roFlow p rinthead m echa- nism to t he print ca rriage u sing …
SQUEEGEE MODULE
REPLACEMENT PROCEDURES
Chapter Issue 4, Jun 18 Technical Reference Manual 10.9
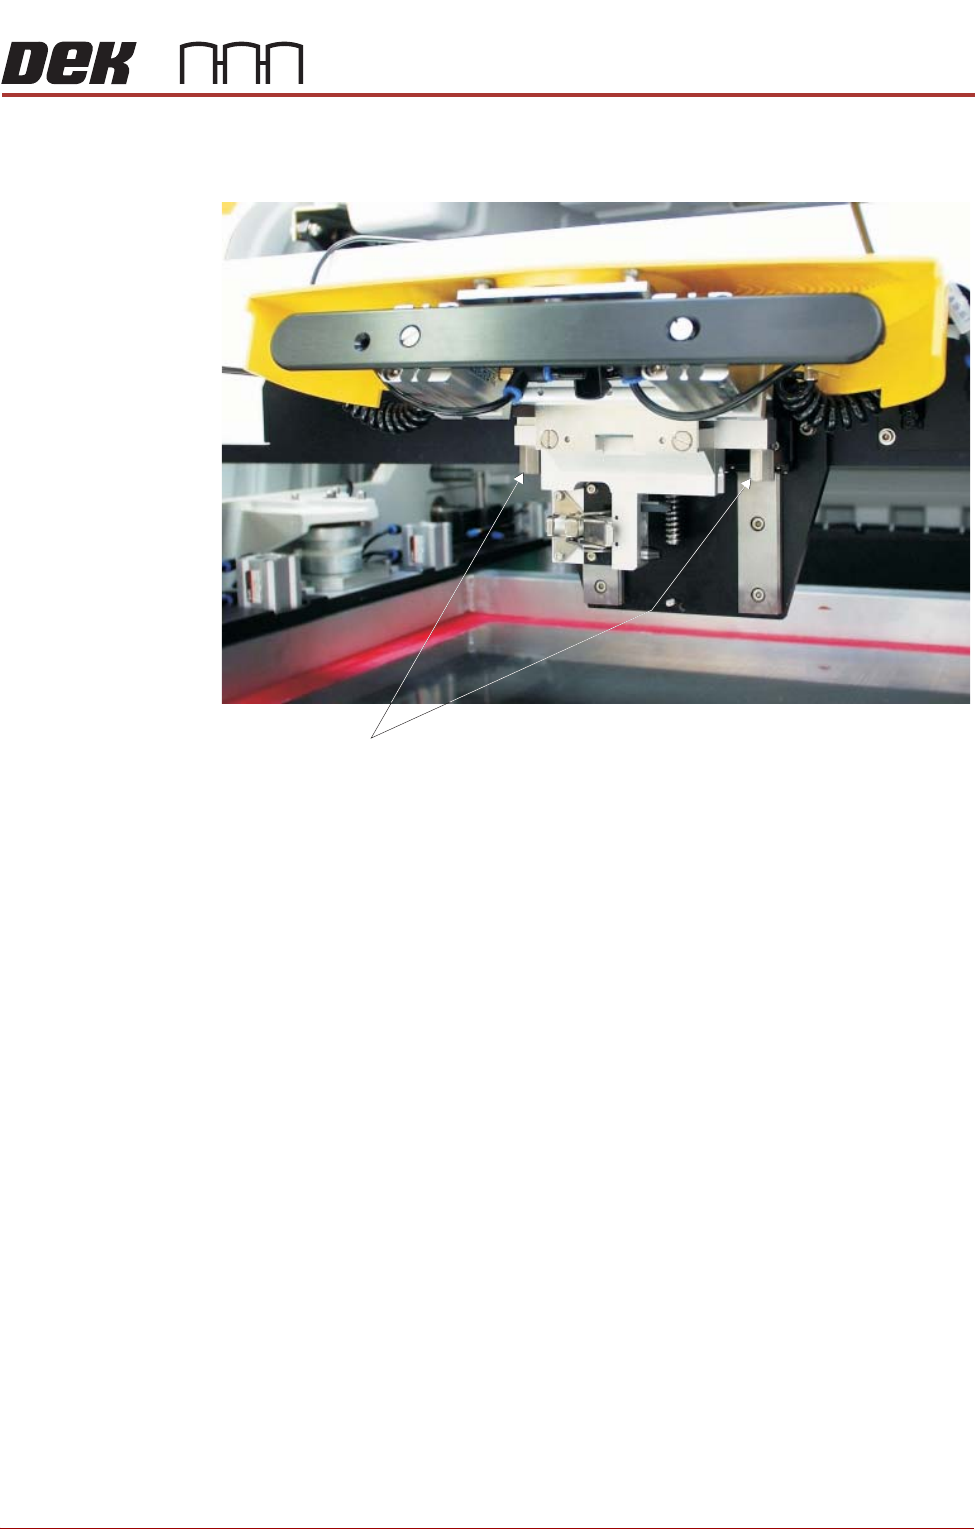
18. Release the pressure mechanism from the printhead mechanism by
unscrewing the two securing bolts, using a 5mm Allen key.
Securing Bolts
SQUEEGEE MODULE
REPLACEMENT PROCEDURES
10.10 Technical Reference Manual Chapter Issue 4, Jun 18
19. Loosen the four captive screws securing the ProFlow printhead mecha-
nism to the print carriage using a 4mm Allen key. Carefully remove the
mechanism from the print carriage.
Fitting Squeegee
Drip Tray
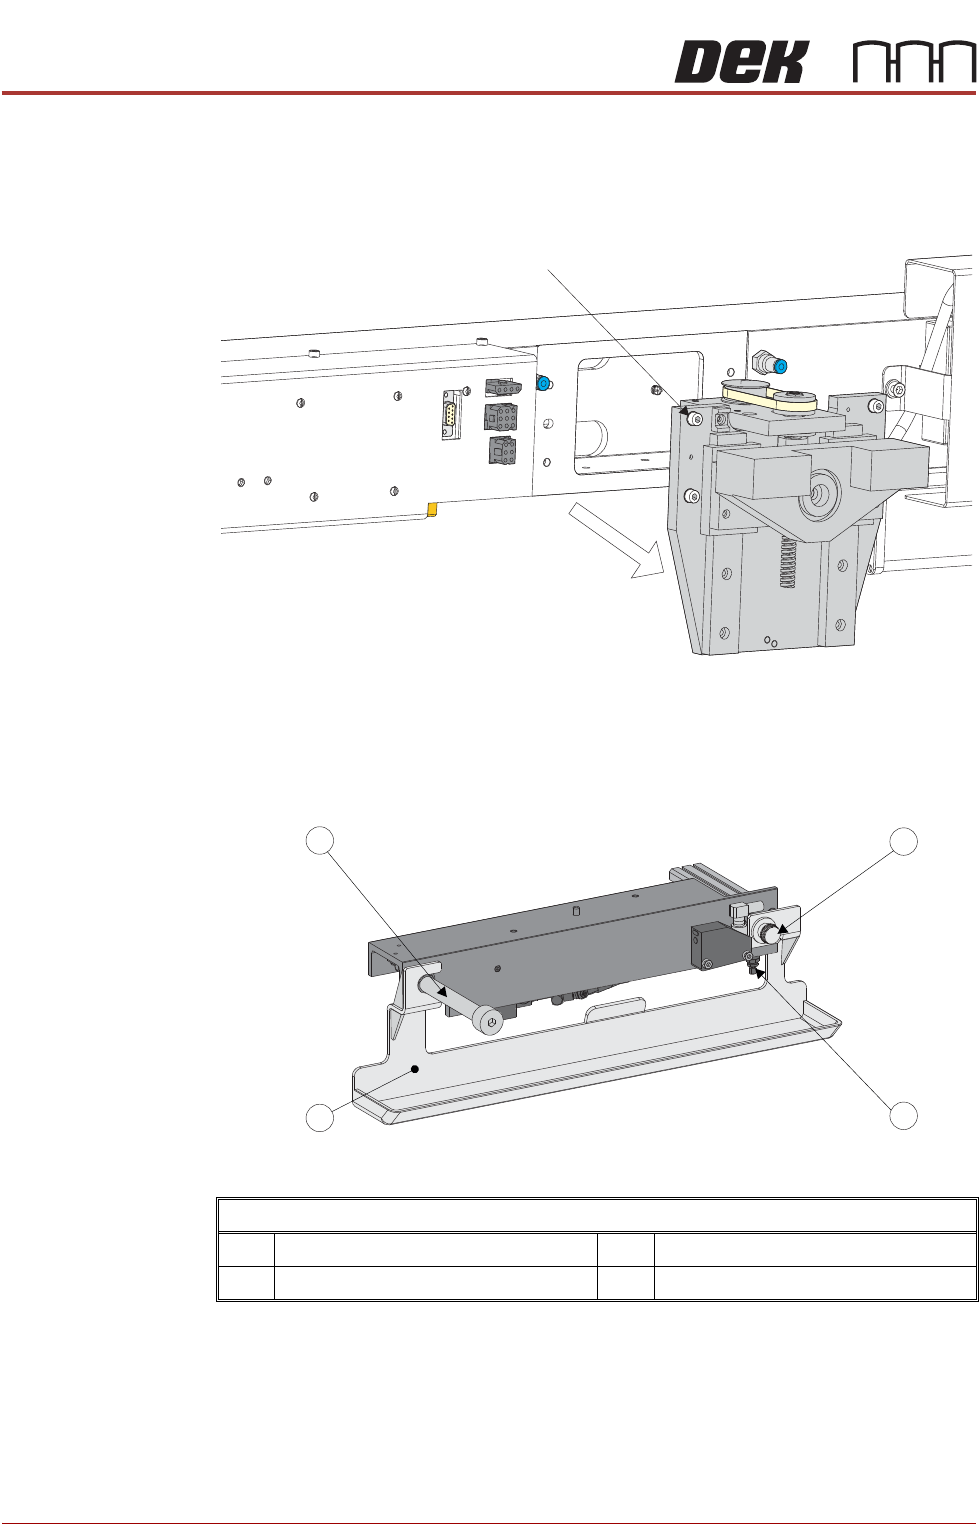
The following procedure details how to fit the squeegee drip tray to the
machine:
1. Slide the slot in the drip tray onto the bearing on the drip tray guide shaft.
2. Secure the drip tray to the actuator piston using the thumbscrew.
3. Open the speed control valves on the drip tray actuator.
Captive Screw (in 4 positions)
Fitting the Squeegee Drip Tray
1 Squeegee Drip Tray Thumbscrew 3 Squeegee Drip Tray
2 Speed Control Valves (in 2 positions) 4 Drip Tray Guide Shaft
SQUEEGEE MODULE
REPLACEMENT PROCEDURES
Chapter Issue 4, Jun 18 Technical Reference Manual 10.11
Fitting The
Squeegee
Printhead
Mechanism
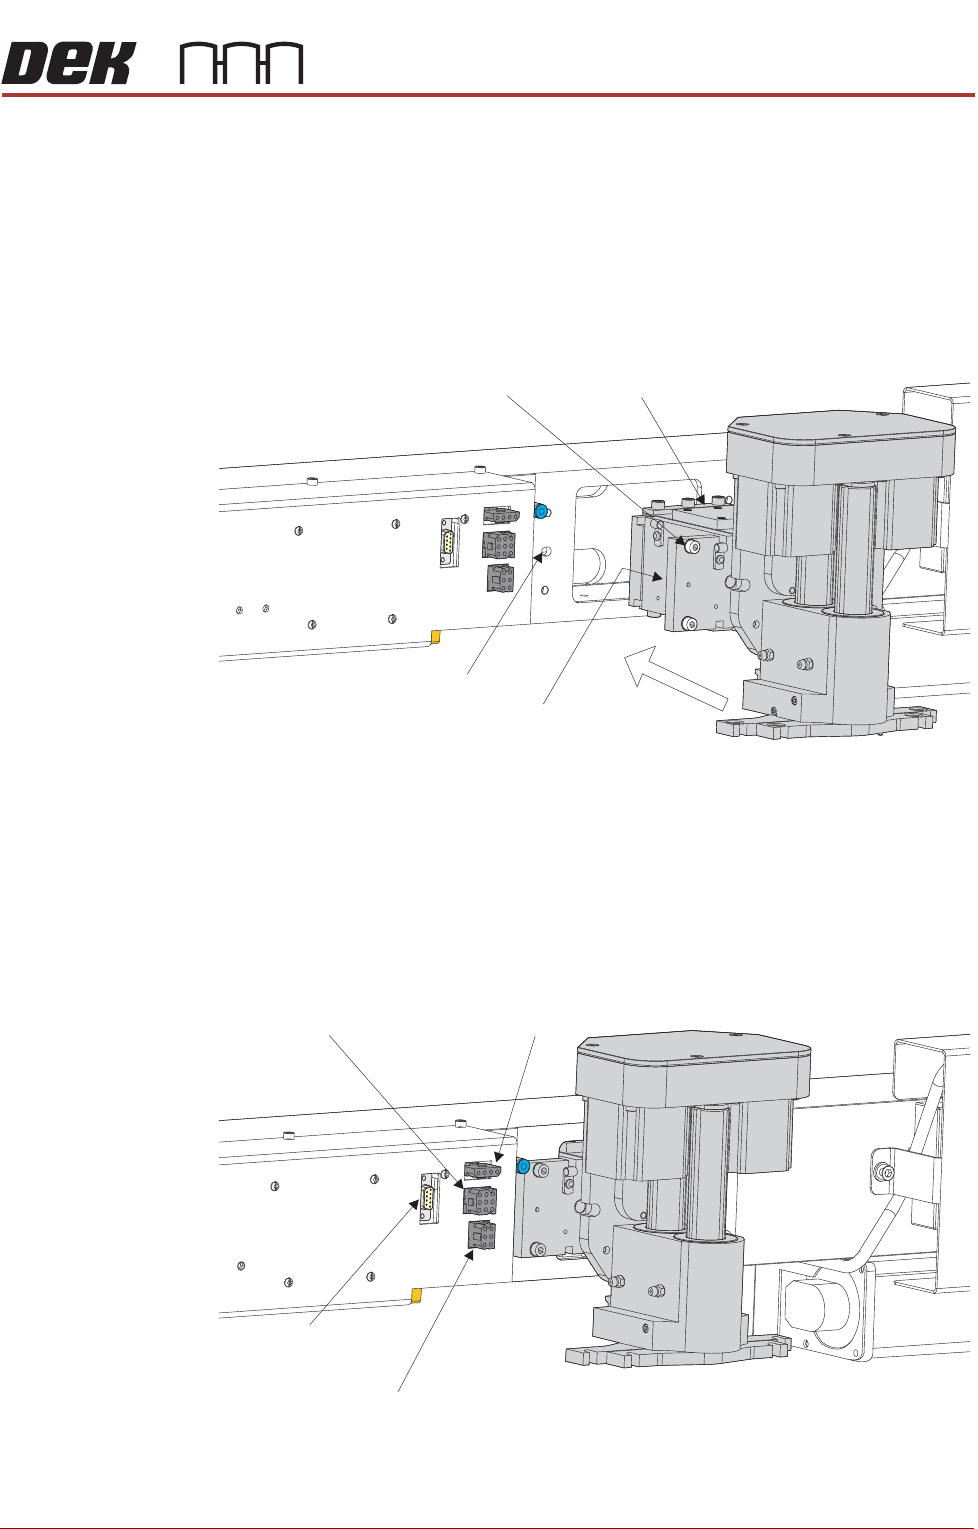
The following procedure details how to fit the squeegee printhead mechanism
to the machine:
1. Carefully position the rear of the printhead mechanism (spring beam
assembly) into the print carriage so that both printhead mechanism dowels
locate into the print carriage locating holes. Secure the unit to the print car-
riage by means of the four captive screws, ensuring the pneumatic pipe is
not trapped.
2. Connect the following connectors to the print carriage, left hand side:
• Rear Squeegee Motor
• Front Squeegee Motor
• Home Sensors
• Squeegee Pressure Amplifier
Captive Screw (in 4 positions) Spring Beam Assembly
Locating Dowel
(in 2 positions)
Print Carriage Locating
Hole (in 2 positions)
Rear Squeegee
Motor (9SK17)
Front Squeegee
Motor (9SK16)
Home Sensors
(9SK08)
Squeegee Pressure
Amplifier (N3SK16)