AOI_RS_v85_en.pdf - 第40页
Chapter 2 Repair Station Main Progr am AOI Repair Station 36 problem to all of other components of the same board.
Chapter 2 Repair Station Main Program
AOI Repair Station
35
6.3.2 [PageDown] Key-You can press the button to increase the brightness
of FOV image.
6.3.3 [HOME] Key-To confirm the all fails on the single board are false
alarm.
6.3.4 [END] Key-To confirm the all fails on the single board are skiped.
6.3.5 [Insert] Key-Insert a fail data manually. This function is the same
with
button.
6.3.6 [Delete] Key-Set this board to have not been confirmed.
6.3.7 [PAUSE] Key-Set this board to have not been confirmed.
6.3.8 [F5] Key (Only for TR7500)- To change the FOV image to color
image, white balanced image or weighting image.
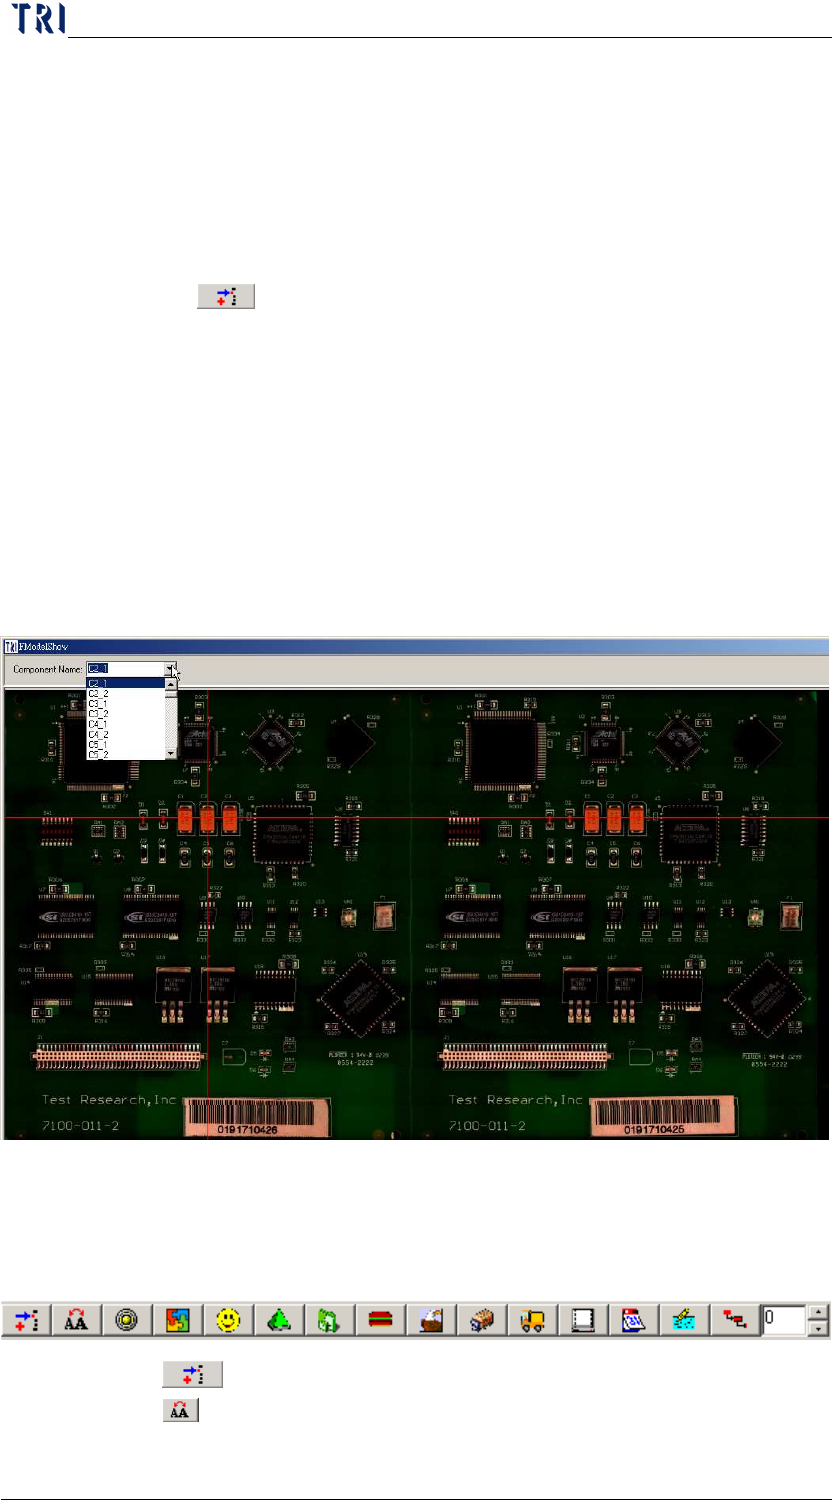
6.3.9 [F6] Key-You can press this button to display the panel map with
double size. The map file is saved in [C:
\aoi_repair_data\modelNAME2X2.bmp.]. On the map you can select a
component at the upper-left corner and the system marks the specified
component with red cross line.
6.3.10 [F9], [F10]-Moves the yellow working area to left (defect
component) or right (defect window) side.
6.4 Other Functions
6.4.1
Component Insert-Insert a fail data manually.
6.4.2
Copy Confirm Defect-To copy a particular component

Chapter 2 Repair Station Main Program
AOI Repair Station
36
problem to all of other components of the same board.
Chapter 2 Repair Station Main Program
AOI Repair Station
37
6.4.3 FOV Line Switch-Display the cross line on FOV image or not
to.
6.4.4
OnlineDataSkip-The button only shows in online mode. After
pressing the button the status of data that have not been confirmed
will be changed to [Skip]. Operators don’t have to confirm those
data.
6.4.5
Rotate 180-The function is to display the images with 180
degree rotation. After you enable this function, you have to [Query]
again.
6.4.6
The Defect in Missing, Polarity, Tombstone must be confirmed
-If the failed kind is “Missing”, the data must be confirmed by
operator. That is, it can’t be confirmed by pressing [Down↓] key.
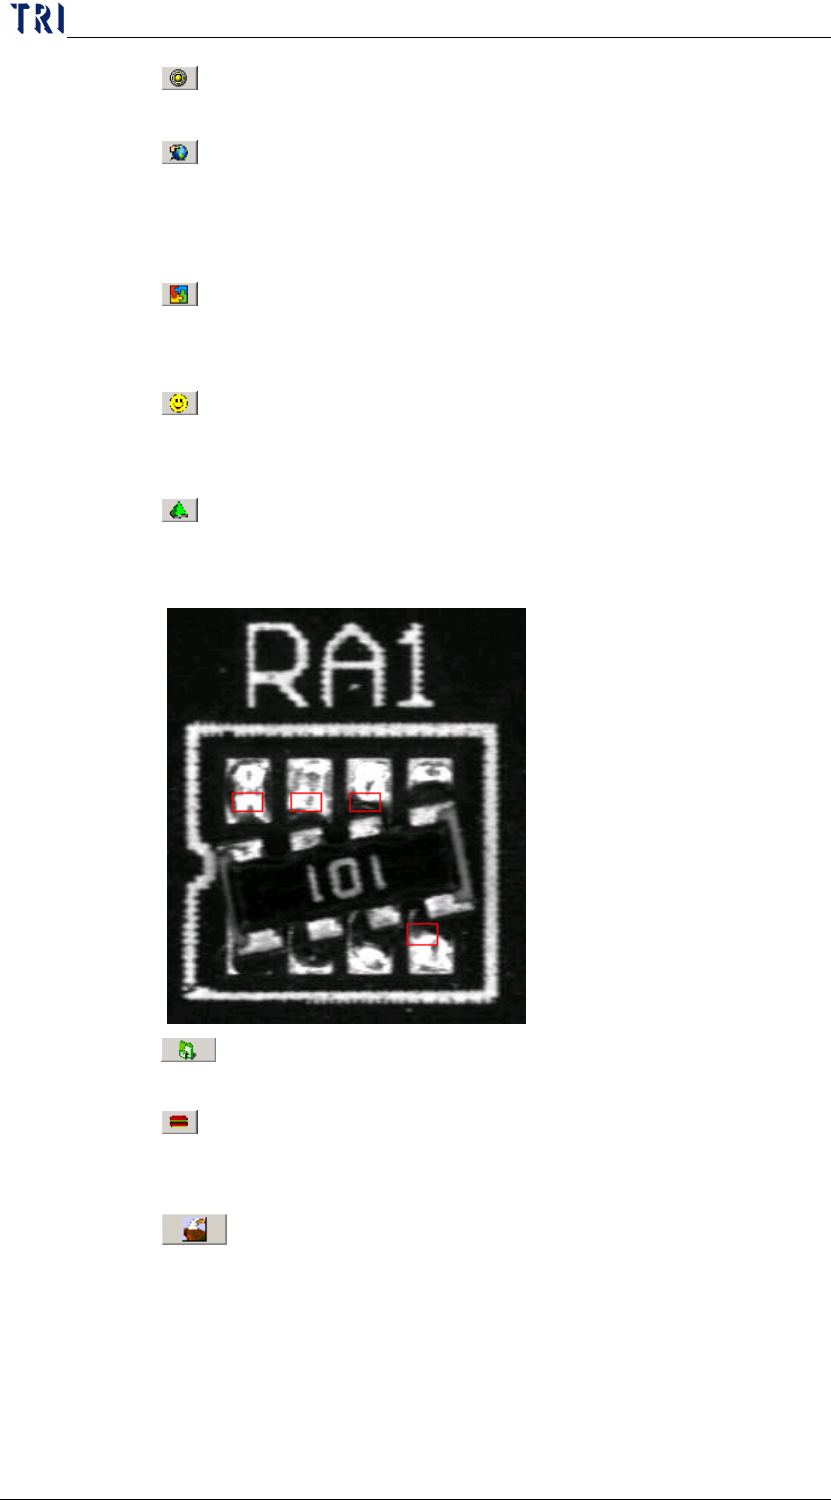
6.4.7
FOV Win All Show-When there is more than one inspection
box failed in one FOV, they are displayed in one FOV image as the
following picture.
6.4.8
Show Placer Data Function-Display the placer information,
it must correspond with AOI machine.
6.4.9 Defect Located in the Center-Click on this button and press
the [Page Up] key then the failed component image will be displayed
at the center of FOV window with the original size.
6.4.10
Show Top 10 Component-Show the top 10 defect
component on the panel map. The processes are as the followings:
(1) Set [Setting/Other/SPC Output] as [True]。
(2) Double click on [Board Information] on main frame.