00194081-01.pdf - 第101页
User Manual SIPLAC E CF 3 Technical data Software Vers ion SR.408.xx 03/2006 US Ed ition 3.10 Nozzle changer for the 6-segm ent Collect&Place head 101 3.10.5 Emptying the reject bin The rejec t bin hol ds aroun d 50 …

3 Technical data User Manual SIPLACE CF
3.10 Nozzle changer for the 6-segment Collect&Place head Software Version SR.408.xx 03/2006 US Edition
100
CAUTION 3
Before you fill magazine, make sure that all the nozzles on the Collect&Place head have
been returned to their magazines. 3
Æ Programming the nozzle changer is described in the SIPLACE C Pro user manual.
PLEASE NOTE 3
Æ Do not allow components to drop onto the magazines. If they do, they could jam the locking
plate.
Æ Do not allow components to drop onto free feeder module locations. They will stick to the
magnetic bar. Production may have to be interrupted if the feeder modules are not placed on
the component table correctly. You should therefore regularly clean the magazines and free
locations.

User Manual SIPLACE CF 3 Technical data
Software Version SR.408.xx 03/2006 US Edition 3.10 Nozzle changer for the 6-segment Collect&Place head
101
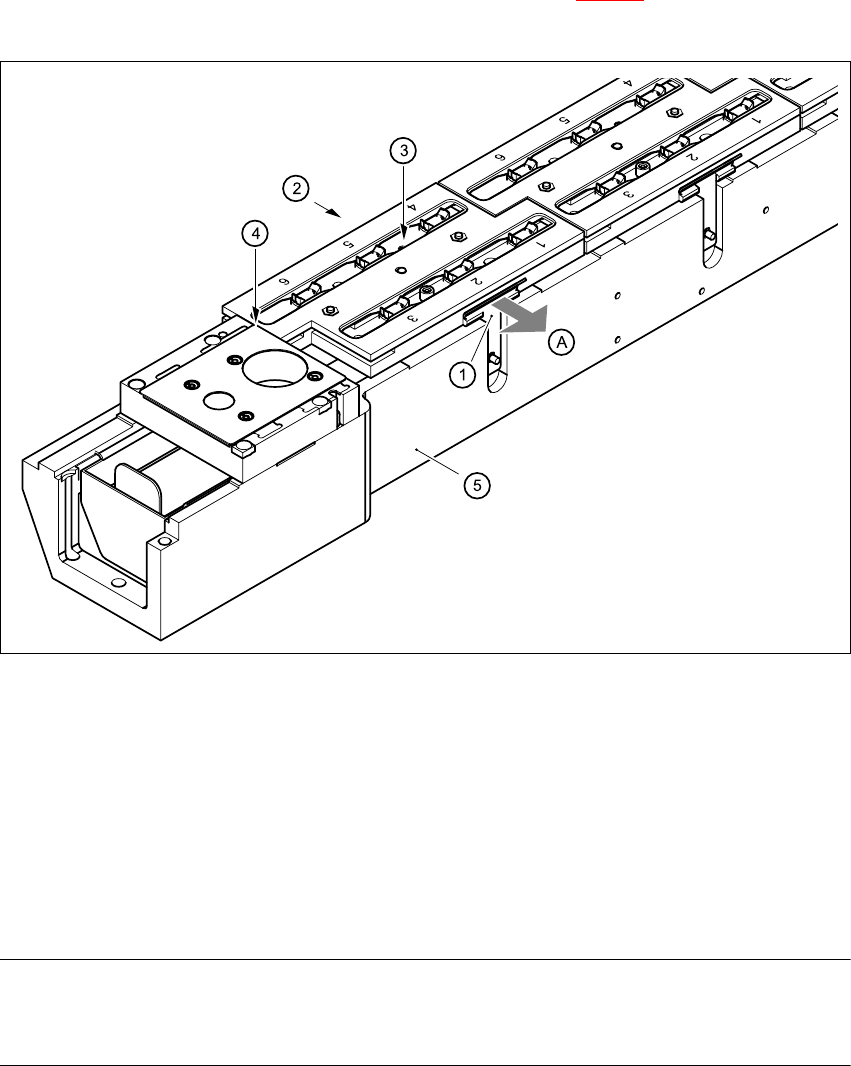
3.10.5 Emptying the reject bin
The reject bin holds around 50 nozzles from the 9xx family. To avoid interruption of the place-
ment sequence, you should regularly empty the reject bin.
Fig. 3.10 - 3 Emptying the reject bin, 6-segment Collect&Place head
3
(1) Remove the reject bin
Æ Pull the reject bin out of its retainer in the direction indicated by the arrow, and lift the bin out
of its holder.
Æ To return the reject bin, push it back into the retainer.
1
3 Technical data User Manual SIPLACE CF
3.10 Nozzle changer for the 6-segment Collect&Place head Software Version SR.408.xx 03/2006 US Edition
102
3.10.6 Changing the magazine
Æ To remove the magazine, push the spring hook (item 1 in Fig. 3.10 - 4) away from the maga-
zine. Lift the magazine out of the carrier.
Fig. 3.10 - 4 Changing the magazine
3
(1) Spring hook
(2) Retaining clamp
(3) Centering hole
(4) Slot
(5) Carrier
(A) Push the spring hook away from the magazine
PLEASE NOTE 3
Make sure that you insert the magazine so that the centering pins slide into the centering hole
(item 3) and slot (item 4). 3
Æ First place the side of the magazine with the centering hole (item 3) and the slot (item 4) on
the base (5). The two knobs on the magazine must slide into the retaining clamp (item 2).