00193790-01.pdf - 第96页
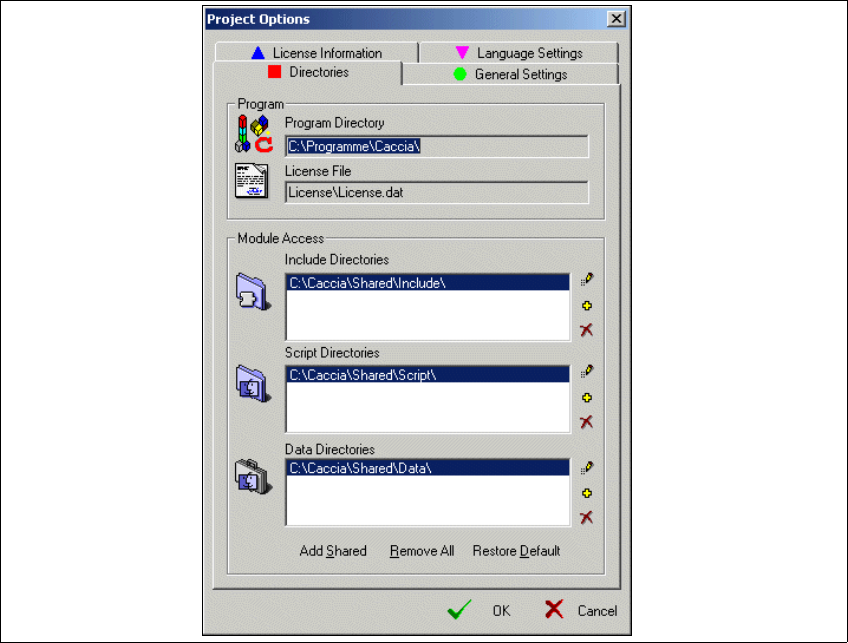
2 English Installat ion and Getting Started with CACCIA 2.6 CACCIA Installat ion Issue 07/2004 30 → The Project Opt ions dialog bo x will o pen: Fig. 2 - 26 Project Options → Select th e Direc tories tab. This s hows whi…
Installation and Getting Started with CACCIA 2 English
Issue 07/2004 2.6 CACCIA Installation
29
2.6.4 Installation Troubleshooting
2.6.4.1 Scripts are not available
You will see the following error message:
ERR_SCRIPT_ECOLL_NOT_FOUND
Possible causes and solutions:
1. Check whether the script folders are correct. To do this, proceed as specified at: “Linking In-
stalled Scripts” on page 29
2. If you receive this error message with a supplied and tested script, this means that Microsoft
Script Debugger has not been installed on your computer. Install Microsoft Script Debugger
and try again. Read the section “Preconditions and Preparation for Installation” on page 18.
Linking Installed Scripts
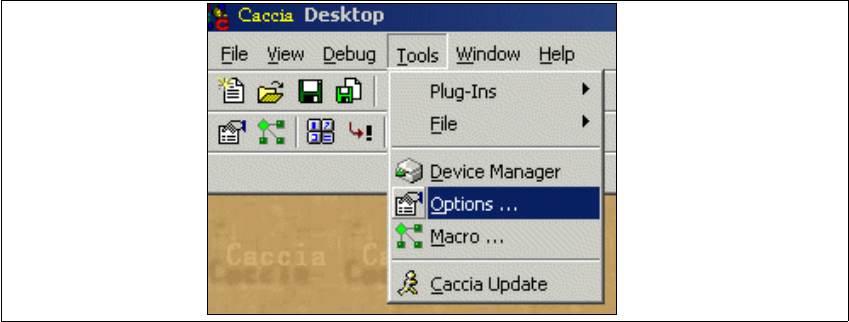
→ Start CACCIA. Open the Windows Start menu and select Program Files → CACCIA →
CACCIA or use the icon on your desktop.
→ Select the menu Tools → Options.
Fig. 2 - 25 Adding Toolbox Scripts
2 English Installation and Getting StartedwithCACCIA
2.6 CACCIA Installation Issue 07/2004
30
→ The Project Options dialog box will open:
Fig. 2 - 26 Project Options
→ Select the Directories tab. This shows which scripts will be loaded.
→ With the help of the example shown, link the scripts as follows - depending on your installation
target directory (e.g. C:\CACCIA\Shared):
– Include directory with the script path .. \Include\
– Script directory with the script path .. \Script\
– Data directory with the script path .. \Data\
→ Click on the Add Shared button and confirm your entries with OK.
Installation and Getting Started with CACCIA 2 English
Issue 07/2004 2.6 CACCIA Installation
31
2.6.4.2 Desktop Does Not Appear
Possible causes and solutions:
1. Check whether the scripts have been installed and whether their folders are correct. Perform
the following steps in the specified order:
2. Install the Toolbox scripts (see page 25)
3. Link the installed scripts (see page 29)
2.6.4.3 Could Not Execute CACCIA Functions
Incorrect CAN card selected.
Possible causes and solutions:
1. Check whether you have selected the correct CAN card on the CACCIA user interface.
2.6.4.4 Could Not Start CACCIA (Only in Windows NT)
Possible causes and solutions:
1. Check how CAN card installation and its connections.
2. Check the CAN driver status.
The CAN driver must be automatically loaded each time the PC/laptop is booted.
→ To ensure this happens, set the CAN driver start mode from Manual to Automatic in the
Windows NT Start → Settings → Control Panel → Devices menu.
→ The CAN driveris activatedeach timethe PC/laptop isbootedand can be used withoutthe
need for administrator rights.
3. Interrupt or address conflict (only with KVASER for laptop)
Check the interrupt settings and the port address. These details can be found at Windows NT
Diagnosis.
→ This function can be accessed from the Windows NT start menu, at Start →Program Files
→ Administrative Tools (Common) → Windows NT Diagnosis
→ Select the Resources tabtoviewtheinterrupt(IRQ) assignments and the port address
(Port).
→ To change these settings, you will need to rerun the CAN driver setup.