00196478-08_MM_SX12DX12_en.pdf - 第39页
Minor Maintenance 4.4.4 Performing Maintenance Tasks Maintenance Tasks for Nozzles Maintenance Manual SIPLACE SX1/SX2/DX1/DX2 39 4.4.4.2 4 . 4 . 4 . 2 R e p la c in g t h e P la s t ic N o z z le s Replacing the Plastic …
Minor Maintenance
Maintenance Tasks for Nozzles 4.4.4 Performing Maintenance Tasks
38 Maintenance Manual SIPLACE SX1/SX2/DX1/DX2
► Apply slight pressure and move the brush back and
forth to remove the partially dissolved dirt and resi-
dues.
► Check the cleaning result with a magnifying glass or
microscope.
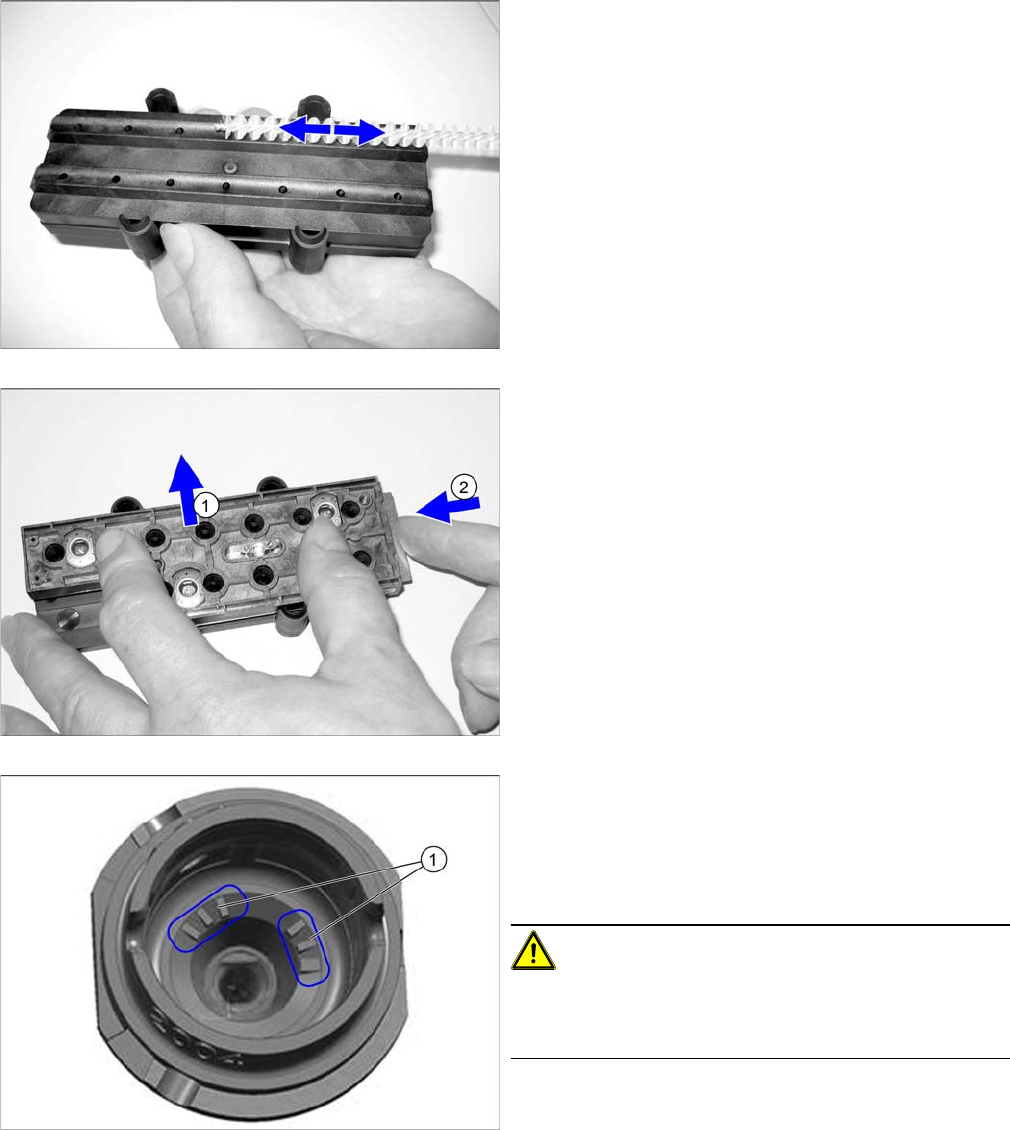
► (1) Remove the brush guidance.
► Place the nozzles in the nozzle magazine and close
the slide (2).
► Dry the nozzles with compressed air.
► If you are using nozzles with a nozzle ID (1), vacuum
the nozzle shaft (dust, components).
If you are unable to clean here, replace the nozzle.
► Place the nozzle magazine back in the nozzle chang-
er.
CAUTION!
Reinsert the nozzle magazine into the same position in
the nozzle changer as before (when it was removed be-
fore cleaning).
Minor Maintenance
4.4.4 Performing Maintenance Tasks Maintenance Tasks for Nozzles
Maintenance Manual SIPLACE SX1/SX2/DX1/DX2 39
4.4.4.2
4.4.4.2 Replacing the Plastic Nozzles
Replacing the Plastic Nozzles
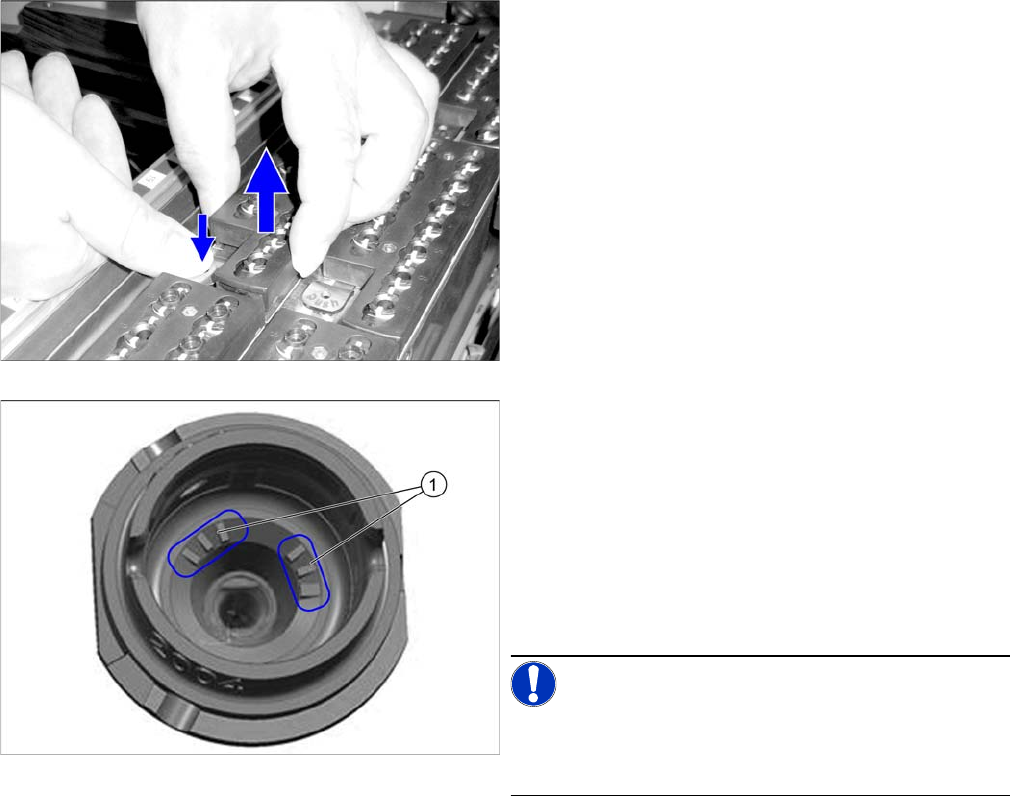
► Remove a full nozzle magazine from the nozzle
changer. When handling a nozzle magazine which is
not full, make a note of the orientation in the nozzle
changer, to ensure correct reinsertion later on.
► Check the nozzles.
Replace damaged nozzles.
► If you are using nozzles with a nozzle ID (1), vacuum
the nozzle shaft (dust, components).
If you are unable to clean here, replace the nozzle.
► Place the nozzle magazine back in the nozzle chang-
er. When handling a nozzle magazine which is not
full, pay attention to correct orientation in the nozzle
changer.
NOTICE!
Prepare additional nozzle magazines according to the
current nozzle configuration and replace the complete
magazine.
Minor Maintenance
Maintenance Tasks for the Conveyor 4.5.1 Tools, Consumables, Spare and Wear Parts
40 Maintenance Manual SIPLACE SX1/SX2/DX1/DX2
4.5
4.5 Maintenance Tasks for the Conveyor
Maintenance Tasks for the Conveyor
4.5.1
4.5.1 Tools, Consumables, Spare and Wear Parts
Tools, Consumables, Spare and Wear Parts
▪ Cotton gloves [00359087-xx]
▪ ESD wristband [00320279-xx]
▪ Vacuum cleaner
4.5.2
4.5.2 Preparatory Steps
Preparatory Steps
Caution Conveyor - No PCB Must Be in the Conveyor
Note Co nveyor - Re commendation: Ad justing Sides via S oftware for Acces sibility
► Move the component trolley out of the machine.
See also
1.2 Preparatory Work... [ ➙ 12]
4.5.3
4.5.3 Performing Maintenance Tasks
Performing Maintenance Tasks
4.5.3.1
4.5.3.1 Vacuuming the Transport, Nozzle Changer and Insert
Vacuuming the Transport, Nozzle Changer and Insert
4.5.4
4.5.4 Final Work
Final Work
► Restore the original conveyor configuration.
CAUTION
No board
There must be no PCBs in the machine during the following tasks.
NOTICE
Accessibility
We recommend using the following procedure for better access:
► Use the station software to adjust the conveyor sides in such a way that you can easily
reach all conveyor belts as well as the whole area below the sides.
CAUTION!
Loose components on the PCB conveyor could cause
faults.
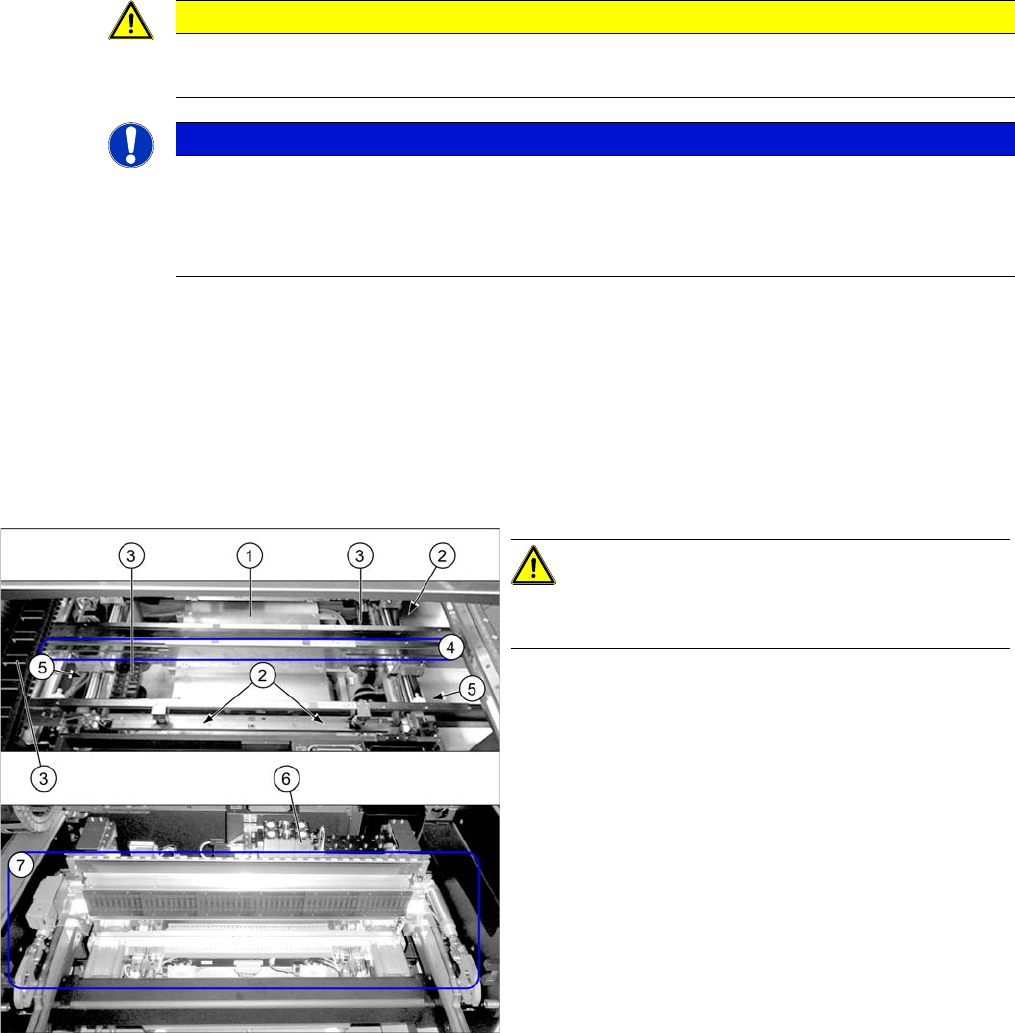
► Use the vacuum cleaner to remove all loose compo-
nents on and around the PCB conveyor. Pay particu-
lar attention to the following areas:
1. Lifting table (also at the side of it)
2. Width adjustment including toothed belt (where ac-
cessible)
3. Trailing cables in the conveyor and at the gantry
4. Conveyor belts (at all sides)
5. Ball screws (2x)
6. Nozzle changers
7. Docking unit, tape cutter