00196428-0102_AI_Reconfig_Kit_X-Serie_CPP_DE+EN.pdf - 第112页
2 Assembly Instructions Head Reconfiguration Kit CPP for the SIPLACE X Series Head Reconfiguration Kit 2.7 Installing the CPP Placement Head Issue 03/2010 112 2.7.13 Completing T asks in the St ation SW X Load the firmwa…
Head Reconfiguration Kit 2 Assembly Instructions Head Reconfiguration Kit CPP for the SIPLACE X Series
Issue 03/2010 2.7 Installing the CPP Placement Head
111
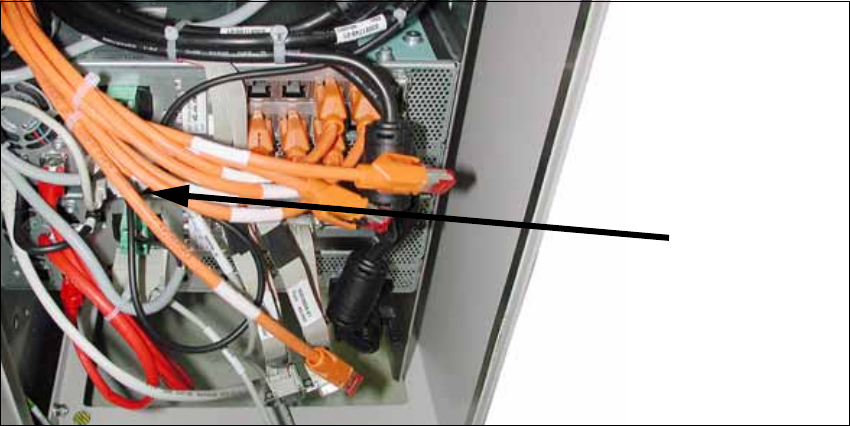
X Plug a USB stick or another appropriate storage medium into the USB port of the station com-
puter.
2
2
X Save the machine data from the storage medium to the station computer.
2.7.12 Completing Tasks
X Switch the placement machine on at the main switch.
X Switch to the menu for service engineers. (See Section 2.6 "Replacing the Placement Head -
Procedure" on page 77, items 13 to 15)
X Accept the data (zero point correction for star and Z axis) from the placement head.
If the placement head is installed on a machine for the first time, it does not contain any cali-
bration data.
X Calibrate the placement head.
If the placement head was already installed on another machine, you can use the calibration
data from the placement head memory.
USB stick
BoxPC
2 Assembly Instructions Head Reconfiguration Kit CPP for the SIPLACE X Series Head Reconfiguration Kit
2.7 Installing the CPP Placement Head Issue 03/2010
112
2.7.13 Completing Tasks in the Station SW
X Load the firmware for the CPP head.
X Measure camera and nozzle changer.
X Carry out a mapping procedure, if necessary.
X Perform another restart.
Thus, the reconfiguration is completed. 2
2.7.14 SIPLACE Pro
See Section 2.8.1 "Configuration of the Placement Heads with SIPLACE Pro" on page 113. 2
Head Reconfiguration Kit 2 Assembly Instructions Head Reconfiguration Kit CPP for the SIPLACE X Series
Issue 03/2010 2.8 Removing the Placement Head
113
2.8 Removing the Placement Head
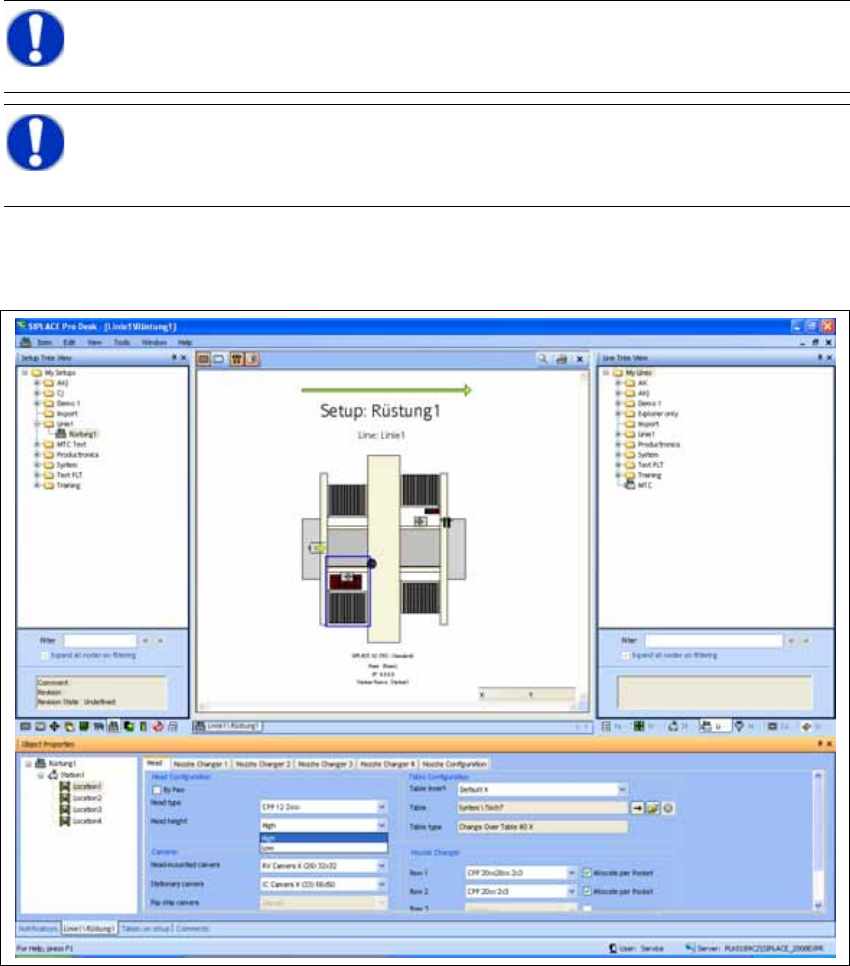
2.8.1 Configuration of the Placement Heads with SIPLACE Pro
X In SIPLACE Pro stop all jobs of the line.
X In the "Properties Setup" dialog enter the new placement head type, the camera type and the
nozzle changer configuration of the corresponding machine location.
2
X Perform a new optimization of the setup in SILPACE Pro. In doing so, make sure to set the
correct head height.
NOTE:
Make a backup of the SIPLACE Pro data. 2
NOTE:
It is recommended to enter the new head into the setup at this point in time (cameras
and nozzles) and to perform an optimization for the setups. 2