52339001系统-2.pdf - 第19页
Page 17 Installing eComStation fr om a Disk Image 52339001 Rev . C This document supports eComStation 2.x and higher and IM-UPS 6.0 and higher. CAUTI ON The PowerQuest Drive Image Pro utility provided on the disks used i…
Page 16
52339001 Rev. C Installing eComStation from a Disk Image
This document supports eComStation 2.x and higher and IM-UPS 6.0 and higher.
Procedure #2: Install eComStation from a Disk Image (ITX or ATX
Motherboards)
Use this procedure on machines with the ITX or ATX motherboard.
The image CD included in this package can be used to install the appropriate
version of eComStation, pre-configured for use on your machine. Once the
image has been installed and the system rebooted the machine controller will
be ready to have IM-UPS installed on it. The machine should run correctly
with no need for further configuration upon completion of this procedure. It
should be possible to go from a new or unloaded hard drive to the
eComStation desktop in less than 10 minutes when loading eComStation
onto an ITX or ATX based control system.
An image package, created by imaging an eComStation installation on a
“Master Drive”, is currently available for the following Universal standard
Operating System/Hardware configuration:
eComStation/ATX/Motorola Power PC
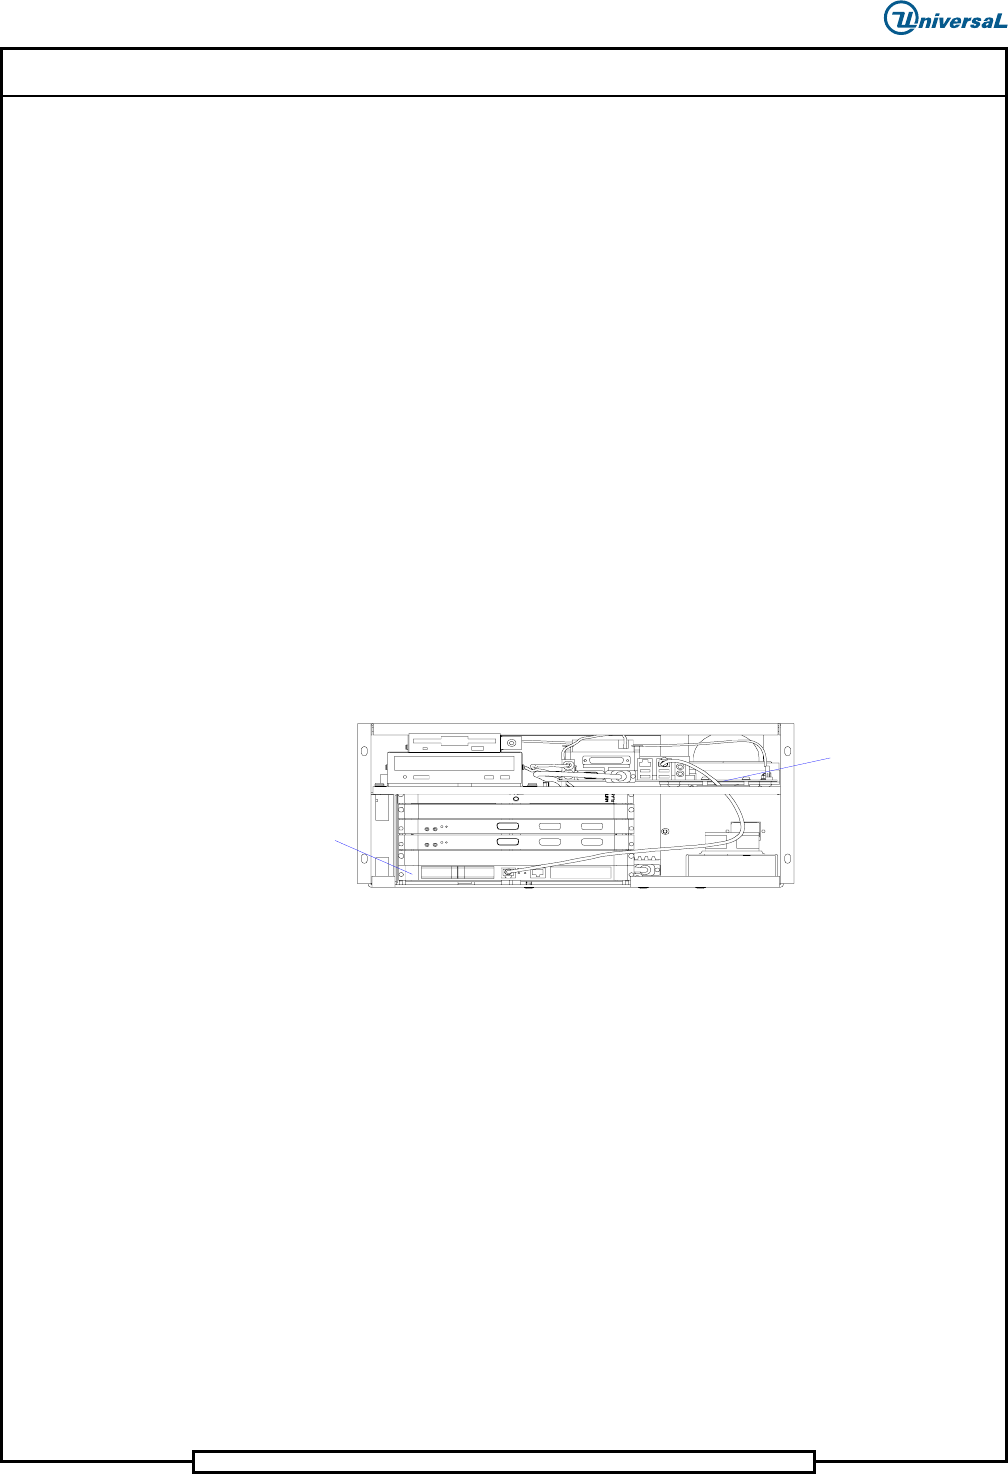
Use the following illustration to determine the hardware configuration.
VME/ATX Chassis Assembly
ATX Mother Board/Motorola Power PC Hardware Configuration
Motorola Power PC
MCOS Board
ATX Mother Board
These images cannot be installed on drives that are smaller than the master
drives the images were created from. The eComStation images must be
installed on a drive that is at least 100GB in capacity. The HPFS file system
used by eComStation allows additional drive space up to a maximum of
64GB, to be used in most cases.
This installation document assumes that the processor BIOS settings are
correctly set. Installing an image on a system with incorrect BIOS settings
might result in improper or unstable operation. Refer to the machine software
installation documentation for details on these settings.
This installation document does not discuss network configuration. Network
settings required for machine operation are incorporated into the image and
should not require changing. Refer to the appropriate section of the software
installation manual if the machine is to be connected to a Wide Area Network
(WAN).
Universal recommends not performing the WAN configuration steps until the
machine has been running correctly in a stand alone configuration.

Page 17
Installing eComStation from a Disk Image 52339001 Rev. C
This document supports eComStation 2.x and higher and IM-UPS 6.0 and higher.
CAUTION
The PowerQuest Drive Image Pro utility provided on the disks used in
this procedure is licensed from Symantec®. Do not create or distribute
illegal copies of this software.
CAUTION
The eComStation images provided on the disks used in this procedure
are licensed for use on a single Universal Instruments insertion
machine. Do not install these images on other systems, and do not
create or distribute illegal copies of this software.
Prerequisites
• Back up IM-UPS if it is already installed on the machine and if the
machine is functioning.
• “Set Up the BIOS” in the Motherboard BIOS Setup manual.
• The ITX or ATX motherboard has been identified.
1. Boot Up the Machine
To boot up the machine, do the following:
1. Insert the appropriate eComStation Image CD into the CD-ROM drive.
2. Power up or reboot the VME Chassis.
Result: The imaging system will boot with 2 drives:
• An A: drive with a bootable FreeDOS operating system and Drive
Image Pro on it
• A C: drive that contains the eComStation images and other files.
The drive with the images on it might be the D: drive if the hard
drive already has a FAT volume on it.
Result: The system will boot to FreeDOS and Drive Image Pro will
automatically launch. In a few seconds, a blue screen with an hour
glass icon displays.
Page 18
52339001 Rev. C Installing eComStation from a Disk Image
This document supports eComStation 2.x and higher and IM-UPS 6.0 and higher.
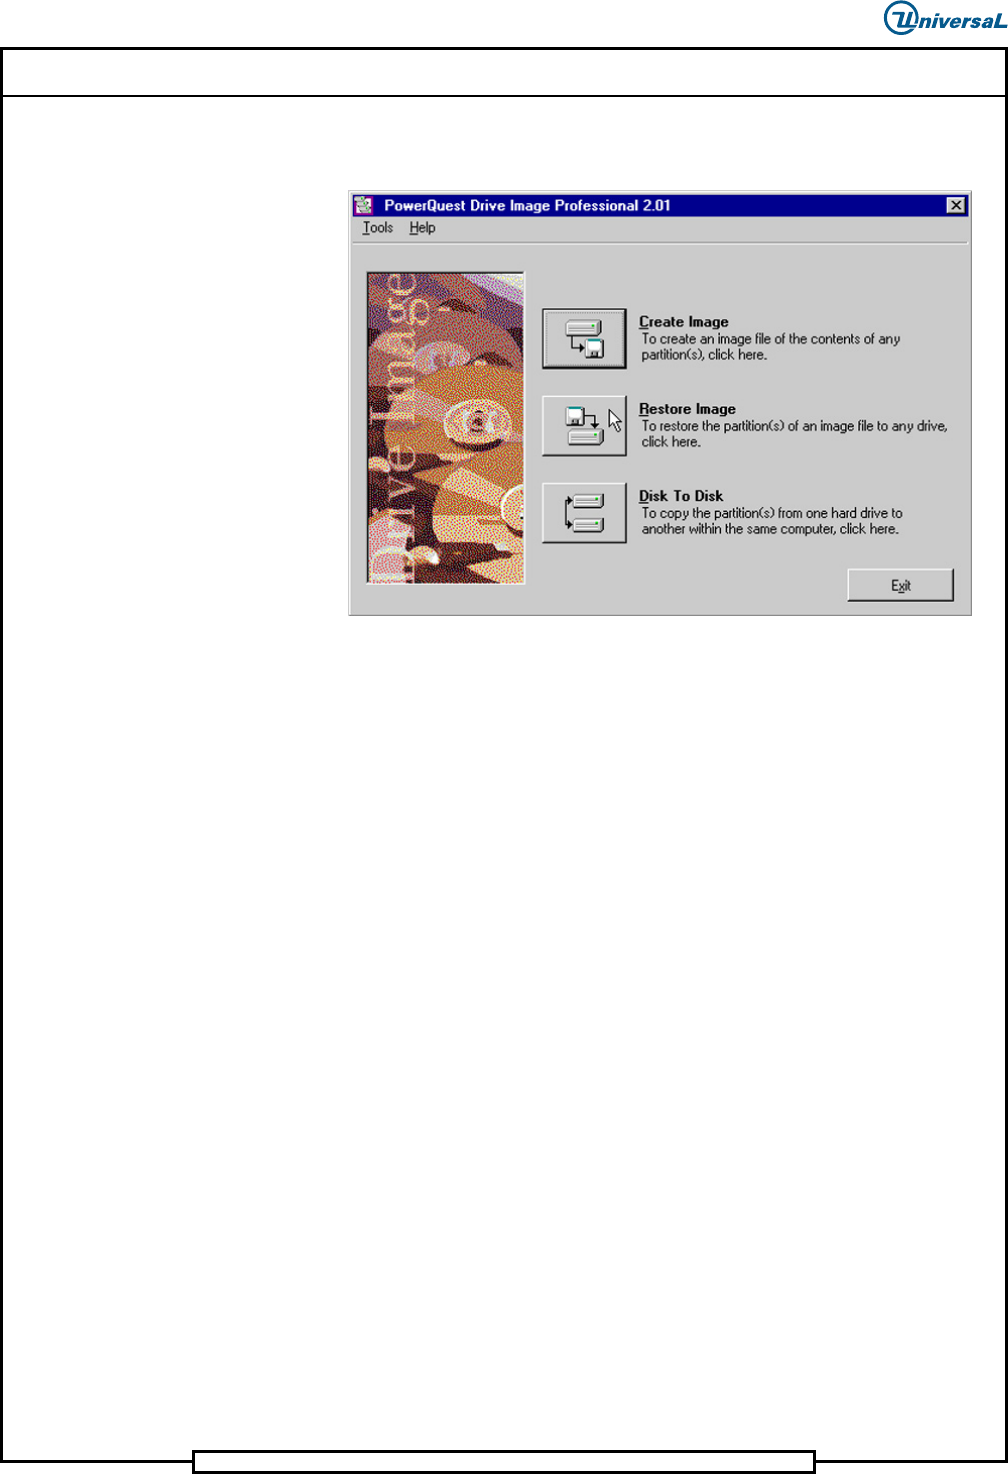
Result: A few seconds later, the PowerQuest Drive Image
Professional 2.01 screen should display.
2. Select the Image File
To select the image file, do the following:
1. Select Restore Image. The Select Image File screen displays.
2. Select Browse. The Open Image File dialog box displays.
3. In the Drives window, select the CD-ROM drive in which the image
disk was inserted. The CD file structure will be shown in the Folders
column.
4. Double-select the Images folder to open it. A list of the image files on
the CD displays in the File Name column.
Note: Each image CD contains 2 image files. These are the English
and Simplified Chinese images of the version of eComStation
appropriate to the machine.
Note: The Image File Comments section at the bottom of the
screen might provide additional details about the selected image.
5. Select the appropriate image file, and select OK. The Select Image
File screen displays, showing the path to the selected image.