52339001系统-2.pdf - 第22页
Page 20 52339001 Rev . C Installing eComStation fr om a Disk Image This document supports eComStation 2.x and higher and IM-UPS 6.0 and higher. This screen shows any partitions that might already exist on the hard drive …
Page 19
Installing eComStation from a Disk Image 52339001 Rev. C
This document supports eComStation 2.x and higher and IM-UPS 6.0 and higher.
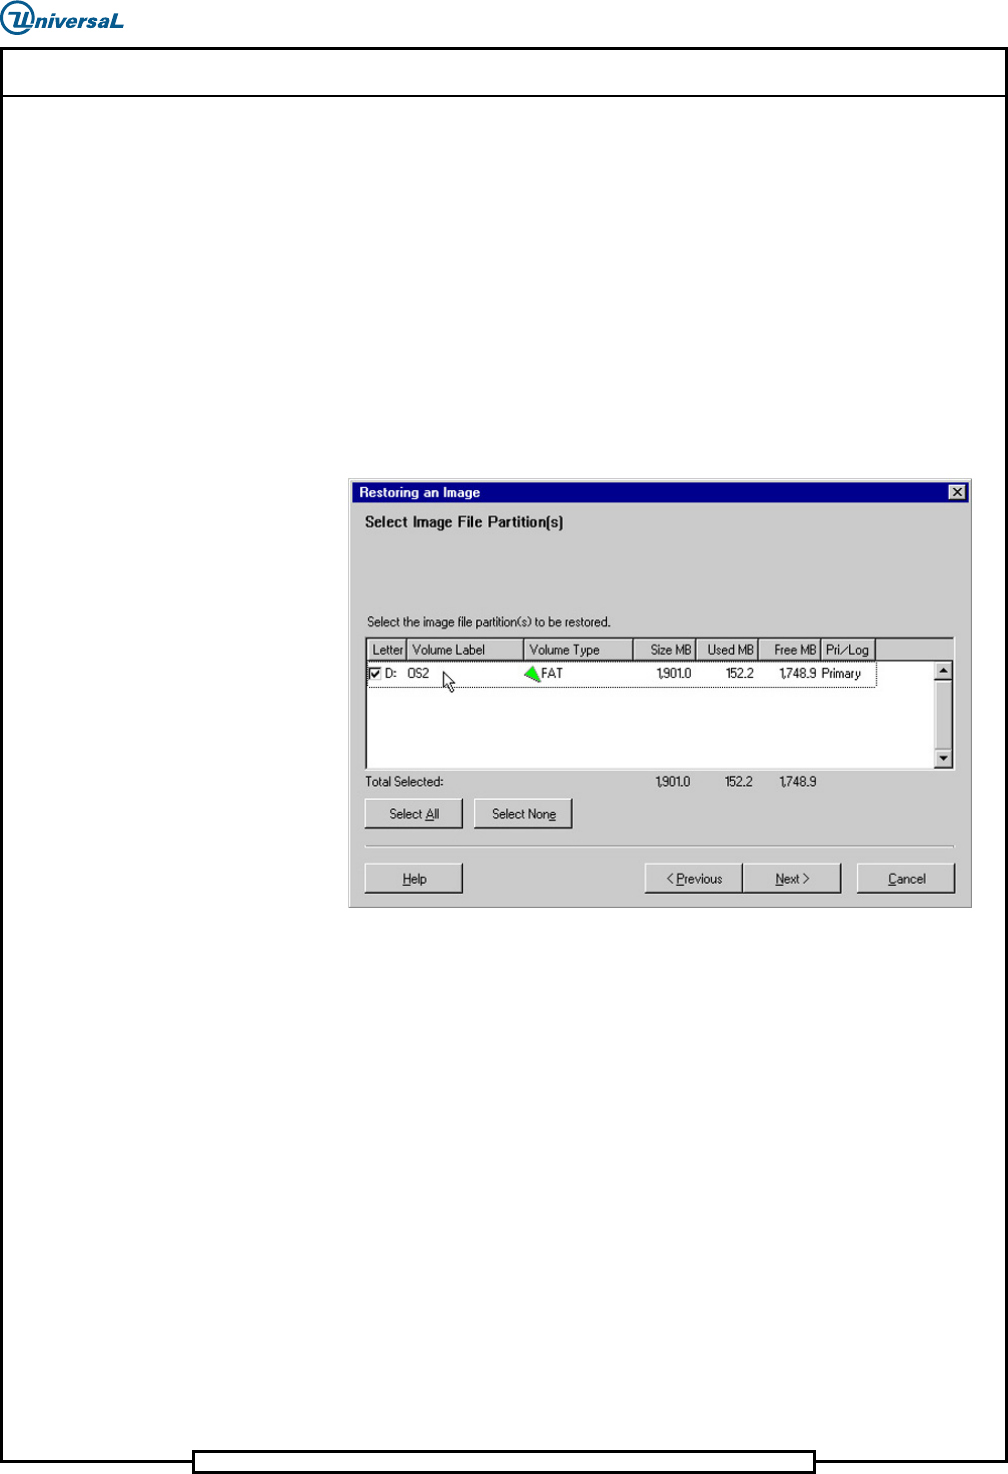
6. Select Next to continue. The Select Image File Partition(s) screen
displays.
This screen shows the partitions that were defined on the drive image
and offers a way to select the partition to be restored. The images
provided by Universal will each have 1 partition.
3. Select the Image File Partitions
To select the image file partitions, do the following:
1. Select the partition (checked) as shown in the following screen.
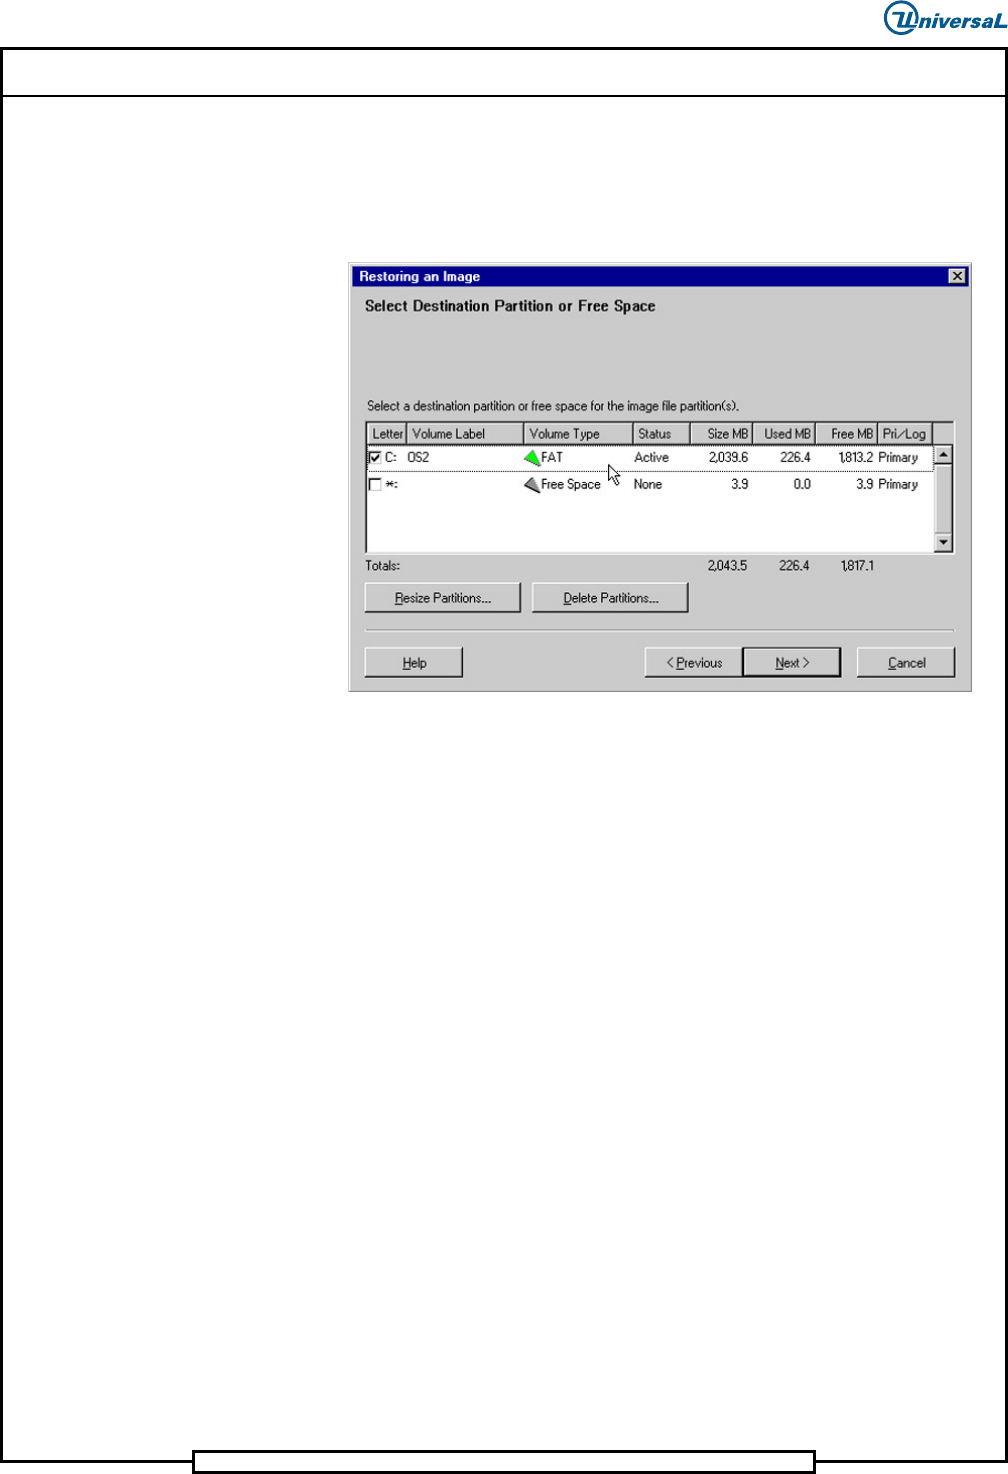
2. Select Next. The Select Destination File Partition or Free
Space screen displays.
Page 20
52339001 Rev. C Installing eComStation from a Disk Image
This document supports eComStation 2.x and higher and IM-UPS 6.0 and higher.
This screen shows any partitions that might already exist on the hard
drive and provides a way to remove partitions before the image is
restored. This example screen shows one active eComStation partition.
The drive also contains some Free Space that is not part of the
partition.
3. Do one of the following:
a. If the list contains only one entry with a Volume Type of Free
Space and a Status of None, there are no partitions to delete.
Go directly to the procedure, “Resize the Partition”.
b. If the list contains a partition as shown in the above example,
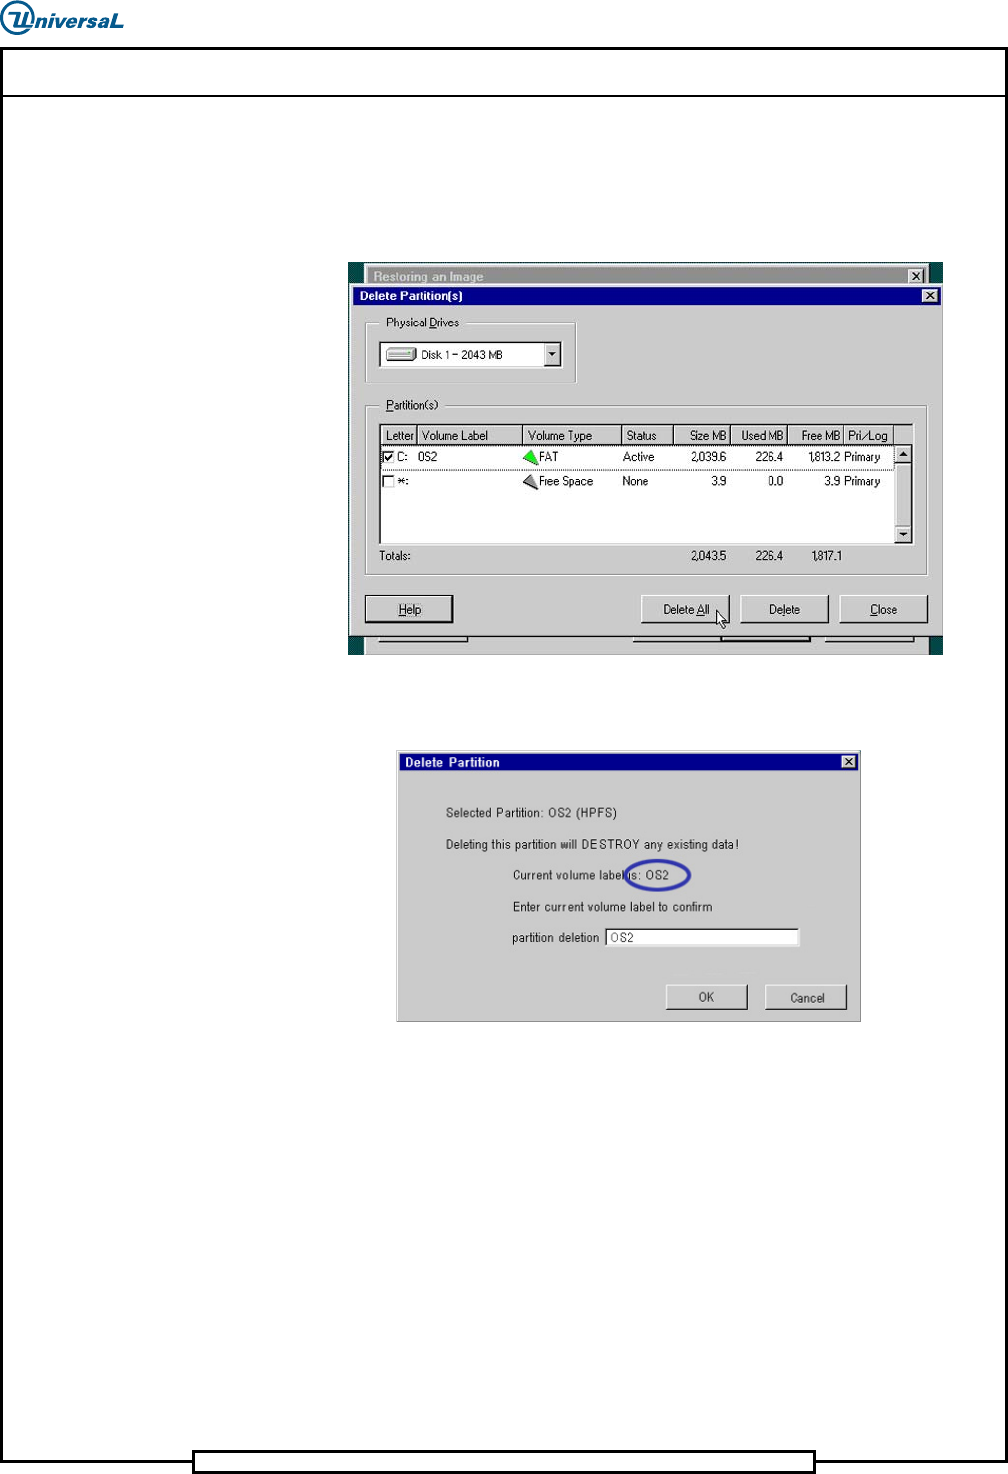
select Delete Partitions. The Delete Partition(s) screen
displays.
Page 21
Installing eComStation from a Disk Image 52339001 Rev. C
This document supports eComStation 2.x and higher and IM-UPS 6.0 and higher.
4. Delete Pre-Existing Partitions
To delete partitions, do the following:
1. Select on the partition to select it, then select Delete All.
Depending on the current state of the hard drive, the following warning
might display.
2. If this dialog displays, enter the volume label to confirm the deletion.
The Volume Label is case sensitive, and must be entered exactly as
shown on the screen.