[Superset] Chapter5_SPC Plus_ENG_20100827TW.pdf - 第48页
Programmer's Manual | 48 3. Once the Production Quantity dialog box is enabled, select DA.Data Clear cat egory . Apply the configured change s above. 3.14.2. P OST - SETUP U SE After completing the Defect An…
Programmer's Manual | 47
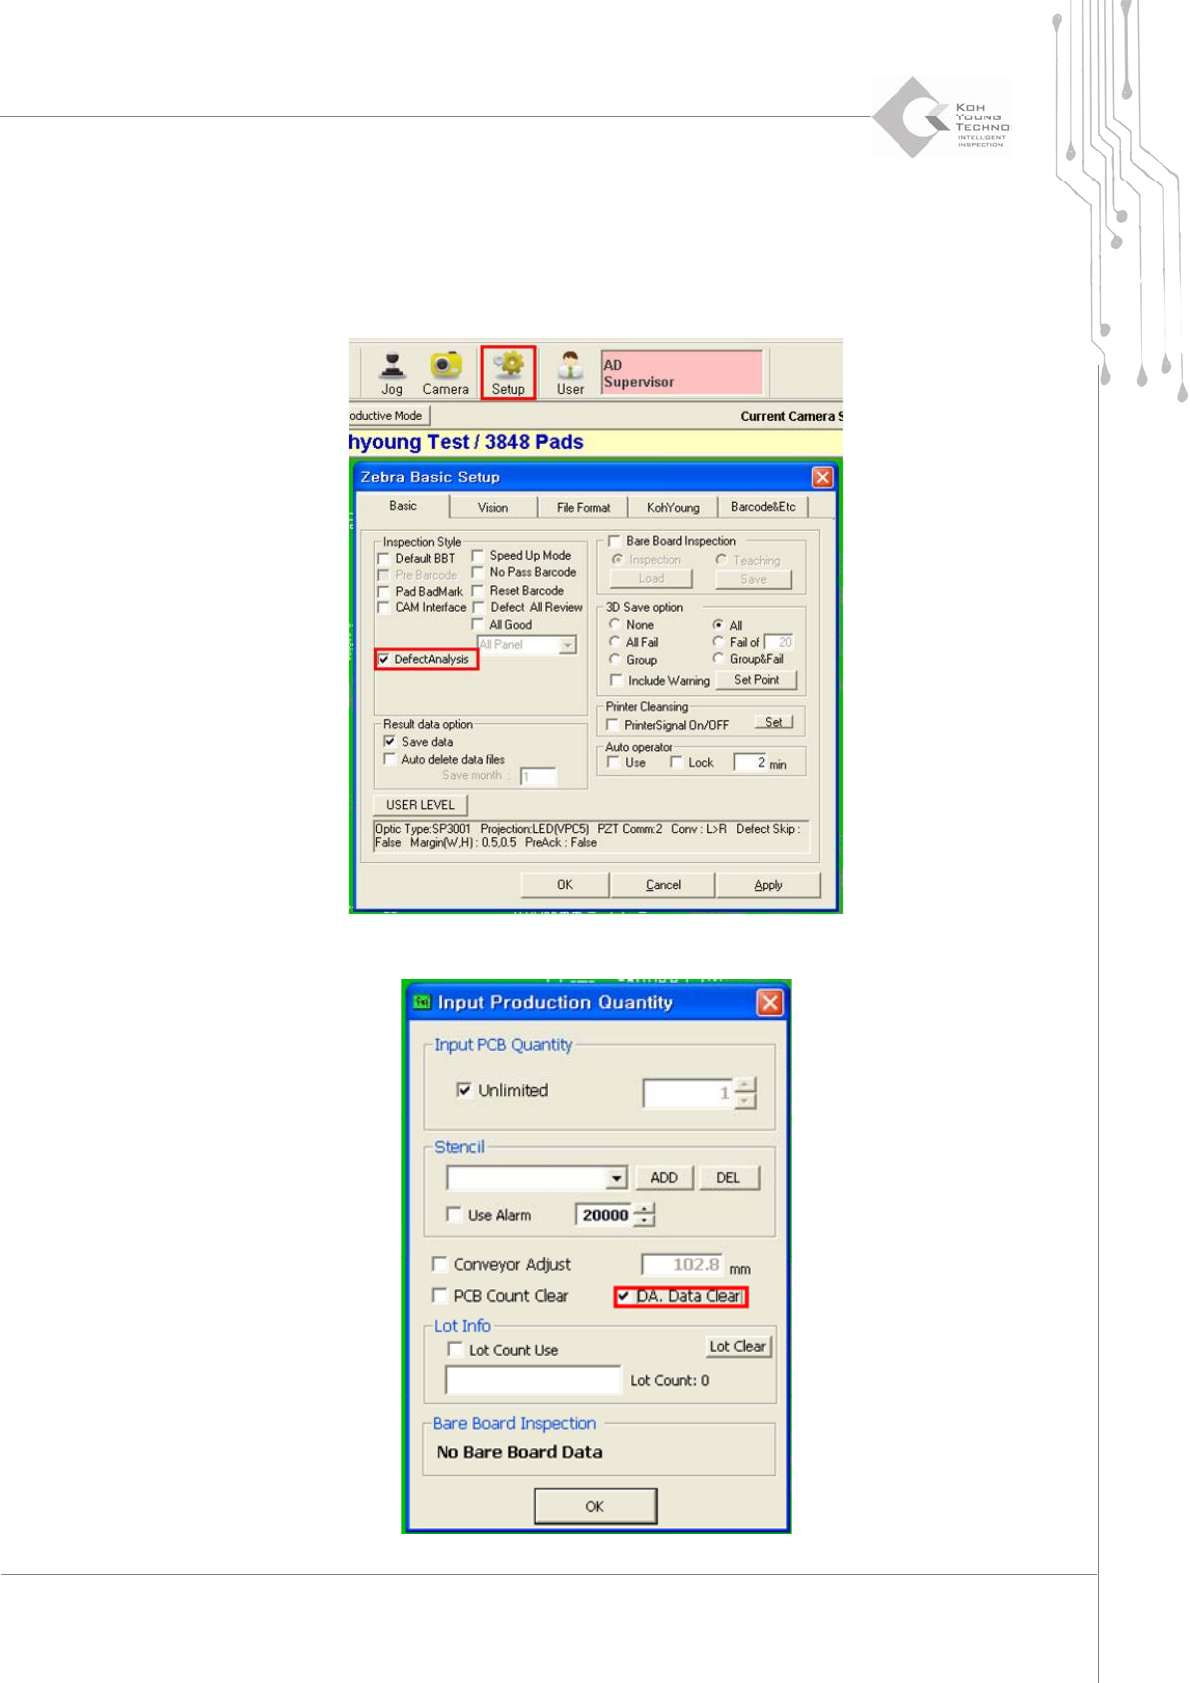
ToenableordisabletheDefectAn alysis functionwhilerunningtheprogram,proceedwith
thefollowing:
1. Click Setup menu in the sub-menu of 3D Inspector
™
to enable the Zebra Basic Setup dialog box.
Select (or unselect) Defect Analysis category on the mid-left side of Basic tab.
2. From the file menu of 3D Inspector™, select an inspection quantity-assigning menu.
Programmer's Manual | 48
3. Once the Production Quantity dialog box is enabled, select DA.Data Clear category. Apply the
configured changes above.
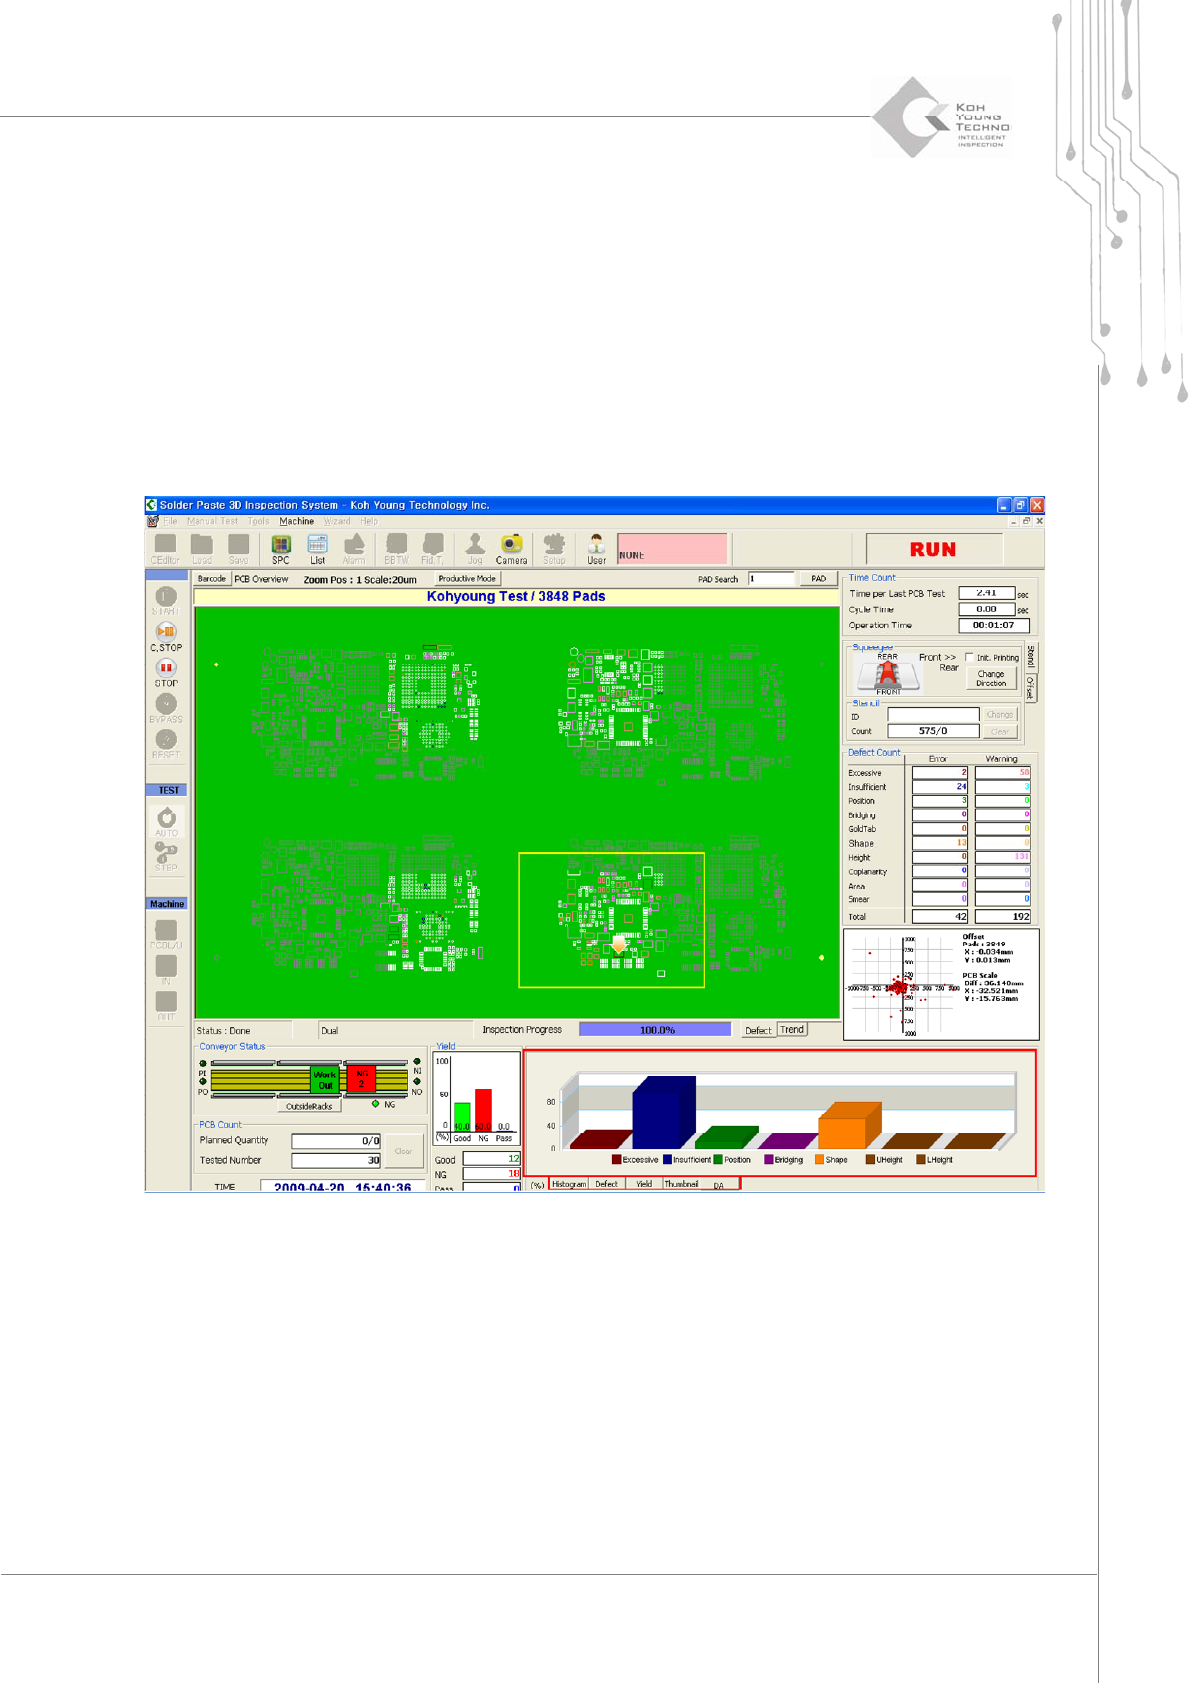
3.14.2. POST-SETUP USE
AftercompletingtheDefectAnalysisfunctionsettings,theDefectAnalysismenuisgeneratedatthe
lowerrightsidewhen3DInspector
™
isexecuted.Thedefectaccumulationcanbecheckedinthe
chart on the screen shown below; clicking parts other than the chart bar connects to RealDefect
TrendViewofSPCPlus
™
.
Programmer's Manual | 49
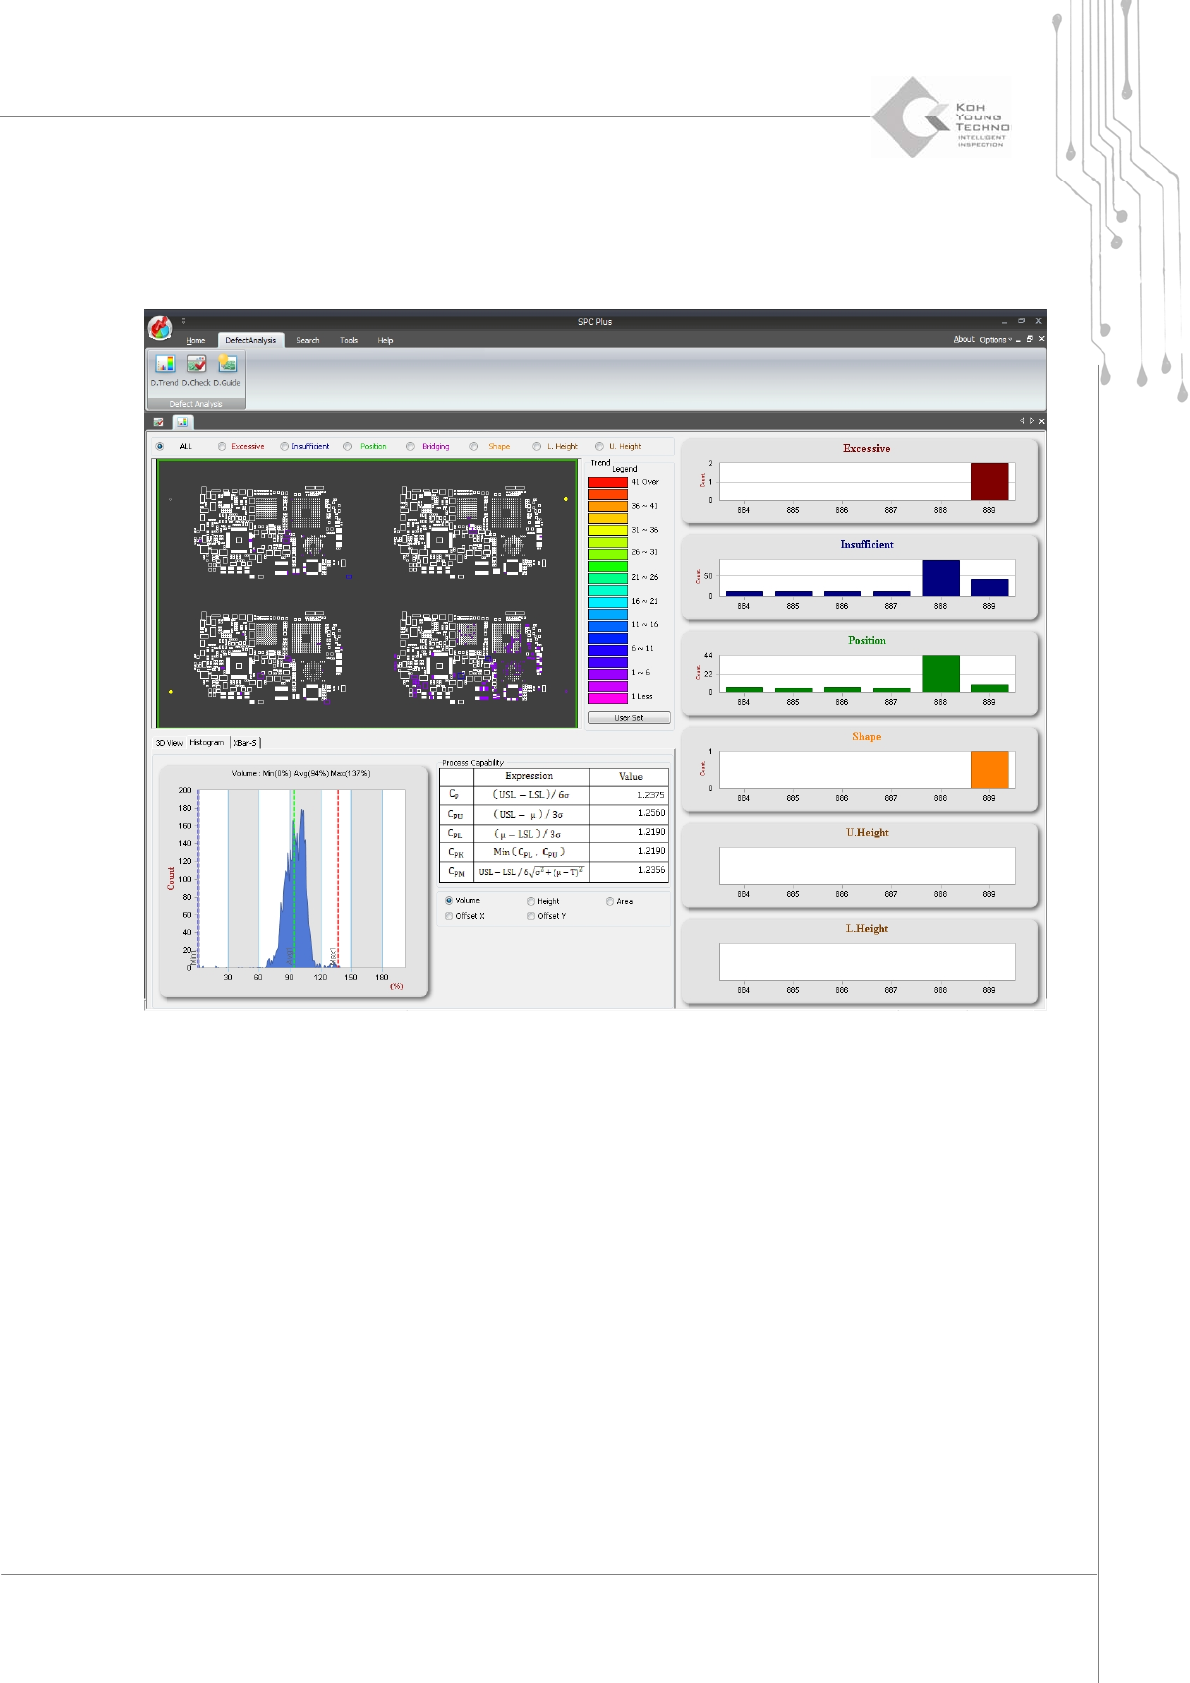
3.14.2.1. Real Defect Trend Tool
SelectingRealDefectTrendToolfromthesub‐menuofDefectAnalysiscausesthequantityofdefects
ineachboardtobedisp layedasshownbelow.