OM-1352-003_w.pdf - 第66页
8-1 Tg1357-ID-SO 8. Maintenance 8.1 Precautionary Items before Maintenance This session describes how to perform inspections, cleaning, lubrication, and adjustment to keep the flux dispensing units in good shape. It is re…
7-2
Tg1357-ID-SO
0703-003
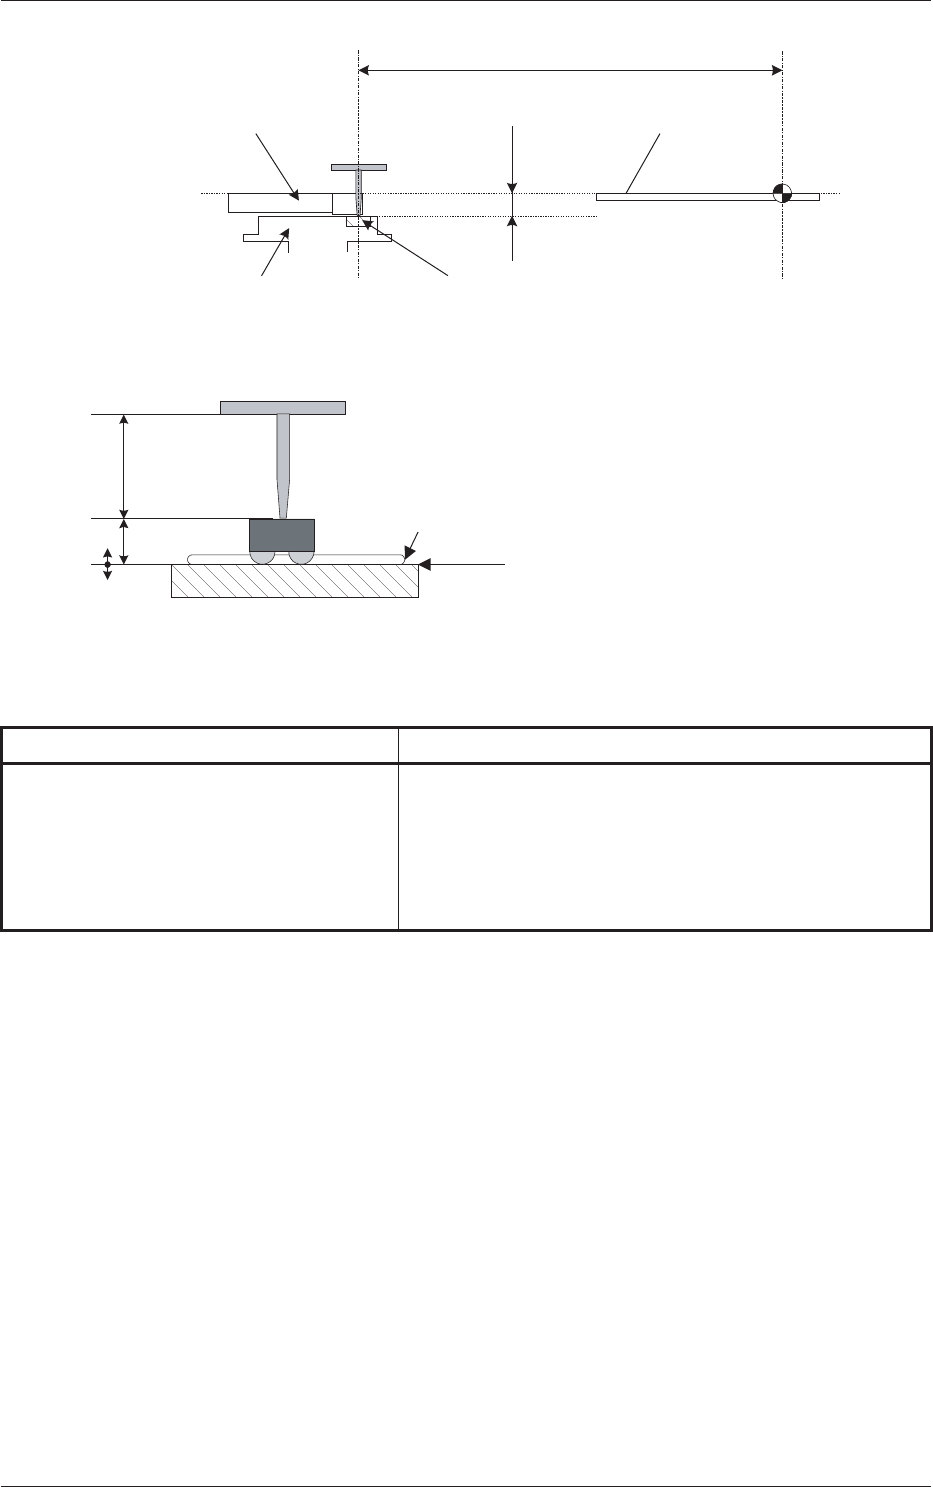
9.5
523.0
PCB Positioning
Upper Surface
Dispensing Reference
Surface
Squeegee
Drum (Ratational Disk)
Flux Dispensing Unit
Stage Center
Reference
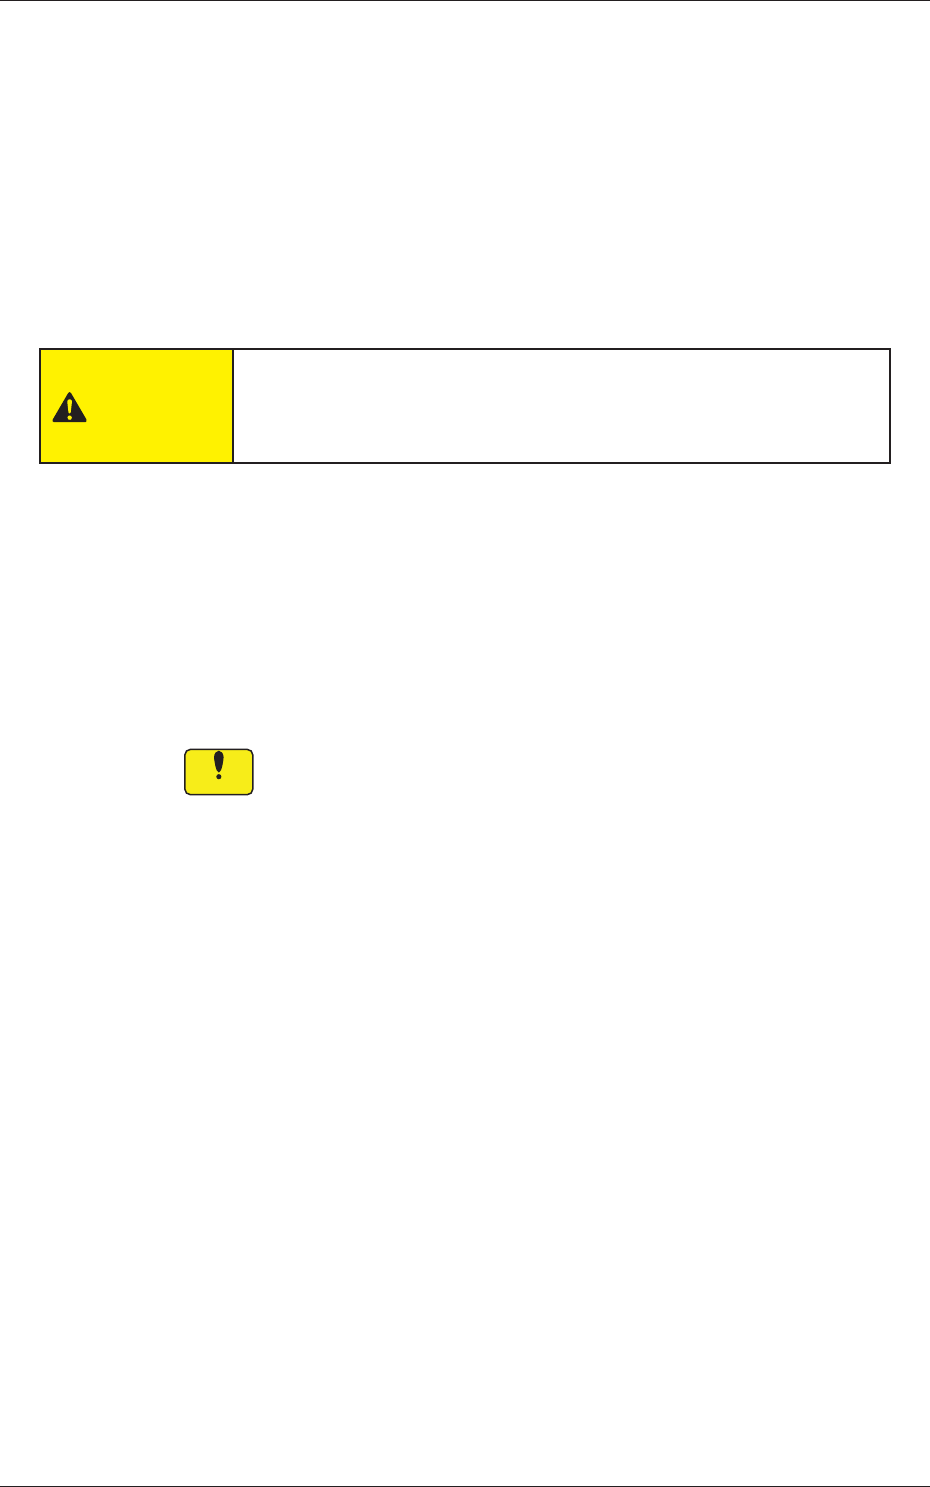
Dispensing Reference Surface
Flux (Coating Pressure: 10 to 100
�m)
Dispensing Level
Component
Thickness (t)
Nozzle Length
At the time of component dipping
Dispensing Position
Fig.34
Table 5
Name Details
Height from Upper Surface of PCB 9.5 mm
+ Feeder Offset (A) L
+ Offset L in Flux Dispensing Unit
- Component Thickness
+ Dispensing Level
7. Offsets
8-1
Tg1357-ID-SO
8. Maintenance
8.1 Precautionary Items before Maintenance
This session describes how to perform inspections, cleaning, lubrication, and
adjustment to keep the flux dispensing units in good shape.
It is recommended that periodic maintenance of the flux dispensing units
should be ensured.
CAUTION
Only a well-trained service person should perform maintenance
tasks carefully through the specified procedures.
8.2 Preparation for Maintenance
Required Items for Cleaning and Lubrication
• Rag
Use a rag made of such material as cotton, etc., that produces as less
waste thread as possible.
Notice
Remaining waste thread may cause the flux dispensing unit to
break down.
• Alcohol
Do not use alcohol for any spots other than the specified ones.
0703-003
8. Maintenance

8-2
Tg1357-ID-SO
0703-003
8.3 Maintenance Method
8.3 Maintenance Method
8.3.1 Understanding of Maintenance Items on Each Section
Clarified in this session are the spots of the flux dispensing units to be
maintained periodically.
View of Inspection, Cleaning, Lubrication, and Adjustment Spots
Every Day Cleaning
Required Time: 3 minutes
Squeegee
Remove two screws from the acrylic
cover, detach the cover, and wipe off
flux accumulated on the squeegee
with a rag soaked in alcohol.
After the cleaning is completed,
attach the acrylic cover and tighten
the two screws.
Be sure to attach the acrylic
cover back in place after the
cleaning.
[1] [2]
[3]
Fig. 35
[1]: Maintenance Spot
[2]: Cycle and Contents of Maintenance
[3]: Details of Maintenance