1_SME_DB_Feeder_User_Guide(Eng_Ver1.4).pdf - 第32页
2-6 SM-Series SME DB Tape Feeder User's Manual 2.1.4. Locking Move the tape guide down after h aving sprockets mesh with the t ransfer slots of the carrier tape and check that the carrier t ape has been properly mes…
2-5
Operation of the Feeder
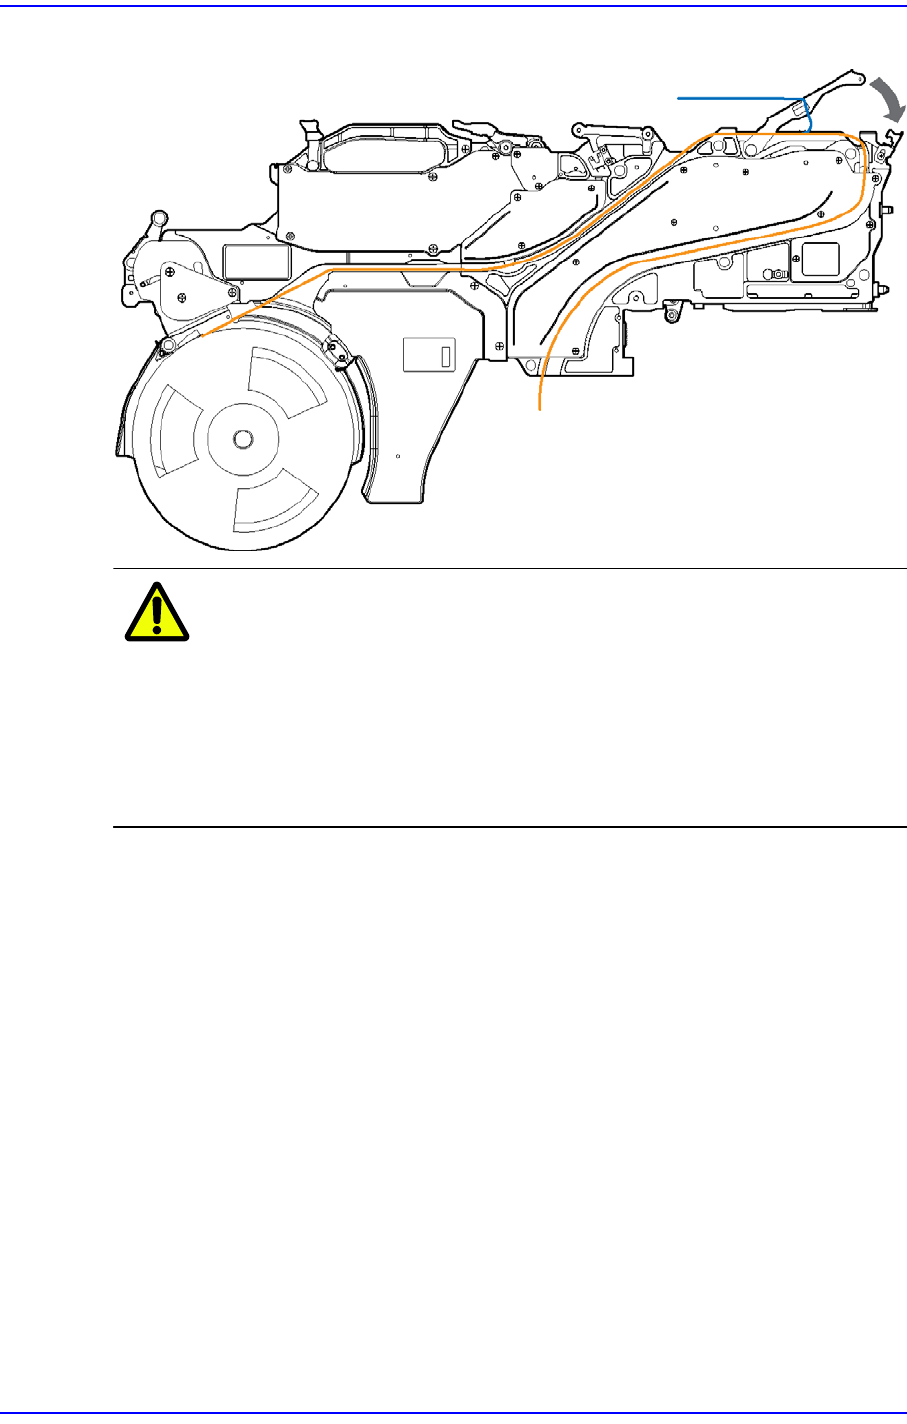
Figure2.7 Exit of the carrier tape of the 8mm/W4P1
tape feeder
Caution In the case of 0402 parts, the tape must be installed in the
feeder through the front slit.
When installing the tape for 0603 parts through the front slit,
use parts that are free of static electricity.
If a part has static electricity, it may cause a pickup error
due to static electricity during its supply.
2-6
SM-Series SME DB Tape Feeder User's Manual
2.1.4. Locking
Move the tape guide down after having sprockets mesh with the transfer slots of the carrier
tape and check that the carrier tape has been properly meshed with the sprockets, with the
tape guide contacting the carrier tape.
Caution Before lowering the tape guide, check whether a chip or
foreign material exists between the tape guide and main
body.
After checking whether sprockets mesh with the transfer
slots of the carrier tape, check whether the carrier tape is
transferred properly.
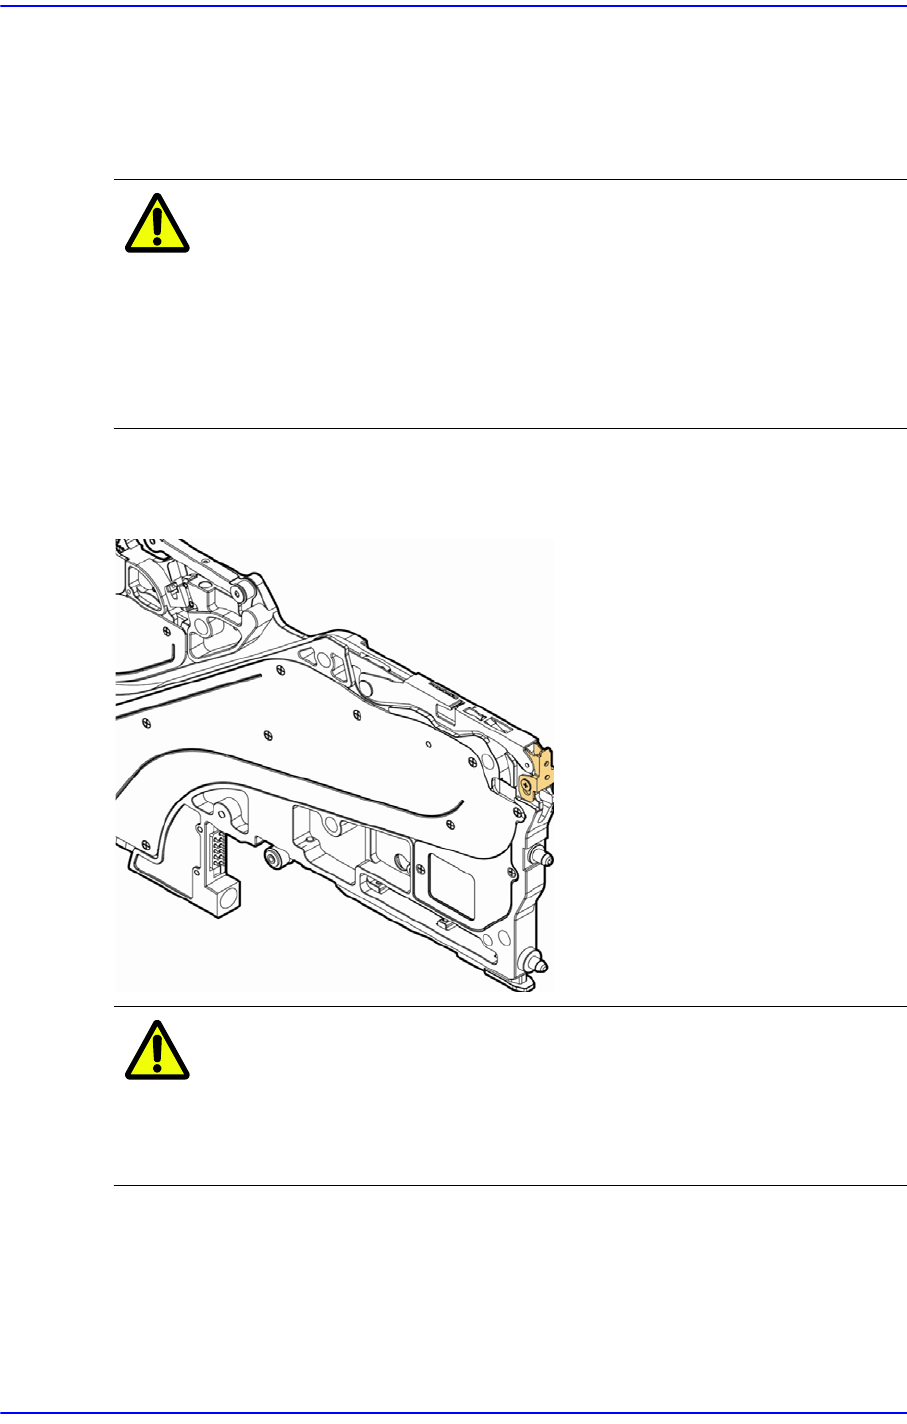
Ensure that the tape guide and the locker are properly locked.
Figure2.8 Checking the locking state of the tape guide and the locker(8mm/W4P1 feeder)
Caution If the tape guide and locker are not firmly secured, tape may
not be supplied or may collide with the main frame.
Therefore, be sure to check that the tape guide is secured
properly.
2-7
Operation of the Feeder
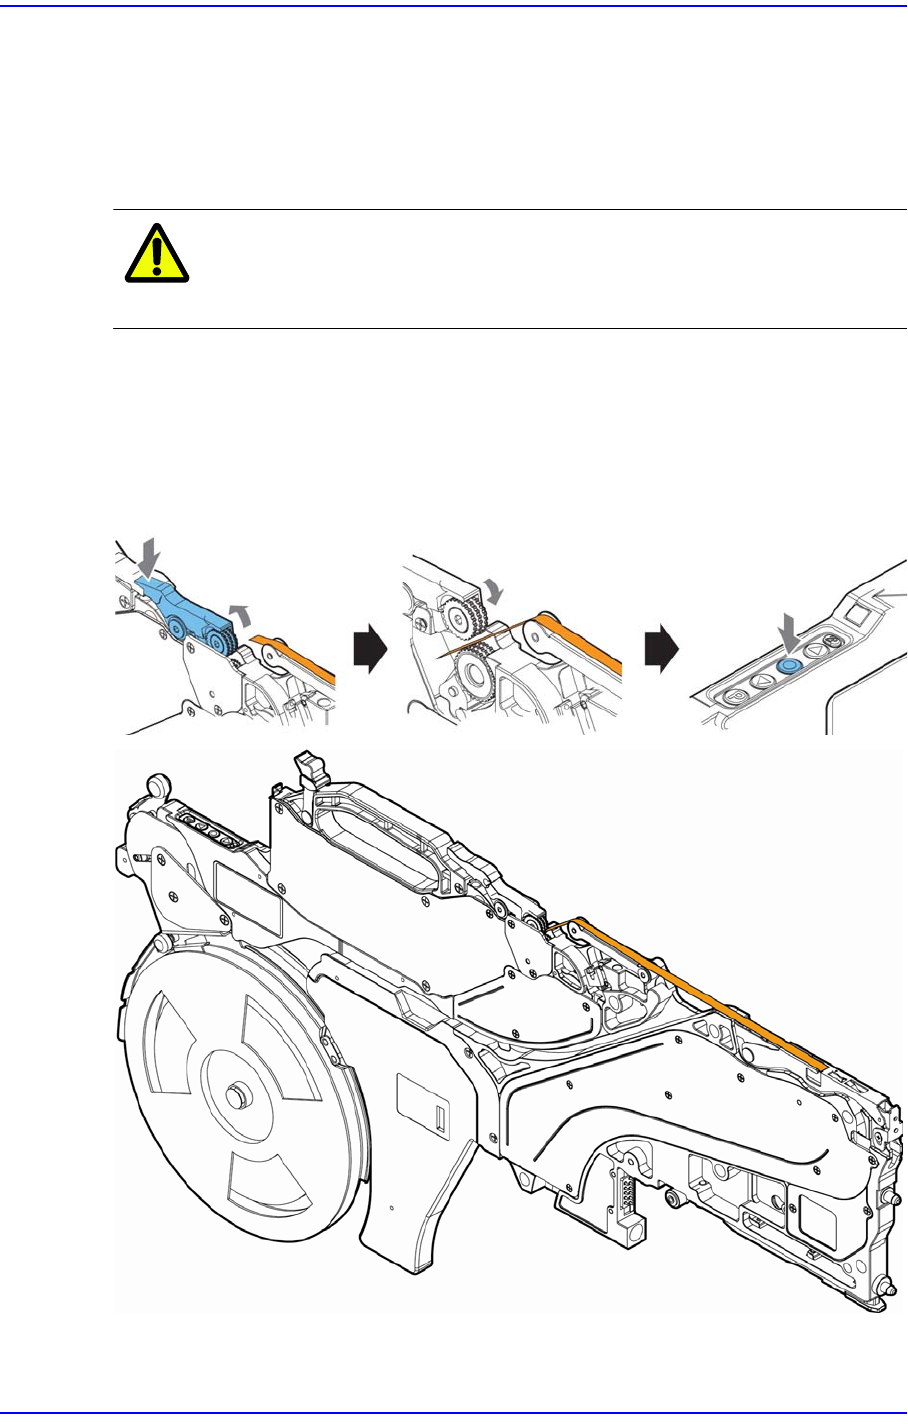
2.1.5. Fixing the Vinyl Tape
Secure the upper cover tape coming out of the tape guide. As shown in Figure 2-9, drape
the upper cover tape coming out through the tape guide on the drain tensioner. Create a gap
between the drain handle and drain gear by pressing the drain handle and insert the vinyl
tape into the gap between the drain handle and drain gear.
Caution When securing the upper cover tape, exercise care so that it
is not twisted.
Move the drain handle down to secure the vinyl tape and check whether the vinyl tape is
placed on the tensioner properly. Then pressing the home button will stop the vinyl tape
discharge motor after pulling the vinyl tape until certain tension is formed on the vinyl
tape by driving the vinyl tape discharge motor.
Figure2.9 Fixing the Upper Cover Tape
(8
mm/W4P1 feeder)