TSR2000-Series-Hardware-User-Guide-V1.pdf - 第7页
7 2.3 Unpacking and Inspectio n Carefully unpack the valve and examine the items contained in the ca rton. These w ill include: • Robot • T eaching Pendant • T eaching Pendant Cable • Keybox • Power Lead • Hardware User …
6
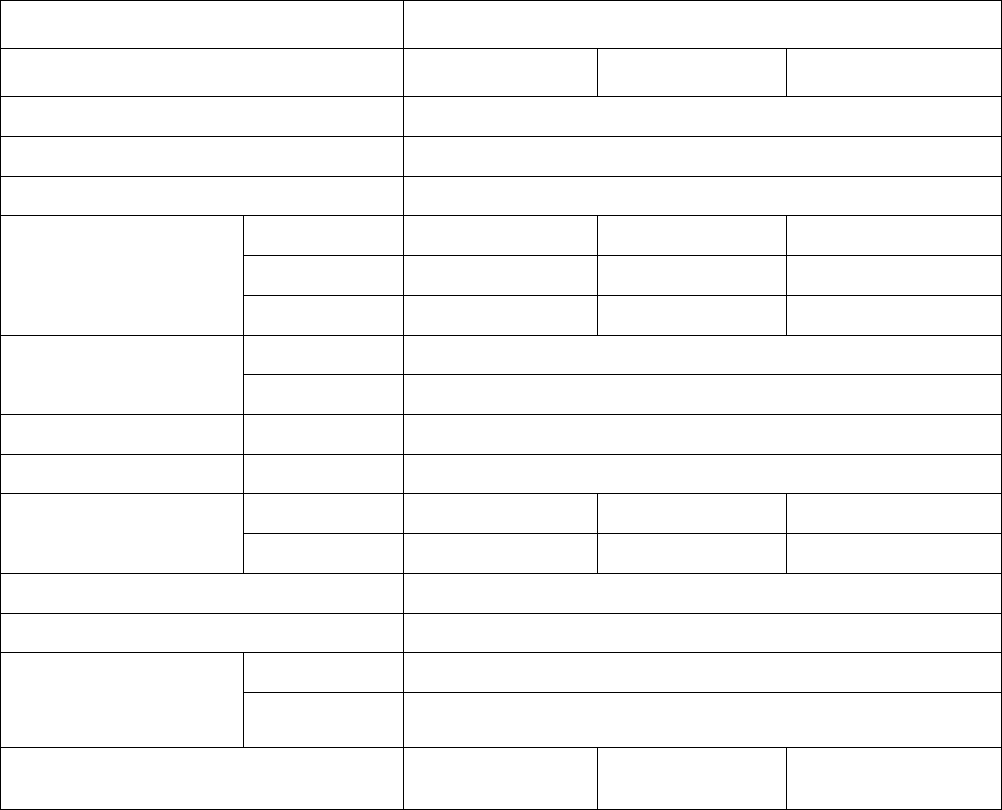
2.2 Specifications
Description
Part Number
TSR2201
TSR2301
TSR2401
Power Supply
100V ~ 240V AC
Power Consumption
80W
Number of Controllable Axis
3 axis
Moving Range
X axis
200mm
300mm
400mm
Y axis
200mm
300mm
400mm
Z axis
100mm
100mm
100mm
Speed Range
X/Y axis
0.1~600 mm/sec
Z axis
0.1~200 mm/sec
Repeatability Accuracy
X/Y/Z axis
0.02mm
Resolution
X/Y/Z axis
0.01mm
Payload
Tool
5 Kg
7 Kg
7 Kg
Head
4 Kg
4 Kg
4 Kg
Storage for Teaching Files
Max. 999 files & Max. 60000 bytes.
Storage for Processing Files
Max. 255 files.
Working Ambient
Temperature
0~40℃
Relative
Humidity
20%~90% (no condensation)
Dimensions (W×D×H)
30.3×37.7×52.1cm
41.8×51.3×52.1cm
51.8×61.3×52.1cm
* The specifications are subject to change without notice.
7
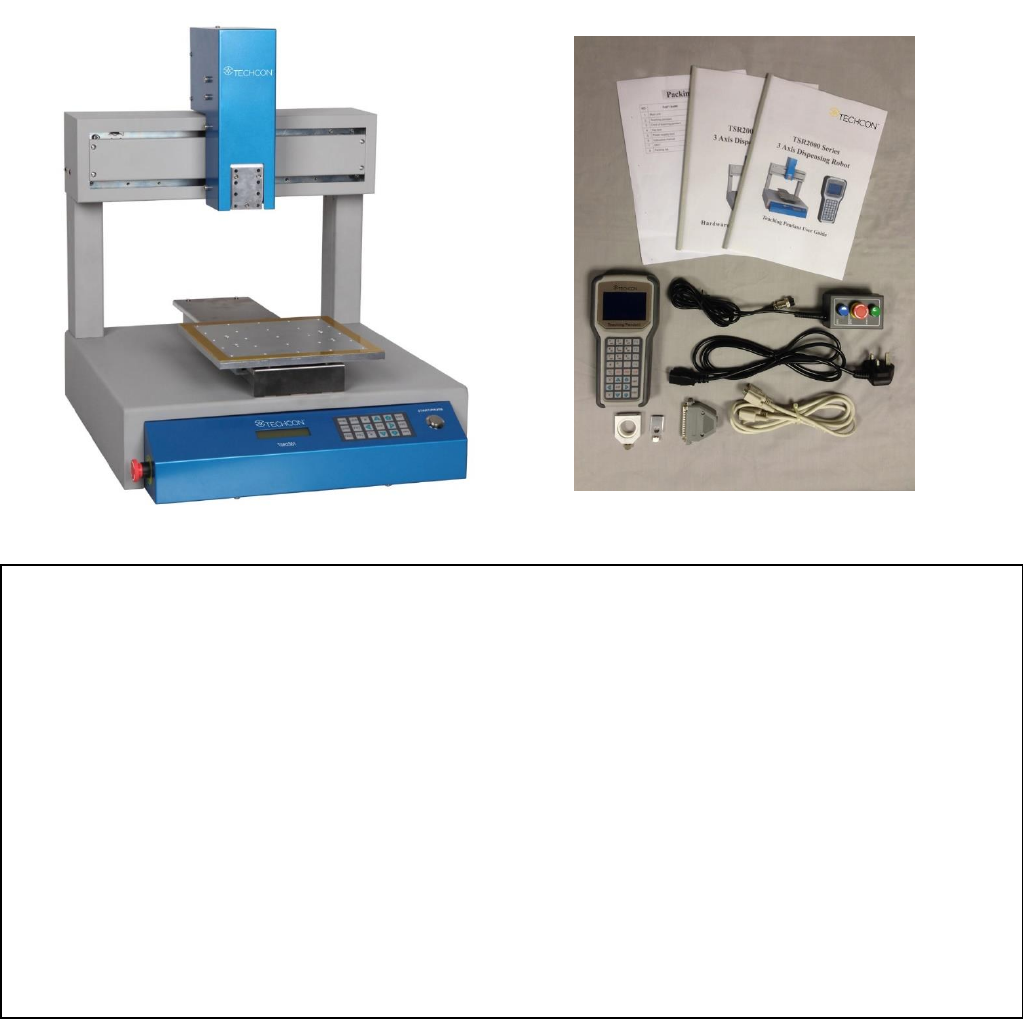
2.3 Unpacking and Inspection
Carefully unpack the valve and examine the items contained in the carton. These will include:
• Robot
• Teaching Pendant
• Teaching Pendant Cable
• Keybox
• Power Lead
• Hardware User Guide
• Teach Pendant User Guide
• Syringe Barrel Mounting Kit
• DB37 Connector
• TSR-VCABLE (not shown) connects robot to TS250, TS350 or TS500R
Inspect the unit for any damaged which may have occurred in transit. If such damage has occurred, notify the
carrier at once. Claim for damage must be made by the consignee to the carrier, and should be reported to the
manufacturer.
8
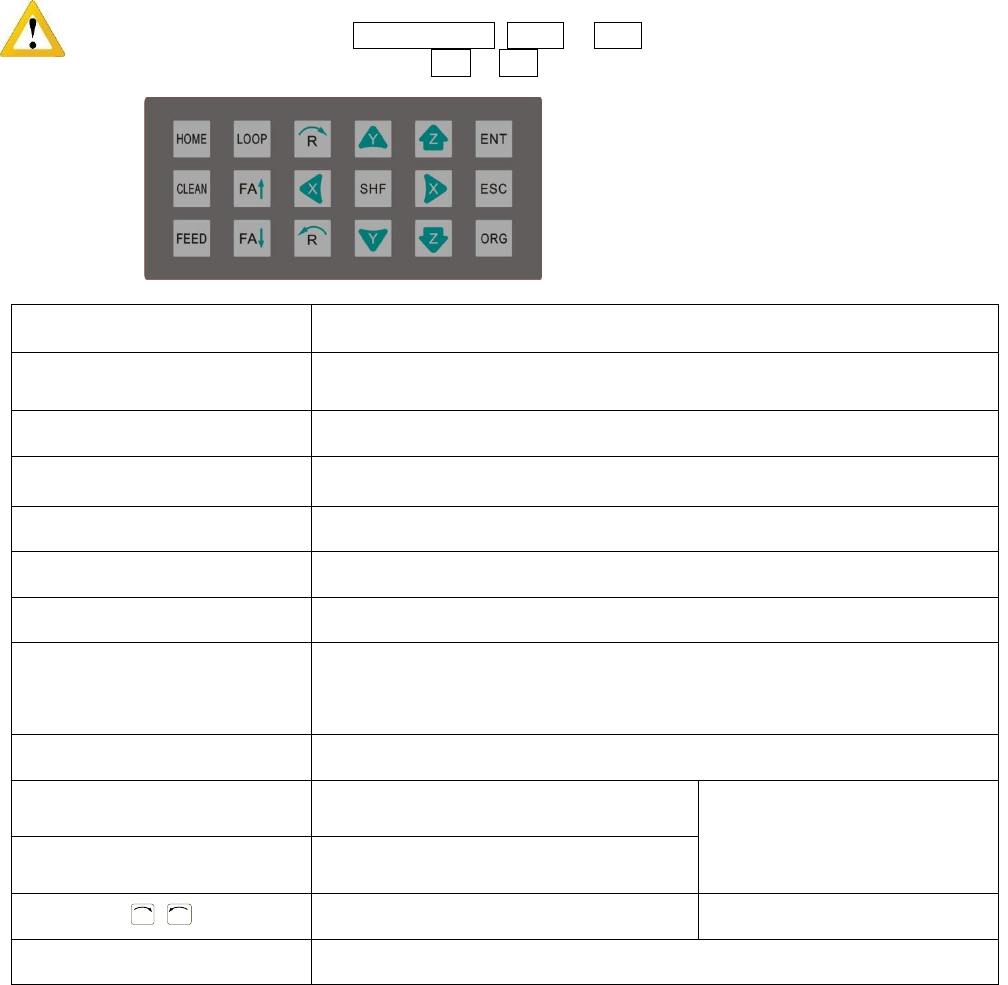
2.4 Instructions about the Keypad - the keypad, on the robot face, can be used when the teaching pendant is
disconnected.
Caution: when connecting the teaching pendant with the main unit (robot), the buttons on the front panel
of the unit are invalid except START/PAUSE, FEED & ORG. If fitting with throttling valve to control
the movement of glue tube, the button FA↑ & FA↓ can be used.
Button
Function Description
X / X / Y / Y / Z / Z
Control the axis’ coordinate
【HOME】
Move the tip to the origin of the processing file, this can be set.
【SHF】
Switch point processing speed, 3 level: low, middle, high
【ENT】
Save the set parameters
【ORG】
Reset, move the tip to the zero point (0,0,0)
【LOOP】
Set the loop operating parameters
【ESC】
1. Return to file processing interface but not save the set parameters.
2. Enter into the testing interface, test the axis’s function
【FEED】
Control dispensing
【FA】
N/A
N/A
【FA】
N/A
R
/
R
Control the R axis’ coordinate
* With R axis type
【START/PAUSE】
Start or pause the processing file.
For Further functions and detailed use of the
buttons refer to the chapter 4 “off-line
operation instruction”.