User Manual SIPLACE Linear Dipping Unit 2 X.pdf - 第55页
4 Operation 4.3 Setting the zero position of the dipping plate User Manual SIPLACE Linear Dipping Unit 2 X 05/2020 55 4.3 Setting the zero position of the dipping plate NOTICE Target group: setup operator The procedure d…
4 Operation
4.2 Performing planarity check
54 User Manual SIPLACE Linear Dipping Unit 2 X 05/2020
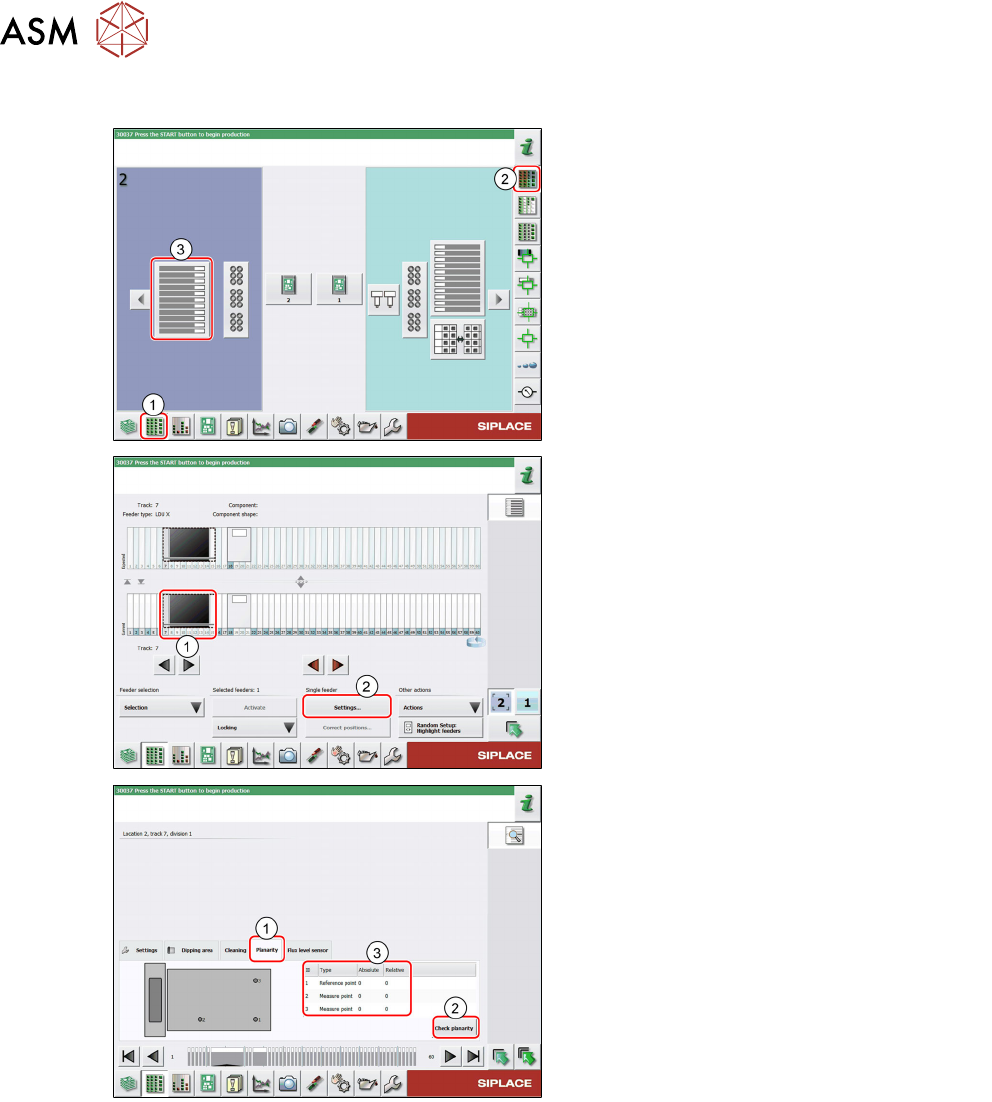
Performing planarity check
► In the station software, select the Setup
view(1) and then the Locations area (2).
► Select the Table (3) on which the LDU is
set up.
► Select the icon of the LDU(1).
► Click on the Settings... button (2).
► Select the Planarity tab(1).
► Click on the Check planarity button(2).
The machine will perform the measurement and
then show the values determined in the table
(3)
.
► Read the values.
●
The relative values for measuring points 2 and 3 are lower than +/- 50 μm: the LDU is set
correctly.
●
The relative values for measuring points 2 and 3 are higher than +/- 50 μm:
► Perform the following steps until the relative values for measuring points 2 and 3 are lower
than +/-50µm:
► Align the LDU (see 4.13 "Aligning" [}76]).
► Repeat the planarity check.
4 Operation
4.3 Setting the zero position of the dipping plate
User Manual SIPLACE Linear Dipping Unit 2 X 05/2020 55
4.3 Setting the zero position of the dipping plate
NOTICE
Target group: setup operator
The procedure described is a task that occurs irregularly and should only be carried out by
a trained operator with special knowledge (setup operator).
The dipping plate has to be exactly on the same level as the park plate in order to move the squee-
gee unhindered and prevent that the flux tank get stuck to the park plate or dipping plate. This posi-
tion of the dipping plate is the zero position.
The zero position is set with the function keys of the LDU user interface or with the station soft-
ware.
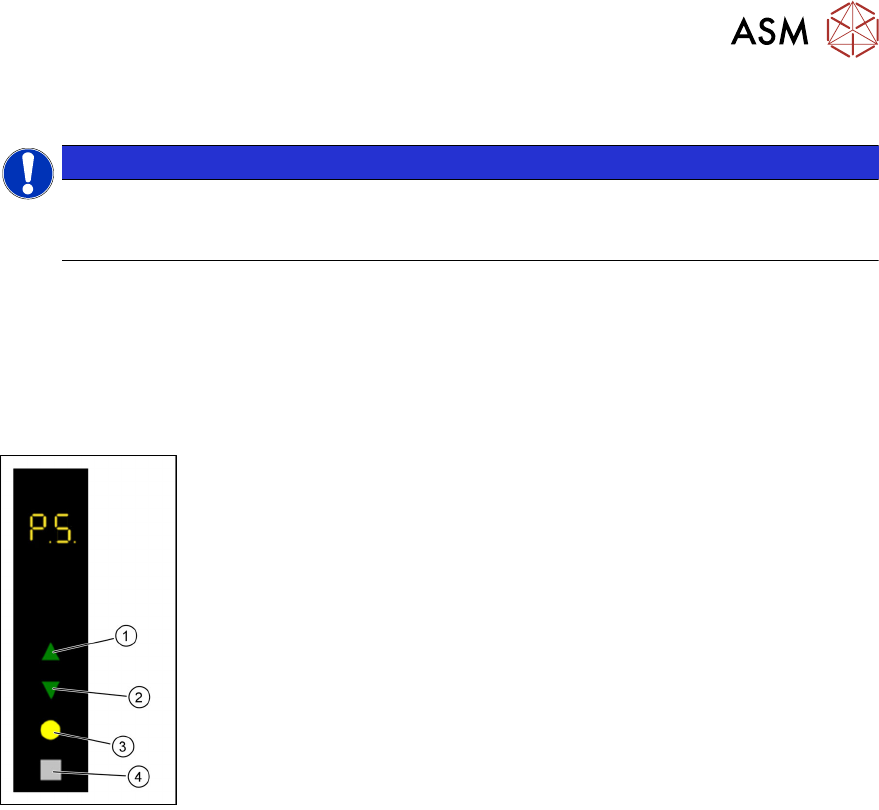
Adjustment with the function keys
► Use the Up (1) or Down key(2) to select the operating mode P1.
► Press and hold theSelect(3) and Adjust(4) keys simultaneously to
switch to the Service
activity level.
► Use the Up (1) or Down key(2) to select the operating mode P5.
► Press the Select button (3) to start the adjustment..
► Use the Up (1) and Down keys(2) to move the dipping plate until the
park plate and the dipping plate are exactly level.
► Press the Select button(3) to save the zero position.
4 Operation
4.3 Setting the zero position of the dipping plate
56 User Manual SIPLACE Linear Dipping Unit 2 X 05/2020
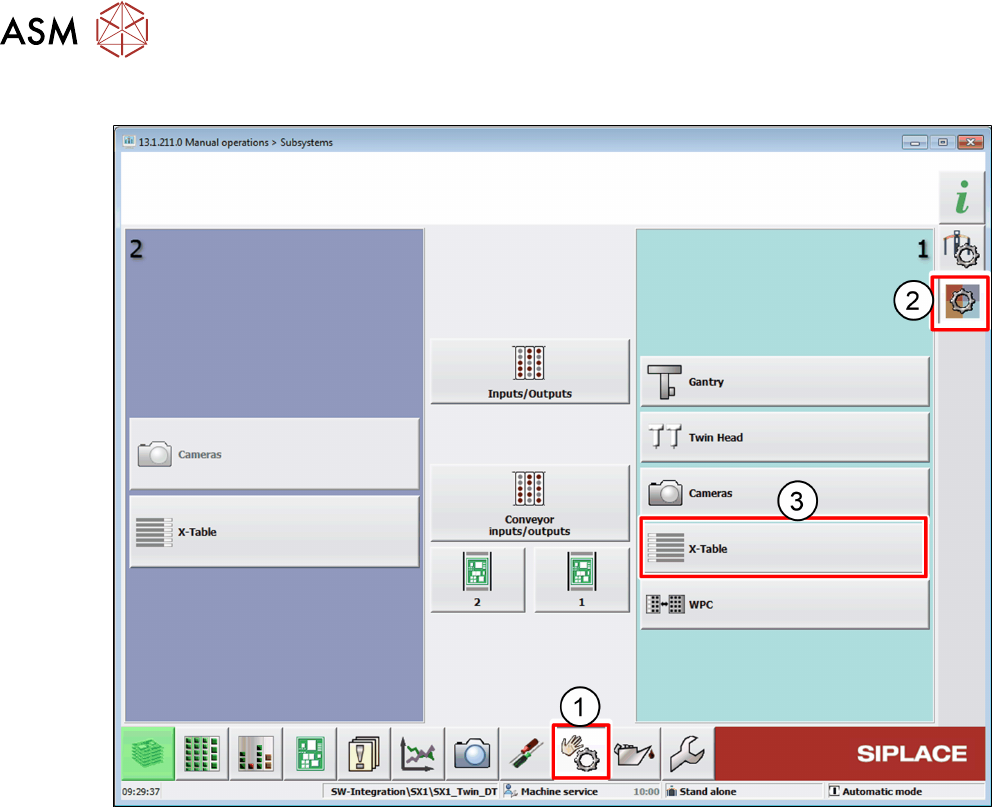
Adjustment with the station software
► In the station software, select the Sensor functions view(1).
► Select the Check sensors and functions of specific components area(2).
► Select the location at which the LDU is set up(3).