User Manual SIPLACE Linear Dipping Unit 2 X.pdf - 第61页
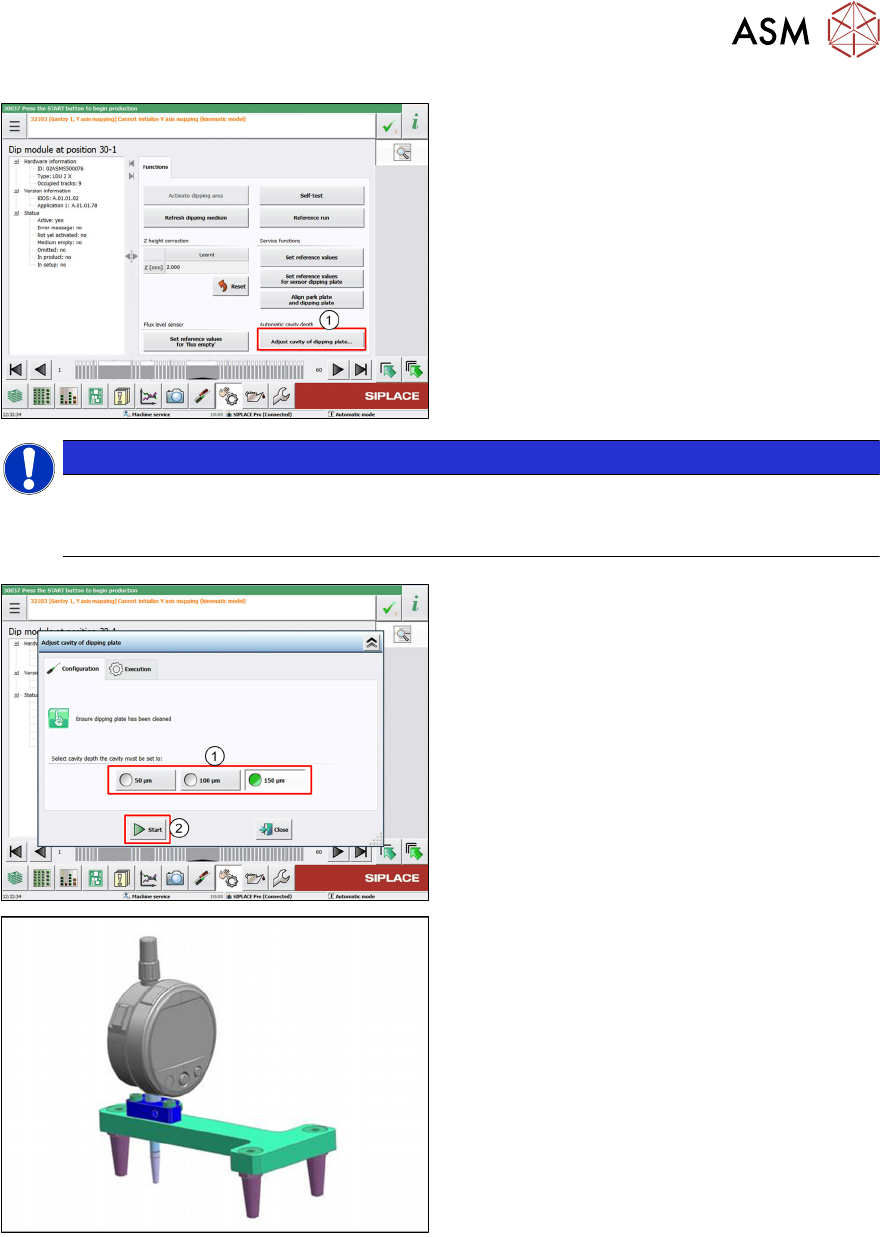
4 Operation 4.4 Adjust cavity depth User Manual SIPLACE Linear Dipping Unit 2 X 05/2020 61 ► Click on the Adjust cavity of dipping plate… button (1) . NOTICE Notice The Adjust cavity of dipping plate… button is only disp…
4 Operation
4.4 Adjust cavity depth
60 User Manual SIPLACE Linear Dipping Unit 2 X 05/2020
4.4 Adjust cavity depth
NOTICE
Target group: setup operator
The procedure described is a task that occurs irregularly and should only be carried out by
a trained operator with special knowledge (setup operator).
In case an auto cavity dipping plate is exchanged the cavity depth (offset) of this exact combination
of auto cavity dipping plate and LDU must be adjusted. For each LDU where the auto cavity plate is
to be used, this auto cavity plate must be aligned to LDU.
The mechanical offset to each LDU can be stored, max. 10 values. Afterwards this plate can be
used on max.10 different LDU`s without additional adjustment.
The LDU stores the determined offset together with the serial number of the dipping plate intern-
ally.
The LDU can store the offset values for a maximum of 10 different auto cavity dipping plates. Sav-
ing the offset value of an additional dipping plate will delete the data of the oldest dipping plate.
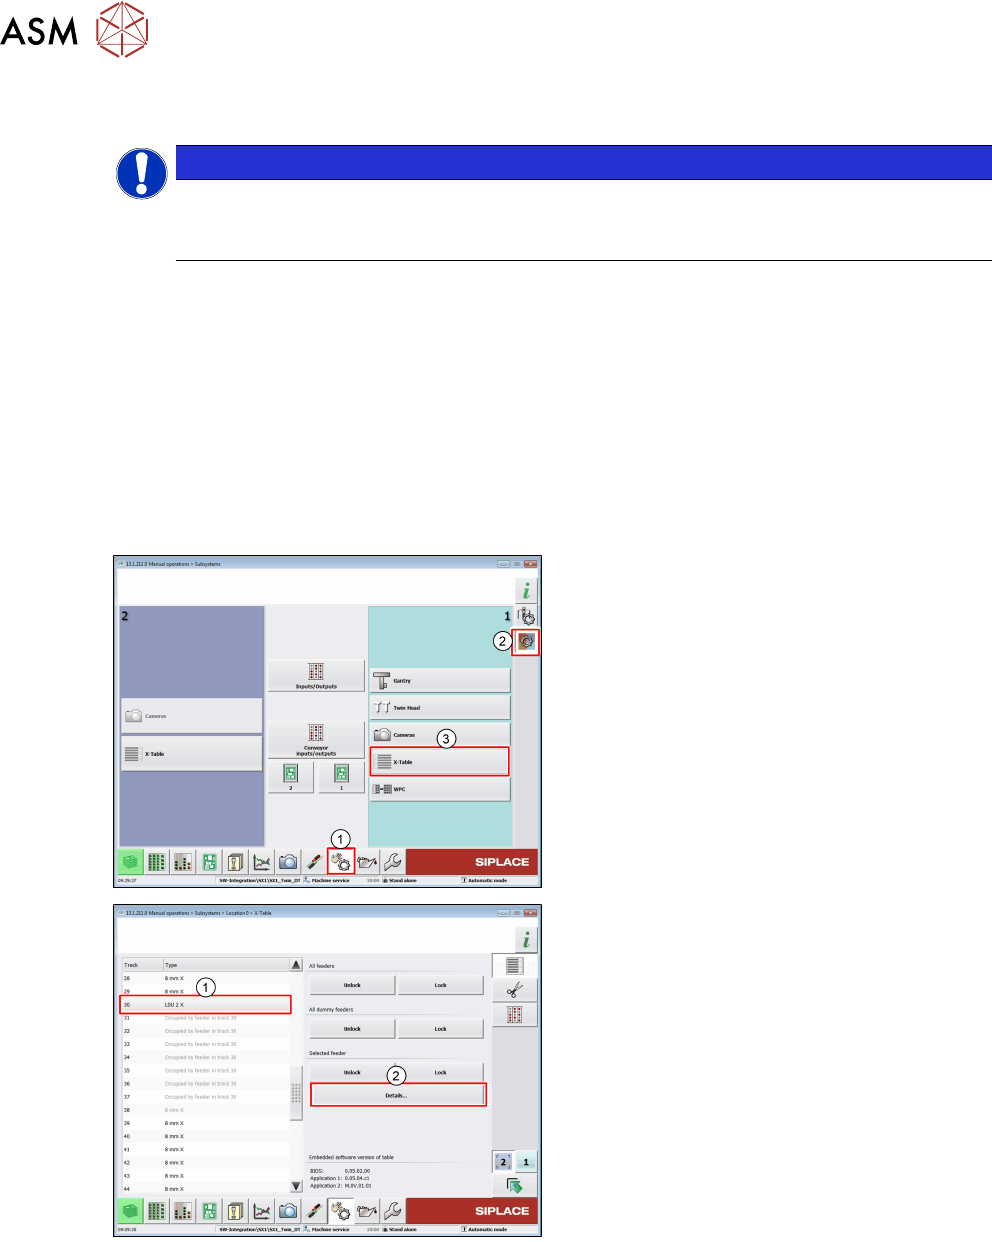
Adjustment with the station software
► In the station software, select the Sensor
functions view(1).
► Select the Check sensors and functions
of specific components area(2).
► Select the location at which the LDU is set
up(3)
.
► Select the LDU from the list(1).
► Click on the Details… button(2).
4 Operation
4.4 Adjust cavity depth
User Manual SIPLACE Linear Dipping Unit 2 X 05/2020 61
► Click on the Adjust cavity of dipping
plate… button (1).
NOTICE
Notice
The Adjust cavity of dipping plate… button is only displayed if a corresponding dipping
plate is available.
► Choose 50 µm, 100 µm or 150 µm as ref-
erence value (1)
.
► Click the Start button (2).
ð The auto cavity dipping plate moves to
the selected reference value.
► Install the mechanical gauge (measuring
device LDU HA [03118995-xx]).
4 Operation
4.5 Checking the layer thickness
62 User Manual SIPLACE Linear Dipping Unit 2 X 05/2020
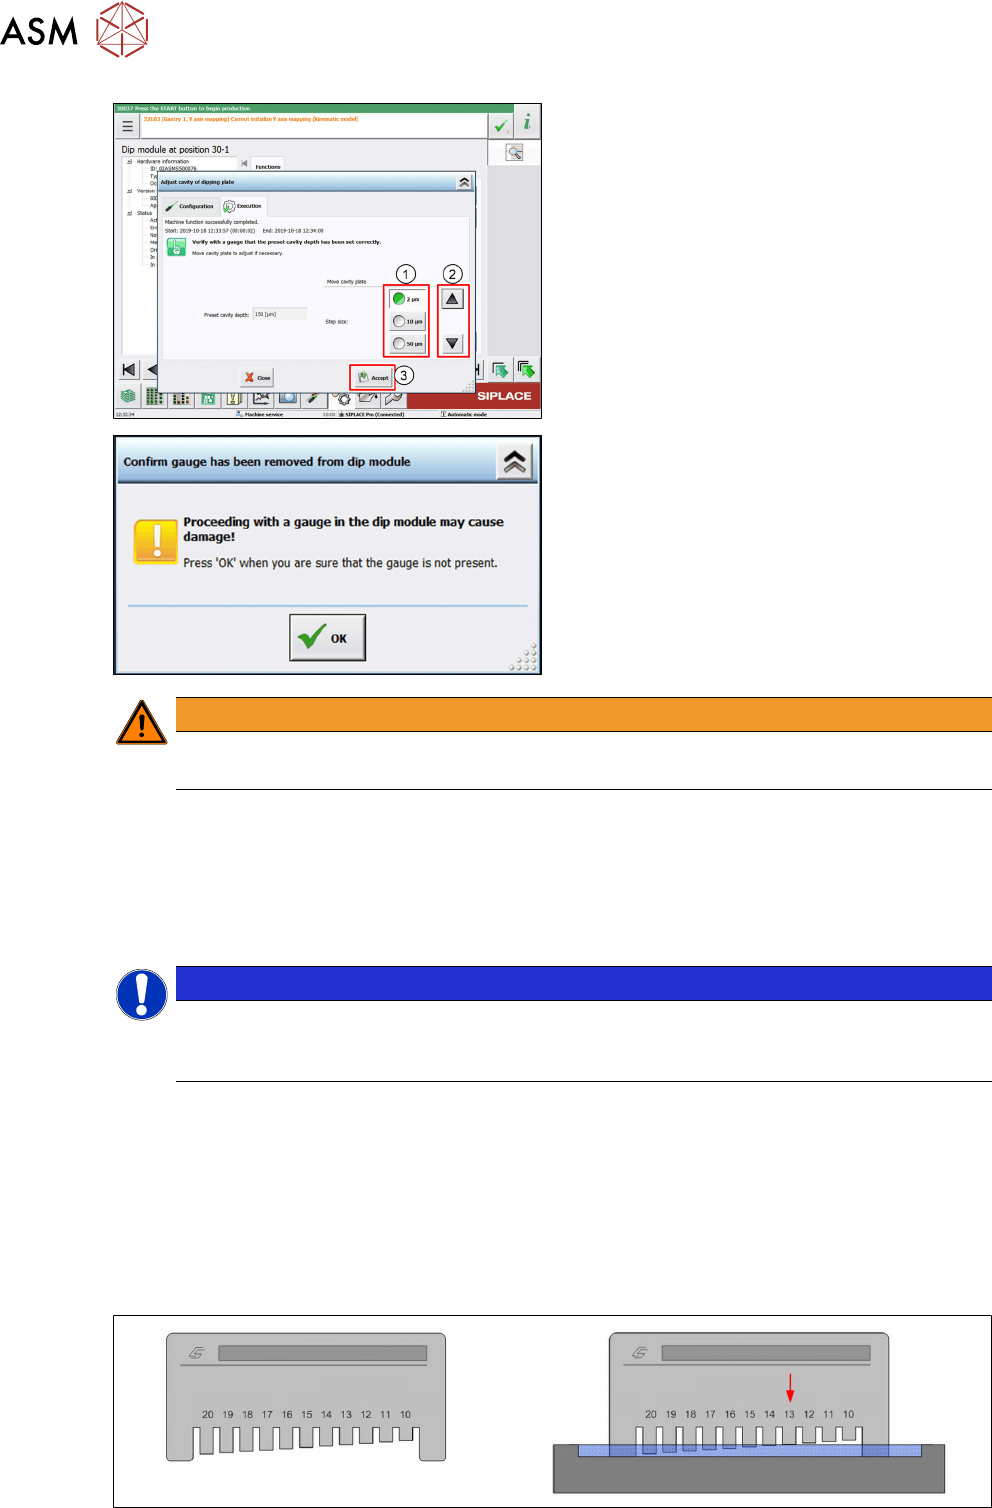
► Measure the cavity depth with the gauge. If
the measured value does not match the
reference value teach the auto cavity plate
to the set value (50/100/150 µm) in steps.
► Choose the step size 2/10/50 µm (1) and
correct the measured value step by step
by clicking the Upward
or Downward but-
ton (2)
until the reference value is reached.
► Click the Accept button (3) to save the off-
set of the auto cavity dipping plate and the
LDU.
► Remove the gauge from the dip module.
The request must only be confirmed by
clicking OK
if you are sure that the gauge
has really been removed!
WARNING
Danger of damage
Proceeding with a gauge in the dip module may cause damage!
The LDU saves the determined offset together with the serial number of the dipping plate internally.
The LDU saves the offset values for a maximum of 10 different auto cavity dipping plates. Saving
an additional dipping plate will delete the data of the oldest dipping plate.
4.5 Checking the layer thickness
NOTICE
Target group: setup operator
The procedure described is a task that occurs irregularly and should only be carried out by
a trained operator with special knowledge (setup operator).
There are numerous measuring devices for paintshops and coating specialists on the market,
which are used to measure the layer thicknesses of paints, varnishes, pastes etc.
(wet film thickness measurement gauge). Two common means of measuring are explained below.
One of the main advantages of these instruments is their ease of use. Precise measurements are
achieved quickly in the production environment.
4.5.1 Layer thickness measurement "comb"
Structure of measuring device